https://www.gymreapers.com/blogs/news.atomGYMREAPERS - Training Resources2026-04-10T13:24:06-06:00GYMREAPERShttps://www.gymreapers.com/blogs/news/4-tracking-tips-to-maximize-your-workouts2025-12-12T15:15:33-07:002026-01-02T10:42:44-07:004 Workout Tracking Tips to Maximize Your ResultsRoc Pilon
Looking to make the most out of your gym sessions in 2026? You don’t need more motivation; you need better data.
Consistently tracking your workouts transforms training from best-guesses into repeatable progress. If you already log your lifts (or you’re about to start), these four tips will help you get way more out of every session.
1. Track Your “Main Lift” First, Every Time
Your main lifts are the backbone of progress. If you only track one thing, track these.
What to write down:
Exercise name (ex: Back Squat)
Total working sets + reps
The exact weight used
Notes on difficulty, form, or setup cues
How this Supports Progress: Progressive overload only works when you can see what you did last time. If your main lifts are getting stronger, everything else follows. When you log them first, you guarantee the most important part of the workout never gets missed.
Tracking Tip:The Gymreapers Workout Journal has dedicated daily log pages where you can record your main lifts, making it easy to compare week-to-week metrics in seconds.
2. Add a Quick Effort Score After Each Set (RPE or RIR)
Numbers tell you what happened. Effort tells you how it happened. After each working set, give it a quick effort rating, nothing fancy. The two most common methods are Rate of Perceived Exertion and Reps in Reserve.
Workout Effort Scoring Examples:
RPE (Rate of Perceived Exertion): 1–10 scale
8 = hard but you had ~2 reps left in you
9 = maybe 1 rep left if you pushed
10 = all out
Reps in Reserve (RIR): how many reps you could have done
2 RIR = you had 2 reps left in the tank, this is a good weight for you to continue building strength
7 RIR = you had 7 reps left in the tank, if you’re doing progressive overload, it’s probably time to add more weight
How this Supports Progress:
If the weight stayed the same but your effort score dropped, you got stronger.
If effort keeps creeping up at the same load, you’re due for a tweak or deload.
If the weight stayed the same and your effort stayed the same, you’re at a good level to continue building strength.
Tracking Tip: Add a tiny note next to sets like “8 RPE” or “1 RIR.” Over time, this becomes a roadmap for when to push and when to pull back.
3. Workout Accountability Starts with Honest Reflection
This is the fastest way to train with intention. At the end of your session, write:
One win: something you improved or did well
One fix: one thing to dial in next time
Examples:
Win: “Hit 5 reps at 225 with clean depth.”
Fix: “Brace harder on reps 4–5.”
How this Supports Progress: Training goes beyond physical exertion; it requires regular feedback and adaptation. This habit of tracking wins and fixes keeps you focused on trajectory, not perfection. It also makes patterns obvious (sleep issues, weak points, form breakdowns, etc.) long before they stall your progress.
Tracking Tip: Use the notes section in the Gymreapers Workout Journal to capture these in 30 seconds. Small reflections stack into big changes.
4. Review Your Last 2–3 Logs Before You Train
Most people either check their workouts every few weeks, or they do it randomly after training.
Flip the order.
Before you lift, check:
What you hit last week
Whether you progressed
What your “fix” note was
What you planned to do today
How this Supports Progress: This turns every workout into a continuation of the last one, not a fresh restart. You walk in with a mission, not a guess.
Tracking Tip:The Gymreapers Workout Journal is built for quick lookbacks (daily pages + weekly structure), so your previous numbers are easy to scan while you warm up.
Keep It Simple. Keep It Consistent.
You don’t need to track everything. You just need to track the right things consistently.
Start with:
Main lift numbers
Effort score
One win + one fix
A quick pre-workout review
Do that for a month, and you’ll train harder, smarter, and with way less wasted effort.
If you want an intentional tracking system that makes this easy, the Gymreapers Workout Journal is designed exactly for this style of tracking: structured logs, weekly progress, PRs, and plenty of space to actually learn from your training.
]]>
https://www.gymreapers.com/blogs/news/gymreapers-strength-kit-the-best-strength-training-gear-for-powerlifters-and-weightlifters2024-10-22T11:39:19-06:002025-12-04T09:43:40-07:00Gymreapers Strength Kit: The Best Strength Training Gear for Powerlifters and WeightliftersDerek Sanders
Strength training isn’t just about lifting heavier. It’s about consistency, injury prevention, and using the right tools to enhance performance. If you’re serious about powerlifting, weightlifting, or overall strength training, having reliable, competition-approved gear can make a world of difference.
Enter the Gymreapers Strength Kit. This premium collection includes the 10mm Lever Weightlifting Belt, 7mm Knee Sleeves, Wrist Wraps, and Padded Lifting Straps. Whether you're a seasoned lifter or just starting to take strength training seriously, this kit is designed to take your performance to the next level.
In this guide, we’ll break down the benefits of each item in the kit, why they’re essential, and how they contribute to long-term progress. Let’s dive into how the best gym accessories for men can help you lift better, stronger, and safer.
Elevate Your Performance with the Gymreapers Strength Kit
1. 10mm Lever Weightlifting Belt: Core Support for Big Lifts
One of the standout features of the Gymreapers Strength Kit is the 10mm Lever Weightlifting Belt. It’s perfect for stabilizing your core during heavy squats, deadlifts, and overhead presses. If you're torn between different belt types, check out our guide comparing the 10mm and 13mm belts to understand which one best suits your training needs.
2. 7mm Knee Sleeves: Protect and Enhance Your Knees
Knee sleeves are critical for supporting your joints during squats and lunges. Our 7mm Knee Sleeves provide compression and warmth, ensuring your knees stay protected. Not sure if knee sleeves are right for you? Dive into our article on how to measure for knee sleeves to get the perfect fit, or learn about the differences between knee sleeves and knee wraps.
If you’re a CrossFit enthusiast, you may also find it helpful to read about knee sleeves for CrossFit.
3. Wrist Wraps: Maximize Your Wrist Support
Wrist wraps are essential for providing stability during pressing movements, especially when going heavy. Whether you're bench pressing or doing push-ups, wrist support can make or break your progress. For those interested in maximizing their wrist protection, check out our breakdown of wrist wraps vs. lifting straps, or explore our guide on how to put on wrist wraps.
4. Padded Lifting Straps: Secure Your Grip, Increase Your Pulling Power
If you're struggling to maintain a strong grip during deadlifts or rows, lifting straps can help take your performance to the next level. Want to learn more about when and how to use them? Check out our comprehensive guide on the proper use of lifting straps.
Why the Gymreapers Strength Kit is a Must-Have for Serious Lifters
When it comes to strength training gear, not all equipment is created equal. The Gymreapers Strength Kit is specifically designed for those who demand durability, support, and competition-level performance from their gear.
1. Built for Durability
The materials used in the Gymreapers Strength Kit are top-tier. Each product is built to withstand the rigors of daily use, whether you’re training for a competition or just pushing yourself to new limits. The neoprene knee sleeves, thick weightlifting belt, and reinforced wrist wraps are all designed to endure the toughest workouts without breaking down.
2. Support When You Need It Most
In powerlifting, weightlifting, and other strength training disciplines, support is key. Whether it's stabilizing your knees, protecting your wrists, or bracing your core, the Gymreapers Strength Kit is crafted to offer the support you need to stay injury-free and keep progressing.
3. Competition-Approved Quality
Serious about lifting? So is Gymreapers. All of the equipment in this kit is designed to meet competitive standards, giving you the confidence that you’re training with the same gear used by top athletes in the sport.
How the Gymreapers Strength Kit Enhances Your Performance
In strength training, details matter. The right gear can be the difference between hitting a personal best and struggling to complete a lift. Here’s how the Gymreapers lifting equipment can take your performance to the next level:
1. Maximize Strength and Stability
Using a lever belt during heavy lifts like squats and deadlifts helps you maintain a stronger core, reducing the risk of lower back injuries. The stability offered by the 7mm knee sleeves and wrist wraps ensures you can focus on lifting with perfect form.
2. Injury Prevention and Long-Term Progress
No one wants to be sidelined by injuries. Using proper gear like knee sleeves and lifting straps can prevent strains, tears, and overuse injuries that often result from heavy lifting. Investing in the best gym accessories for men means investing in your longevity as an athlete.
3. Confidence Under Heavy Loads
There’s nothing quite like the feeling of lifting heavy weight with the right gear backing you up. The Gymreapers Strength Kit provides the support and confidence you need to push past your limits and chase those PRs.
The Gymreapers Difference: Durable, Supportive, and Competition-Ready
Durability and performance are key when it comes to lifting gear. The Gymreapers Strength Kit is crafted from high-quality materials designed to endure the heaviest training sessions. Whether you’re pushing through a brutal leg day or going for a new PR in your deadlift, each piece of this kit is built to last.
Ready to take your training to the next level? Explore more about the Gymreapers Strength Kit and discover how it can enhance your workouts.
Ready to Upgrade Your Training?
Feeling ready to upgrade your gear? Check out the Gymreapers Strength Kit and level up your performance with premium, competition-approved equipment. Plus, learn more about our gear through these helpful resources and ensure you’re getting the most out of your lifts.
]]>
https://www.gymreapers.com/blogs/news/ultimate-tricep-finisher-sculpt-your-arms-with-this-effective-routine2024-10-01T15:13:02-06:002024-10-24T11:33:47-06:00Ultimate Tricep Finisher: Sculpt Your Arms with This Effective RoutineDerek SandersIntroduction
Looking to add serious definition to your arms? It all starts with building your triceps. These muscles make up two-thirds of your upper arm, so if you want a strong, toned look, you can’t skip them. When it comes to building impressive triceps, Gymreapers athlete Danny Swole has a few key exercises and techniques he swears by. In a recent video, Danny shared his favorite tricep workout routine that incorporates high-rep sets and the Gymreapers tricep rope attachment, helping you push your limits while avoiding unnecessary strain.
This Tricep Finisher Workout is the perfect way to wrap up any routine, torching your muscles with high reps and sending blood straight to your arms for a killer pump. The best part? It only takes basic equipment and is suitable for everyone—whether you're new to fitness or a seasoned gym-goer. Ready to feel the burn? Let's dive in!
Why Use a Tricep Finisher?
Ever heard of a “finisher” in workouts? It’s a simple concept: a short burst of intense exercise at the end of your routine designed to push your muscles to their limit. Adding a tricep finisher can elevate your workout, promoting muscle hypertrophy and enhancing endurance while carving out well-defined arms.
High-rep finishers are particularly effective because they focus on specific muscles after you’ve already pushed them to the limit with your main workout. By pushing those triceps through their final burst of effort, you can fully maximize your gains and leave your arms feeling strong and pumped. Adding a tricep finisher is a great way to elevate your fitness routine and carve out more defined arms!
Equipment Needed
To get started with your tricep finisher, you’ll need a couple of key pieces of equipment:
Rope Attachment: While most gyms have a generic rope, consider using the Gymreapers tricep rope attachment. Its unique strap design reduces forearm fatigue, allowing you to focus on your triceps without straining your wrists. This means you can push through more reps for a better workout.
Dumbbells: Use light to moderate weights, around 15 to 30 pounds, for overhead extensions. This weight is manageable yet challenging enough to help you build strength and endurance.
With just these two pieces of equipment, you’re ready to fire up those triceps and achieve that killer pump!
Using the Right Gear
When performing tricep exercises, choosing the right equipment can make a significant difference. Gymreapers attachments, like the ones Danny Swole uses in his workouts, offer additional comfort and performance.
“This is the Gymreapers tricep rope attachment. What I like about it is that when I'm doing back or tricep exercises, I can place my wrists into the loops, which helps reduce strain on my forearms, preventing them from getting fatigued.” — Danny Swole
Danny Swole's High-Rep Tricep Finisher
For an intense tricep workout, Danny Swole recommends a high-rep variation with a focus on rope extensions and overhead movements: "So, you're going to start with ten regular, slightly bent-forward tricep extensions... then another ten with my palms close together, and finish with 20 overhead extensions for a total of 40 reps in one set." — Danny Swole
This effective workout includes three variations of rope tricep extensions, each designed to target your muscles in different ways.
1. Standard Tricep Extension
How to Do It: Stand with a slight forward lean, keeping your wrists inside the straps. This position engages your triceps while minimizing forearm involvement.
Reps: Aim for 10 reps.
2. Close-Grip Tricep Pushdown
How to Do It: Adjust your grip higher on the rope. Keep your elbows tucked in as you press down to ensure a deep contraction.
Reps: Perform 10 reps.
3. Overhead Rope Extensions
How to Do It: Lean forward, place your wrists back into the straps, and fully extend your arms overhead. Focus on slow, controlled movements to create maximum tension in your triceps.
Reps: Aim for 20 reps.
Total Reps: That's 40 reps per set! This routine will leave your triceps feeling pumped and defined!
The Dumbbell Skull Crusher Super Set
The Dumbbell Skull Crusher Super Set is a fantastic way to push those muscles to their limits.
1. Standard Skull Crusher
How to Do It: With a neutral grip, bring the dumbbells to your shoulders and extend back up. Control is key; feel every rep without rushing.
Reps: Aim for 10 reps.
2. Behind-the-Head Skull Crushers
How to Do It: Lower the dumbbell behind your head for a deeper stretch, targeting your triceps even more effectively. For an extra challenge, lift your legs off the ground to engage your core.
Reps: Perform 20 reps
Total Reps: That give you 30 reps per set! This super set will leave your triceps burning and craving that definition!
Focus on Form & Failure
As you dive into your tricep finisher, remember: form is everything. Maintaining good form helps avoid injuries and ensures you're truly working those triceps. If you hit failure, that's great! Use partial reps to maximize muscle activation even when you can't complete a full rep.
Pushing Past Failure
Hitting failure isn’t the end of the set; it’s an opportunity to push even further. Danny encourages adding partial reps to keep the triceps engaged, even when you can no longer perform full reps.
“Even if it’s just this, you're still getting activation, pushing past that failure point. I believe in doing partials… there’s nothing wrong with that, especially when you’re going heavy.” — Danny Swole
Partial reps help you squeeze out every ounce of effort, ensuring you’re maximizing activation in the target muscle group.
Common Mistakes to Avoid
Flaring Elbows: Keep them tucked in to maintain tension on the triceps.
Using Momentum: Focus on controlled movements for better results.
Stay focused, and finish strong. Your triceps will thank you!
Why You Should Try This Finisher
Why should you give this tricep finisher a try? Because it works! After just one session, you'll feel an intense pump in your triceps that’s hard to beat. This workout is incredibly versatile. You can do it at home or in the gym, and all you need is basic equipment—no fancy machines required. Tackling high reps helps you push through failure points, building strength and endurance simultaneously. It's a perfect way to challenge your muscles and keep your routine fresh. Dive into this finisher, and you’ll wonder how you ever worked out without it!
Final Tips for Success
Ready to see results? Consistency is key. To build those triceps, aim to incorporate this finisher into your routine 1-2 times a week. Pushing through muscle fatigue might feel tough, but it's where the magic happens!
Track Your Progress
As you get stronger, gradually increase the weights to keep challenging your muscles. Remember, every rep counts on your journey to bigger, stronger arms. Stick with it, and you'll be amazed at how quickly you can achieve your fitness goals!
Conclusion
The Tricep Finisher Workout is more than just a burnout; it's your ticket to stronger, more defined arms. With its high-rep approach, you'll maximize muscle engagement an get that satisfying pump you crave. So, why wait? Try this workout today and feel the difference for yourself!
We’d love to hear about your experience, so don’t forget to share your thoughts. Plus, if you want to elevate your performance, check out Gymreapers gear—from our tricep rope attachment to elbow sleeves and wrist wraps, we’ve got what you need to support your fitness journey. For more workout tips and inspiration, follow us on social media! Your stronger self is just a workout away!
]]>
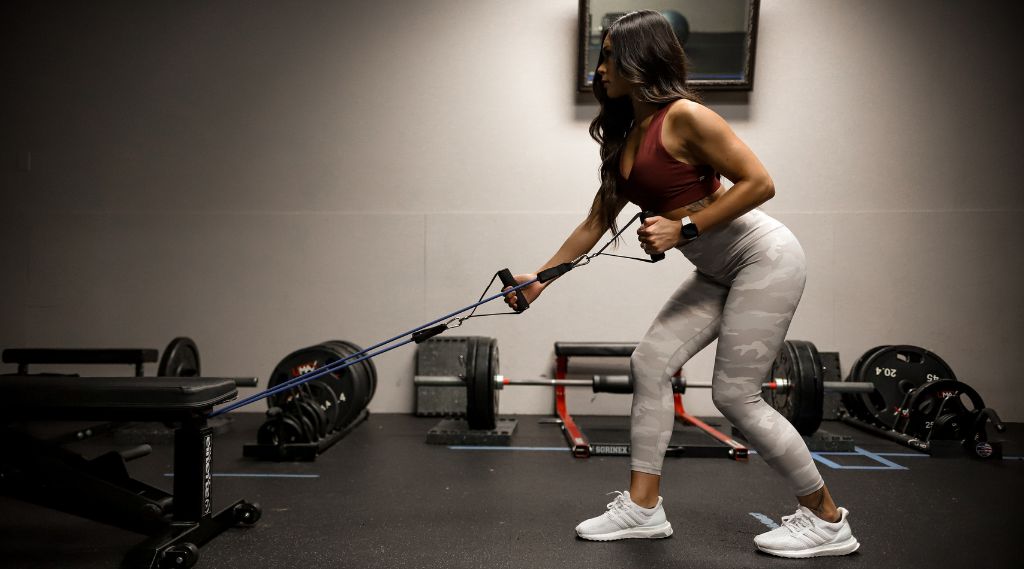
https://www.gymreapers.com/blogs/news/resistance-bands-vs-tubes2023-08-31T23:39:22-06:002023-08-31T23:39:22-06:00Resistance Bands vs Tubes: What Are The Differences?Roc Pilon
If you’re interested in working out from home then you may be wondering whether resistance bands or resistance tubes are the better investment for your home gym.
Resistance bands and tubes are both designed to increase resistance as they are stretched. However, their differences in construction affect their versatility, durability, and range of resistance. Resistance bands offer better longevity and a wider range of resistance than tubes.
To help you figure out which piece of equipment is best for you, I’ll discuss their differences, the benefits and drawbacks of each, and share my top pick.
Key Takeaways
Resistance bands are more versatile than resistance tubes because they can be used on their own or in combination with other gym equipment (i.e. barbells), and they come in a wider range of resistance.
Resistance tubes are a cheap short-term investment but are not as durable as resistance bands, so they may cost you more in the long run.
Resistance bands are best for beginner-to-advanced athletes working out at home or in a gym setting, whereas resistance tubes are suitable for beginners working out at home.
Differences Between Resistance Bands & Tubes
One of the primary differences between resistance bands and tubes lies in their design and construction. Resistance bands are flat, wide strips of latex or rubber, whereas resistance tubes are hollow, cylindrical tubes typically constructed with a rubber or plastic material.
Resistance tubes also have carabiner clips at each end that can be clipped together to form a loop, whereas resistance bands almost always come looped. You can get small loop bands often called “hip bands” or larger loop bands.
These differences in design lead to variations in the types of exercises each can be used for, the level of resistance provided, and the durability of the band.
Resistance Bands
Resistance bands are large elastic bands that provide varying levels of resistance based on their thickness and tension. They come in different colors, each denoting a different resistance level.
These bands are lightweight, portable, and easy to store, making them an excellent choice for home workouts or when traveling.
To increase the versatility of the band, you can purchase handles and a door mount that attaches to the band and allow you to perform a wider variety of exercises, especially if you’re working out at home with limited equipment.
Benefits Of Resistance Bands
The benefits of resistance bands include:
Versatility: Resistance bands can be used to target almost every major muscle group in the body. They allow for a wide range of exercises including compound exercises (i.e. deadlifts), isolation exercises (i.e. lateral raises), and stretches (i.e. lat stretch).
The versatility improves more when paired with handles and a door mount. Using these three tools together you can perform basically any exercise you can with machines or dumbbells.
Joint-Friendly: The elastic nature of resistance bands reduces the stress on your joints, making them an excellent option for individuals with joint issues or those recovering from injuries.
Adjustable Resistance: By simply adjusting the length of the band or using a different band with higher tension, you can easily modify the resistance level to suit your fitness level and specific exercise requirements.
Durability: Resistance bands have much greater durability than resistance tubes because they are made from a thicker and sturdier rubber that is less likely to rip. Resistance bands can last for 10+ years (when used responsibly).
Safety: Better durability also means better safety when using resistance bands because you don’t have to worry about the band snapping when you’re using it. This is especially important if you’re using bands for movements like assisted pull-ups.
Portability: Resistance bands are lightweight, compact, and easy to transport. They can be easily folded or rolled up, making them suitable for home workouts, travel, or even outdoor exercises.
Drawbacks Of Resistance Bands
The drawbacks of resistance bands include:
Limited Resistance Range: While resistance bands offer adjustable resistance, their maximum resistance level may not be sufficient for advanced strength training. Individuals with significant strength may find that bands are not challenging enough on their own to enhance strength or muscle gain.
Grip Limitations: Some exercises require a secure grip on the bands, which can be challenging if you have sweaty hands or limited grip strength.
However, this issue can be mitigated by using handles or loop attachments specifically designed for resistance bands.
Who Should Use Resistance Bands
Resistance bands are suitable for individuals of all fitness levels, from beginners to advanced athletes. They are particularly beneficial for those looking to build strength, improve flexibility, or implement rehabilitation exercises.
Due to their versatility and joint-friendly nature, resistance bands are ideal for home workouts or when access to a gym is limited.
They are a great tool for warm-ups or isolation exercises for advanced athletes or can be used for an entire workout for beginner or intermediate lifters who are focused on general strength and health.
Resistance Tubes
Resistance tubes, also known as resistance cords or exercise tubes, consist of a rubber or plastic tube with handles on either end.
The handles provide a comfortable grip and allow for a variety of exercises that target different muscle groups. The level of resistance is determined by the thickness and quality of the tube.
Benefits Of Resistance Tubes
The benefits of resistance tubes are:
Cheap: Resistance tubes typically retail for $30-$50 with handles and a door mount included, whereas a similar set of resistance bands will cost around $100-$150 without handles and a door mount.
That said, it is worth noting that because the durability of resistance bands is better than tubes even though the short-term investment is less the long-term investment is likely to be more.
Strength and Hypertrophy: Resistance tubes provide a challenging workout that helps build muscle and strength. The continuous tension throughout the exercises engages the muscles throughout the entire range of motion while loading the muscles more at the end range.
Loading the end range of movements is a common method used for strength training as it gets you used to heavier loads where the movement is easiest and it is lighted where the movement is easiest.
Portability: Similar to resistance bands, resistance tubes are lightweight, compact, and easy to transport. They can be easily folded or rolled up, making them suitable for home workouts, travel, or even outdoor exercises.
Multiple Attachments: Many resistance tube sets come with interchangeable handles, ankle cuffs, or door anchors, allowing for a variety of exercises targeting different muscle groups and offering a wider range of workout options.
Resistance tubes that have carabiner clips on each side can also be attached together to function similarly to looped resistance bands.
Drawbacks Of Resistance Tubes
The drawbacks of resistance tubes include:
Limited Range of Motion: Compared to free weights or machines, resistance tubes may have a more limited range of motion. This is because the tube's resistance is dependent on its length and the tension it provides.
Therefore, exercises that require a larger range of motion, such as chest presses or overhead exercises, may not be as effective with resistance tubes.
Durability Concerns: Depending on the quality of the resistance tubes, there may be concerns about durability. Over time, the tubes can wear out or lose their elasticity, affecting the level of resistance and potentially compromising safety during exercises.
The attachments where the tube attaches to the cloth are also more susceptible to breaking. It is essential to inspect and replace worn-out tubes to maintain optimal performance and safety.
Who Should Use Resistance Tubes
Resistance tubes are best suited for beginners looking to workout at home instead of at a gym. They can help these individuals to build foundational levels of strength, and muscular endurance, and improve movement mechanics.
Resistance Band Recommendation
When it comes to selecting high-quality resistance bands, Gymreapers stands out as a reliable and reputable brand. They offer a wide range of resistance bands that are durable, versatile, and designed to withstand intense workouts. These bands are made of premium latex material, ensuring excellent elasticity and longevity.
I recommend the Gymreapers Resistance Band Set in particular because it includes a variety of bands with different resistance levels to allow you to progress over time and use them for a variety of exercises.
Gymreapers' resistance bands are color-coded, making it easy to identify the level of resistance for each band.
Other Product Recommendations
Other products that are useful in combination with a set of high-quality resistance bands are handles, a door mount, and ankle straps.
Adding handles and a door mount to your band set increases the versatility of your bands allowing you to hit any movement needed to get a great workout.
With the door mount and ankle straps you can use bands for glute kickbacks, adductions, abductions, leg extensions, and leg curls, allowing you to do full-body workouts at home.
]]>
https://www.gymreapers.com/blogs/news/how-to-use-arm-blaster2023-08-31T23:33:48-06:002024-07-19T15:55:51-06:00How To Use Arm Blaster PROPERLY (According To PT)Roc Pilon
As a personal trainer, part of my job is to teach my clients how to use various gym tools to elevate their training. This includes the often-overlooked arm blaster.
An arm blaster is a long, flat metal piece of equipment that is positioned against your upper abdomen. The objective is to place the back of the upper arms against the metal plate to improve technique and muscle activation on bicep curls and some tricep exercises.
Using an arm blaster isn’t complicated, but there are some details trainees must be aware of to get the most out of the tool and minimize the risk of injury.
Key Takeaways
An arm blaster promotes better technique and muscle activation by keeping the elbows stationary and restricting back-and-forth movement.
The ideal position for an arm blaster is against the upper abdomen. It allows trainees to place the area just above their elbows against the curved edges for support.
My favorite arm blaster is the Gymreapers Arm Blaster because it has a padded neck strap, it’s easily adjusted, and it comes with a 1-year replacement guarantee.
Arm Blaster: Overview
An arm blaster is a popular but underutilized piece of training equipment. It is essentially a long, flat aluminum piece with curved edges and an adjustable strap designed to keep your arms stationary during bicep curls.
Some trainees also use the arm blaster for tricep exercises, such as the rope cable arm extension.
The goal is to place the strap around your neck, position the arm blaster against your torso, and place the back of your upper arms against it for stability.
"The main reason why many lifters continue to use the relatively old-fashioned arm blaster is simply; it is very effective at its intended purpose of improving biceps development."
- Debbie Luna, fitness content writer, powerlifter, and Olympic lifter
Benefits Of Using An Arm Blaster
The benefits of using an arm blaster include:
Form Correction
With your upper arms against the arm blaster, your elbows are less likely to move forward or back, promoting better form on movements like bicep curls. In contrast, performing curls without the use of an arm blaster makes it easier to move your elbows back and forth, which inevitably affects the range of motion and bicep activation.
Muscle Activation
Most trainees report feeling their biceps working harder during curls when using an arm blaster. This is because keeping the elbows from moving forward and back isolates the biceps and forces them to do more work, leading to better activation and potentially more growth.
Strength Gains
The arm blaster’s ability to improve technique and boost muscle activation makes it a fantastic tool for building bicep strength. This is highly beneficial as it allows you to curl and row more weight, as well as do more chin-ups and pull-ups.
Versatility
Despite its simplicity, the arm blaster can be the perfect addition to countless bicep exercises and a few tricep exercises, allowing you to step up your training and encourage more growth.
How To Use An Arm Blaster: Step-By-Step Guide
Place the nylon strap over your head and behind your neck with the metal piece hanging in front of your body.
Adjust the arm blaster strap to the ideal length. The area just above your elbows should be pressed against the curved ends of the arm blaster. For most people, this means having the arm blaster resting against the upper abdomen.
Grab your weight(s) (like a barbell, dumbbells, or cable attachment).
Stand tall and position the back of your upper arms against the curved ends of the arm blaster.
Assume a comfortable stance, take a deep breath, and engage your abs.
Perform a bicep curl (or tricep extension), squeezing your muscle forcefully at the end range.
Slowly control the weight back to the start position as you exhale. You will notice that your elbows remain at your sides, and your muscles work much harder to complete the eccentric portion of each rep.
6 Common Arm Blaster Mistakes
To maximize the benefits of the arm blaster, it’s important to avoid the following mistakes:
Mistake #1: Incorrect Strap Length
The most common mistake I see is trainees shortening the neck strap too much and having the arm blaster resting on their chest. This makes for a more awkward and less effective position, especially for curls.
How To Fix
Adjust the strap to a length that allows the arm blaster to rest against your upper abdomen. For most people, the ideal length would be to have the area just above the elbows to be positioned against the curved edges of the arm blaster.
Mistake #2: Using Momentum
When trainees first start using an arm blaster, they will likely notice that the inability to move their elbows back and forth affects their performance, forcing them to use less weight. Some lifters try to continue lifting the same amount, which typically results in swinging the body and using jerking motions to do the same number of reps as before.
How To Fix
Leave your ego at the door and reduce the amount of weight you use when you wear an arm blaster, at least initially. Doing so will help you get used to the new technique requirements, produce better results, and reduce your risk of injury.
Mistake #3: Shortening the Range of Motion
Another common mistake that occurs when you use a weight that’s too heavy with the arm blaster is having to shorten the range of motion because you’re not strong enough to perform the full repetition. Shortening the range of motion will affect your results because you’re not strengthening the full range of motion and you’re limiting muscle activation, which means less growth potential.
How To Fix
The fix here is the same as for the previous error. Reduce the amount of weight you’re using and be mindful of your technique to ensure you’re getting the most out of your arm blaster training.
Mistake #4: Not Resting Your Elbows On the Blaster At All Times
Not resting your elbows on the metal plate is a less common mistake but one you should still be mindful of. While the elbows cannot travel back during the eccentric (lowering) phase, they can move forward as you curl the weight. As a result, you might struggle to flex your elbows to the same degree and activate your biceps for optimal growth.
How To Fix
Keep your upper arms glued to the arm blaster at all times. There should not be any daylight between your elbows and the plate throughout the set.
Mistake #5: Poor Posture
Arching the lower back or rounding the shoulders can occur on many exercises, including bicep curls with an arm blaster. Upper back roundness occurs when trainees position the arm blaster too low on their torso, which forces them to hunch over to get their elbows low enough. Rounding the upper back might not affect bicep curl mechanics, but it could contribute to poor posture and eventually lead to neck pain. Similarly, lower back arching can place unnecessary stress on the spine, eventually leading to pain.
How To Fix
Position the arm blaster at the appropriate height, typically resting against the upper abdomen. You should be able to place your upper arms against the metal plate and keep your shoulder blades retracted (squeezed together). Additionally, you should engage your abs at the start of the set to draw your ribcage closer to your pelvis to reduce the risk of back arching. Take a deep breath and squeeze your abs at the start of the set. You can also squeeze your glutes for additional stability, especially when curling more weight for 8-10 reps.
Mistake #6: Forgetting to Breathe
Holding your breath is not beneficial for a couple of reasons. First, it reduces oxygen delivery, which is necessary for energy production in your muscles. Second, it makes you winded. In both cases, your performance will likely suffer, and you would be forced to stop a set before exhausting your biceps which means that you’re limiting your results.
How To Fix
Take a deep breath as you’re about to curl the weight and exhale at the top and as you extend your arms. Practice this sequence before using heavier loads to ensure that you can breathe properly as the weight gets more challenging.
How To Implement An Arm Blaster Into Your Training
Let’s discuss some important training details on how to use an arm blaster in your routine:
Arm Blaster Exercises
The arm blaster is an excellent addition to many bicep exercises and a couple of tricep movements. Movements where the arm blaster can help include:
Barbell and EZ-bar bicep curl
Standing dumbbell and cable curl (with elbows to the sides)
Hammer curl
Reverse-grip dumbbell, barbell, EZ-bar, and cable curl
Zottman curl
As briefly mentioned, the arm blaster can also be a good addition for tricep movements like the cable pressdown, where the goal is to have your elbows at your side.
Frequency
Training muscles two to three times per week is generally best to promote growth and strength gain. This allows for better volume allocation (not having to do as many sets in any given workout) while still promoting recovery. Smaller muscles like the biceps and triceps tend to recover more quickly than larger ones, so training them once every seven days would cause you to miss out on better results.
Exercise Order
You should always start your training with compound (multi-joint) exercises (like bench presses, squats, and deadlifts) while you’re still fresh, and move on to isolation lifts (like the bicep curl) near the end of your sessions.
In terms of when to use the arm blaster for your bicep exercises, there are a couple of options:
The first bicep movement, where you’re using more weight: the arm blaster could help you maintain proper form and potentially build more strength.
The second or third bicep movement, where you’re using less weight: the arm blaster could promote better form, allowing you to thoroughly exhaust your biceps with high-rep sets and cause more metabolic stress, which could build more muscle.
Progression
Making steady progress in your training is essential for continuing to build muscle, whether you use an arm blaster or not. Placing increasingly more stress on your muscles forces them to continue to adapt by getting stronger and bigger. That said, progress in the form of doing more reps or lifting more weight should never come at the expense of proper form. This is one reason the arm blaster is such a valuable tool, as it makes it harder to “cheat” the movement.
I strongly recommend the Gymreapers arm blaster for your training needs. It’s durable, gets the job done, and has a comfortable neck strap to prevent bruising.
The heavy-duty aluminum construction ensures a sturdy feel and durability. Its contoured shape allows the blaster to fit more comfortably on your chest or upper abdomen, leading to a more comfortable experience, even when curling more weight. Both ends of the frame are capped, which creates friction between your arms and the blaster while keeping you comfortable and confident in your training. Combined with the rounded edges, your arms feel far more secure, allowing you to push yourself close to failure without worry.
The nylon strap is adjustable, which allows you to set the arm blaster at the perfect height regardless of your anatomy and unique needs. You can also pick from three color options: classic black, red, and green. To top it off, Gymreapers offers a 1-year replacement guarantee.
]]>
https://www.gymreapers.com/blogs/news/can-kettlebell-swings-help-lose-belly-fat2023-08-31T23:31:00-06:002024-05-01T16:09:53-06:00Can Kettlebell Swings Help Lose Belly Fat? Yes, Here's How To StartRoc Pilon
If you’re trying to lose belly fat then you’re probably wondering if explosive movements like kettlebell swings will help you lose fat more quickly.
So, can kettlebell swings help lose belly fat? Kettlebell swings are a dynamic exercise that can be extremely effective and helpful for losing belly fat when programmed correctly. If you program kettlebells in a way that cultivates a higher caloric burn then you will increase the amount of fat that is being lost during a workout.
To help you maximize fat loss with kettlebell swings, I’ll explain how kettlebell swings help you lose belly fat and how to incorporate them, and provide you with a sample kettlebell workout you can implement to start losing belly fat.
Key Takeaways
Kettlebell swings can help you lose fat by increasing the number of calories you burn per day through exercise and by increasing muscle mass.
Kettlebell swings cannot target the fat in your belly, but they can help you lose total body fat which will eventually cause you to lose fat from your belly.
Kettlebell swings by themselves do not cause you to lose fat, you must also be in a calorie deficit.
How Kettlebell Swings Help You Lose Belly Fat
Kettlebell swings can help you lose body fat but they cannot guarantee that the fat you lose will come from your belly. Your genetics determine where you lose fat more easily and the more stubborn areas.
Some people may lose fat from their belly first, whereas others may lose body fat everywhere else before they lose it from their belly.
If you stay consistent, you will lose total body fat so don’t get discouraged if you’re not seeing reductions in belly fat right away.
Kettlebell swings help encourage fat loss in a variety of ways:
Increases Energy Expenditure
Total daily energy expenditure (TDEE) is the number of calories your body burns throughout a day.
TDEE consists of your basal metabolic rate (the number of calories you burn to simply exist), your activity level, and the thermic effect of food (the number of calories you burn digesting and absorbing food).
The easiest ways to influence the number of calories you burn per day is to consume fewer calories or increase your activity level. Most people find it easier to increase their activity level than to eat less food.
Implementing kettlebell swings is an easy way to increase your activity level and encourage fat loss.
Increases Muscle Mass
Kettlebell swings can increase muscle mass in the glutes, hamstrings, quads, back, and shoulders. Since the kettlebell swing can increase the mass of so many muscles it has an especially potent effect at increasing your metabolism.
Essentially, the more muscle you have the more calories you burn (even at rest) because muscle requires more energy (calories) to maintain and use.
Therefore, increased total body muscle mass can increase your BMR and help increase the number of calories you burn per day (TDEE).
Saves Time
Kettlebell swings are often included in High-Intensity Interval Training (HIIT), which involves alternating between periods of high-intensity training and lower-intensity training.
This style of training is short-lived but can significantly increase your heart rate which can further increase the amount of calories burned and subsequently causes fat loss.
Implementing kettlebell training using HIIT can help you lose belly fat more efficiently even if you’re short on time.
How To Incorporate Kettlebell Swings To Lose Belly Fat
Learning how to incorporate kettlebell swings into your routine is important to maximize your ability to lose belly fat.
Frequency
High-frequency kettlebell swing routines can promote greater fat loss because more sessions throughout the week will increase your weekly total energy expenditure. I would program training kettlebell swings for up to three sessions a week to promote fat loss.
Sets
High-set kettlebell swing workouts (5+) can further increase total volume which can increase weekly fat loss. More sets can increase the amount of work you accumulate throughout the week, leading to more calories burned and potentially more muscle growth.
Reps
High repetitions (10+) can also increase the amount of work that is done during a given workout which leads to increased fat loss.
Higher repetitions within a set will change the energy system that is utilized during the set, more specifically the anaerobic lactic system which may burn more calories.
Intensity
Low-to-moderate intensities can be performed for a higher number of reps which promotes higher energy expenditure in a given workout.
Additionally, training to failure (the point where you can’t do another rep with good form) causes more muscle growth.
Both of these mechanisms (energy expenditure and muscle growth) can help you to lose belly fat more efficiently.
Therefore, it may be best to have some of your kettlebell workouts focus on using very light weights for higher reps to increase energy expenditure and other workouts during the week that focus on moderate loads and training to failure to encourage muscle growth.
Styles Of Training
There are also different styles of training to choose from:
Standard training is your traditional sets X reps X load workout that involves resting between each set. This style of training allows you to lift heavier loads and push yourself closer to failure.
Tabata can increase the total intensity of your kettlebell workout by limiting rest which can lead to improved fat loss. Tabata is a system that involves timed sets rather than goal repetitions.
HIIT using kettlebell swings integrated with other exercises can lead to a high-intensity workout to lose belly fat.
HIIT involves the implementation of a wide variety of exercises, so you can pair kettlebell swings with sled pushes, kettlebell snatches, and sprints to increase the total volume of work for the weight to burn calories.
Sample Kettlebell Workout To Lose Belly Fat
Here is a sample week-to-week kettlebell workout to lose belly fat:
Week 1
Monday
Tabata with kettlebell swings
20 seconds on: 10 seconds off for five rounds
Wednesday
HIIT workout: 3 rounds
Sprints for 10 seconds
Kettlebell swings for 20 seconds
Sled pushes for 20 seconds
Friday
Alternating kettlebell swings: 2 x 15 each @40%
Kettlebell swings: 2 x 15 @40%
Kettlebell goblet squats: 3 x 20 @30%
Week 2
Monday
Tabata with kettlebell swings:
20 seconds on: 10 seconds off for six rounds
Wednesday
HIIT workout: 4 rounds
Sprints for 10 seconds
Kettlebell swings for 20 seconds
Sled pushes for 20 seconds
Friday
Alternating kettlebell swings: 2 x 15 each @40%
Kettlebell swings: 2 x 15 @40%
Kettlebell goblet squats: 3 x 20 @30%
Week 3
Monday
Tabata with kettlebell swings:
25 seconds on: 10 seconds off for five rounds
Wednesday
HIIT workout: 4 rounds
Sprints for 15 seconds
Kettlebell swings for 25 seconds
Sled pushes for 20 seconds
Friday
Alternating kettlebell swings: 3 x 15 each @40%
Kettlebell swings: 3 x 15 @40%
Kettlebell goblet squats: 3 x 20 @30%
Week 4
Monday
Tabata with kettlebell swings:
25 seconds on: 10 seconds off for five rounds
Wednesday
HIIT workout: 4 rounds
Sprints for 15 seconds
Kettlebell swings for 25 seconds
Sled pushes for 20 seconds
Friday
Alternating kettlebell swings: 3 x 15 each @40%
Kettlebell swings: 3 x 15 @40%
Kettlebell goblet squats: 3 x 20 @30%
Best Kettlebells To Help Lose Belly Fat
The Gymreapers kettlebell is my favorite kettlebell for kettlebell swings, especially for those who want to lose fat. The sturdiness of these cast-iron kettlebells allows you to perform hundreds of reps of kettlebell swings without the fear of breakdown.
A range of cast-iron kettlebells are available for you to purchase:
4 kg (9 lbs)
8 kg (18 lbs)
10 kg (22 lbs)
12 kg (26 lbs)
14 kg (31 lbs)
16 kg (35 lbs)
18 kg (40 lbs)
20 kg (44 lbs)
40 kg (88 lbs)
For weight loss, I would focus on the lighter range of the weights that are available. You can also perform kettlebell swings with two kettlebells at a time, so purchasing a pair of each would be great for weight-loss workouts.
How Long Does It Take To Lose Belly Fat With Kettlebell Swings?
Typically, the goal of weight loss should be 1-2 lbs of bodyweight a week. More than this may compromise the hard-earned muscle that you’ve built, while less than this may stretch out your weight loss phase for a long period.
By tracking calories and introducing dynamic kettlebell swing workouts you can easily lose the target of 1-2 pounds per week.
Remember that you may not see this loss in your belly right away if you’re losing fat in other areas first, but if you stay consistent it will eventually come from your belly.
]]>
https://www.gymreapers.com/blogs/news/kettlebell-clean-and-jerk2023-08-31T23:24:12-06:002024-05-01T16:10:24-06:00Kettlebell Clean & Jerk: How-To, Muscles, Benefits, MistakesRoc Pilon
If you’re interested in CrossFit or simply looking for new exercises to perform with your kettlebell, the clean & jerk should be a staple exercise in your routine.
So, what is the kettlebell clean and jerk? The kettlebell clean and jerk is an explosive exercise that improves power development. The movement can be broken down into two separate portions, the first being the transition of the kettlebell from the floor to the shoulders, and the second being from the shoulders to an overhead position.
In this article, I will discuss the benefits of performing kettlebell clean and jerks, how to do them correctly, and the 4 common mistakes you should avoid (and how to fix them).
Key Takeaways
Kettlebell clean & jerks target the glutes, quads, hamstrings, triceps, and lats to build total body muscular strength and power.
The kettlebell clean and jerk improves weightlifting performance, back and core stability, overhead pressing strength, and total body coordination.
Some of the common mistakes include underutilizing the lower body, incorrectly timing the pull, and excessively rounding the upper back.
Kettlebell Clean & Jerk: Anatomy Overview
The muscles involved in the kettlebell clean and jerk are:
Glutes (Gluteus minimus and maximus). The glutes are responsible for external rotation and extension at the hip joints.
Quads (Rectus femoris, vastus medialis, vastus lateralis, and vastus intermedius). The quad muscles are responsible for knee extension (straightening the legs) and hip flexion (bending at the hips).
Hamstrings (Semitendonsis, semimembranosus, and biceps femoris). The hamstring muscles are responsible for knee flexion (bending the knees) and hip extension (straightening at the hips).
Triceps brachii. The triceps muscles are responsible for elbow extension (straightening the arms), shoulder extension (bringing the shoulder back), and shoulder adduction (bringing your arms toward the midline).
Latissimus dorsi (lats). The muscle actions of the lats are internal rotation of the shoulder (rotating the arm inward), shoulder extension, and shoulder adduction.
These muscles work together to help execute the kettlebell clean and jerk, which is why it is considered a full-body exercise and it requires higher levels of muscle coordination.
Benefits Of Clean & Jerks With A Kettlebell
The benefits of kettlebell clean & jerks include:
Improves Weightlifting Performance. Weightlifting requires total body expression of strength and power. Although performing clean & jerks with a kettlebell isn’t exactly like barbell olympic lifting, there is still a lot of carryover for power and strength development which can improve your weightlifting performance.
Improved Back and Core Stability. Kettlebell clean & jerks are a complex multi-joint movement that requires core and back stabilization to maintain positioning during the lifting of the weight.
You could even use kettlebell clean & jerks as a therapeutic exercise for improving back pain.
Improved Overhead Pressing Strength. Being strong and stable in an overhead position is a fundamental skill for performance athletes. The jerk phase of this movement requires strength, power, and stability to move heavier loads into the overhead position.
This has direct carry-over to movements such as throwing or other lifting movements such as bench press, overhead press, snatch, and shoulder press.
Improved Total Body Coordination. Kettlebells require an immense amount of balance and coordination to pull the weight from the floor to the front rack position and then into the overhead position.
Developing balance and coordination by kettlebell clean and jerks can be beneficial for older populations who want to decrease their risk of falls, or athletic populations who want to increase their dexterity for their sport.
How To Do A Kettlebell Clean & Jerk
Here’s how to perform kettlebell clean & jerks:
Stand with your feet just outside of hip-width apart.
Place a kettlebell between your legs.
Load your glutes and hamstrings by hinging at the hips.
Grab the kettlebell with one hand and engage the upper back to keep it from rounding.
Push the ground away with your legs as you snap your hips forward, letting the kettlebell glide upward.
Continue the upward momentum of the kettlebell by fully extending the legs and shrugging through the shoulders.
Rotate your arm around the kettlebell to catch it in the front rack position.
Break at the hips and knees to load the glutes and hamstrings.
Snap the hips and quads into extension while subsequently driving the kettlebell upward to receive it with your arm locked out overhead.
Let the kettlebell fall back between your legs and then repeat the previous steps for the desired amount of repetitions.
4 Common Mistakes With Kettlebell Clean & Jerks
To maximize the benefits of the kettlebell clean and jerk and reduce the risk of injury, avoid the following mistakes.
Mistake #1: Underutilization Of The Lower Body Muscles
Oftentimes lifters try to perform the clean & jerk using only their upper body, but this severely limits how much weight you can lift and increases your risk of injury.
Instead, the lower body muscles should be responsible for lifting the weight up and your arms should simply follow through to complete the movement.
Knowing how to load the glutes and hamstrings, and how to transition into the front rack position is fundamental for proper technical execution.
How To Fix
To improve lower body muscular involvement, let the arms hang loose in front of you when grabbing the kettlebell. The hands should simply act as hooks and your focus should be on maintaining tension in the legs and the upper back.
Use your legs to stand up with the weight and pull the kettlebell with your arm into the upright row position at the last possible second of hip extension. This will minimize upper body involvement and maximize the involvement of the lower body muscles.
Mistake #2: Poor Timing Of The Pull, Transition, Or Jerk
Another common mistake with the clean & jerk is messing up the timing between the 3 different portions of the movement (the pull, transition, or jerk).
Pulling too soon can result in a reduction in power output and can also place you in a compromised position increasing the risk of injury.
Also, if you transition from the pull to the front rack position too soon it can result in a loss of power, but if the transition is too late, the kettlebell can end up in front of you and cause you to lose power as well.
During the jerk, if the pressing motion is made too soon or too late it can decrease the momentum from the lower body and force you to “muscle the weight up” which places more stress on your shoulders and limits how much you can lift overhead.
How To Fix
Here is how we can address each of these timing issues during the kettlebell clean and jerk:
Focus on building tension off the floor by tightening the lats (squeezing the armpits shut), having a proud open chest, and loading the glutes and hamstrings. Upon achieving tension in these key areas you can begin to initiate the pull by driving your legs into the floor.
The transition phase is best initiated when the kettlebell is at the hip socket. As the kettlebell reaches hip height, you can start transitioning to the front rack position. This ensures that all the possible energy from the lower extremities transfers to the upper body to complete the rotation to the front rack position.
Maximal leg drive is achieved during the jerk when the overhead push is initiated after the hip and knees are completely extended. This ensures that the legs do the majority of the work and the upper body is simply guiding the kettlebell overhead and locking it out.
Mistake #3: Letting The Kettlebell Drift Too Far Forward
If the kettlebell travels too far away from your center of mass then you will need to compensate by involving other muscle groups that typically wouldn’t be part of the lift. You’ll also have to work harder to get the kettlebell back toward you to receive it in the front rack position, which limits how much you’ll be able to lift.
How To Fix
To fix this make sure that the kettlebell sits between your legs at the beginning of the lift. During the transition phase, make sure that the kettlebell stays as close to your body as possible rather than swinging it out away from you.
When performing the jerk, focus on keeping the kettlebell stacked over the top of your body so that you form a straight line when the kettlebell is locked out overhead.
Mistake #4: Excessive Upper Back Rounding
The kettlebell clean & jerk starts from the floor and finishes overhead, so if your positioning from the floor is compromised then it will affect the rest of the movement.
It’s common for lifters to use poor mechanics, like excessively rounding the upper back, to pick up the weight. This may be due to a hip, hamstring, or upper back mobility issue forcing them to round their upper back to get into position.
It could also be a technical issue that occurs from not knowing how to effectively hinge at the hips, which also forces the upper back to round to pick up the weight.
How to Fix
There are several ways we can minimize upper back rounding to improve positioning during kettlebell clean and jerks:
Open your chest when getting into the starting position. Having an open chest (puffing your chest up) will aid in effectively maintaining an upright posture at different points during the clean.
Get into position by pushing the hips back. Loading the hips and hamstrings by hinging at the hips can minimize back rounding while placing a greater emphasis on proper loading of the lower body to pick the weight up.
Maintain tension in the upper back. As you grab the kettlebell, remember the cue of “squeezing your armpits” as this will activate your lats and often help flatten out the upper back.
Build and maintain a proper brace when setting up. Building intra-abdominal pressure by taking a big breath before the setup can assist in maintaining postural stiffness and decrease upper back rounding.
Best Kettlebells For Clean & Jerks
The ergonomic design of the Gymreapers Kettlebell makes it my go-to option for kettlebell clean & jerks. The durability of these cast-iron kettlebells allows me to throw them around without worrying about wear and tear.
These kettlebells come in a large range of sizes, including:
4 kg (9 lbs)
8 kg (18 lbs)
10 kg (22 lbs)
12 kg (26 lbs)
14 kg (31 lbs)
16 kg (35 lbs)
18 kg (40 lbs)
20 kg (44 lbs)
40 kg (88 lbs)
This allows you the versatility of loading the clean and jerk either for strength or power development. Heavier loads on this spectrum can help you build strength, whereas lighter loads can help you develop technique and power.
Finally, I like the design and logo as well. It’s sleek and fits nicely in a variety of weight room settings. The colored handles help differentiate the available loads as well making it very easy for setting up group workouts so that my athletes can differentiate between the weights.
]]>
https://www.gymreapers.com/blogs/news/kettlebell-sumo-deadlift2023-08-31T23:22:16-06:002024-05-01T16:11:49-06:00Kettlebell Sumo Deadlift: How-To, Muscles, Benefits, MistakesRoc Pilon
Kettlebell sumo deadlifts are my favorite exercise to program to strengthen and build the hips and are a great option for promoting hip health as well.
So, what is a sumo deadlift? The sumo deadlift is an incredible total body exercise that requires you to pick up a kettlebell from the ground by hinging at the hips and using your back and legs to stand up with the weight.
In this article, I will discuss the benefits of performing kettlebell sumo deadlifts, teach you how to perform them correctly, and highlight 4 common mistakes to avoid.
Key Takeaways
Kettlebell sumo deadlifts target total body musculature including the glutes, quads, hamstrings, lower back, and upper back muscles.
Kettlebell sumo deadlifts help teach you proper posture and deadlift mechanics, which increases the resiliency of your hips and back.
Some of the common mistakes that are made while performing the kettlebell deadlift include excessive back rounding and excessive knee bending.
Kettlebell Sumo Deadlift: Anatomy Overview
The muscles that are involved in the kettlebell sumo deadlift are:
Glutes (Gluteus minimus and maximus). The glutes are responsible for external rotation and extension at the hip joints. During the sumo deadlift, these actions maintain the hip position and are involved with standing the weight up.
Quads (Rectus femoris, vastus medialis, vastus lateralis, and vastus intermedius). Quads are responsible for knee extension and hip flexion. This is most involved during the starting position of the deadlift and the pushing of the weight off the floor.
Hamstrings (Semitendonsis, semimembranosus, and biceps femoris). The hamstring muscles are responsible for knee flexion and hip extension. Strong hamstrings are associated with locking out the sumo deadlift and stabilizing the load throughout the movement.
Lower Back (Spinal erectors). These muscles are responsible for the extension of the spine and work to prevent lower back rounding during the sumo deadlift.
Upper Back (Trapezius and Lats). These muscles are responsible for maintaining the depression of the traps and preventing the upper back from rounding excessively during the sumo deadlift.
Benefits Of Sumo Deadlifts With A Kettlebell
The benefits of the sumo deadlift include:
A Simpler & Safer Option. Barbell sumo deadlifts can be hard to master and are often demonized by the fitness industry because they’re often performed incorrectly which leads to injury.
Conversely, kettlebell sumo deadlifts are easier to master and have a lower risk of injury. This makes them ideal for those who are recovering from an injury or new to the gym.
Teach Proper Posture and Movement Mechanics. Back injuries are common due to improper posture during regular activities of daily living like picking up heavy objects at work or bending down to pick something up off the floor.
Kettlebell sumo deadlifts can improve one’s ability to maintain proper posture in these compromised positions.
Improves Hip and Back Resiliency. A stronger back can increase the resilience of your body while in compromised positions, which makes you less susceptible to hip and back injuries.
Additionally, stronger muscles can carry over to increased performance in movements such as barbell squats, deadlifts, lunges, and various other lower extremity movements.
Portable. Kettlebells allow you to perform sumo deadlifts in a variety of settings (private gym, garage gym, or hotel gym).
This allows you to keep up with your workout regime when you’re on the road or working with limited equipment.
How To Do Kettlebell Sumo Deadlifts
Here’s how to do kettlebell sumo deadlifts:
Have your feet in a wider-than-shoulder-width stance with your toes pointed outwards.
A wider stance will prioritize your glutes and hamstrings, whereas a narrower stance will target your quads and glutes.
Set up with a kettlebell in between your feet.
Build tension in the upper back by driving the traps down (keeping your shoulders away from your ears) and squeezing the armpits to activate the lats.
Get into position by hinging at the hips and bending your knees to grab the kettlebell. You should feel tension in your glutes and hamstrings.
Grip the kettlebell with both of your hands and use the weight of the kettlebell to wedge yourself into position.
Maintain an upright posture with a proud chest throughout the entirety of the rep.
Forcefully stand up with the kettlebell while maintaining positioning and stiffness in the upper torso.
4 Common Mistakes With Kettlebell Sumo Deadlifts & How To Fix Them
To make the most of your kettlebell sumo deadlift, avoid the following mistakes:
Mistake #1: Kettlebell Is Too Far Forward
When the kettlebell is too far forward it places excessive stress on the lower back, and reduces the amount of weight that you can lift.
How To Fix It
To ensure the kettlebell stays close to your body, start with the kettlebell in line with your midfoot and keep your lats tight to keep the kettlebell close. This will reduce your risk of injury and allow you to lift more weight.
Mistake #2: Excessive Back Rounding
It is extremely common for lifters to round their back during kettlebell sumo deadlifts if they have movement restrictions or are unaware that their back is rounding.
Rounding the back under load places excessive stress on the spine and stabilizing muscles, which can lead to injury.
How To Fix It
There are a few ways to prevent back rounding with the kettlebell sumo deadlift:
Keep Your Chest Proud. Maintaining an upright posture by puffing your chest can help reduce rounding of the upper and lower back engaging the back muscles.
Focus On Your Set-Up. Rather than bending down to pick up the weight without thought, try initiating the setup by pushing the hips back first and then bending at the knees to grab the kettlebell.
Breathe and Brace. Bracing during a sumo deadlift involves filling the abdomen with a lot of pressure by taking a deep breath in and holding it as you pull the kettlebell off the floor.
This intra-abdominal pressure helps to stiffen your torso and protect the entire back from rounding, which subsequently prevents potential injuries from occurring.
Mistake #3: Squatting The Weight
Excessive knee bending (squatting rather than hinging) can be problematic for multiple reasons:
Changes Your Body Position. Excessive knee bending in relation to the weight can lead to inefficient mechanics during a sumo kettlebell deadlift.
Emphasizes The Quads Rather Than The Glutes and Hamstrings. The sumo deadlift is meant to be an exercise for the posterior chain, which is generally underdeveloped and weak for the average person. Excessive knee bending prevents you from recruiting the posterior chain as intended.
Places More Stress On The Knees. If you’re squatting the weight up, you’re placing more stress on the knees which can become a problem if you’re already including squats in your workout routine because it may be more stress than your body can recover from.
How To Fix It
To fix excessive knee bend during kettlebell sumo deadlifts, you will need to maintain a perpendicular shin angle to the floor in the start position and focus on hinging at the hips rather than squatting to set the kettlebell back on the ground.
Mistake #4: Letting The Chest Cave
Losing tension in the upper back and glutes can lead to the chest collapsing during the kettlebell deadlift. If the chest is caving before lifting, or during, then you will limit how heavy you can lift and place your body in a compromised position.
How To Fix It
To fix a caving chest, it is better to begin with a more upright torso. In this way, your starting position will be improved, subsequently preventing a caving chest.
Best Kettlebells For Sumo Deadlifts
The Gymreapers Kettlebells were my favorite option for sumo kettlebell deadlifts because these kettlebells are made from cast iron, which makes them extremely durable. Gymreapers kettlebells are currently sold out.
The range of loading gives you access to build an arsenal of intensities to load your sumo deadlift.
The flat base promotes stability at the bottom of the deadlift, allowing you to focus on lifting rather than the kettlebell wobbling around at the bottom. The compact design allows you to either take your weight on the go or load up your home gym with a range of kettlebells.
Furthermore, Gymreapers kettlebells allow you to effectively perform heavy or light sumo deadlifts for many repetitions. These kettlebells are extremely durable in the sense that you don’t have to worry about damaging them when you’re throwing them around during harder sets.
]]>
https://www.gymreapers.com/blogs/news/arm-blasters-position2023-08-31T23:10:42-06:002023-08-31T23:10:42-06:00Where To Position Arm Blasters For Best ResultsRoc PilonAs a personal trainer, I’ve seen plenty of trainees using an arm blaster incorrectly simply because they’ve positioned it poorly on their torso.
To help you get the best results while using an arm blaster, I’ll teach you how to wear it correctly, how to use it, and what common mistakes to avoid to keep injuries at bay.
Key Takeaways
The ideal arm blaster position is when you can place the back of your lower triceps (the area just above the elbows) against the curved sides of the frame while keeping your shoulder blades retracted.
An incorrect arm blaster position can lead to discomfort and place unnecessary stress on your elbows when performing bicep curls and cable tricep extensions.
There are four common mistakes to be mindful of regarding the arm blaster position.
Arm Blaster Overview
An arm blaster is a long, flat piece of aluminum with slightly rounded edges and an adjustable neck strap holding it in position. The objective is to loop the strap around your neck and have the arm blaster in front of your body.
From there, trainees can position the back of their upper arms against the curved sides of the metal piece for support during bicep curl exercises. The arm blaster prevents the elbows from moving back and forth, improving training technique, and leading to better bicep activation.
“An arm blaster workout uses a tool to isolate the biceps and triceps by giving the back of your arms a stable surface to anchor against. By limiting the movement of your shoulders, you put more strain and emphasis on the biceps and triceps to get more targeted results.”
The adjustable neck strap is typically made of nylon and it allows trainees to adjust the position of the arm blaster to suit their height and torso/arm length.
How To Wear An Arm Blaster
If you're new to using an arm blaster, here’s how to put it on and use it correctly:
Place the adjustable strap behind your neck with the arm blaster in front of your body.
Grab your preferred weight, be it a straight or EZ bar, dumbbells, cable, or something else.
Stand tall and position the back of your upper arms (the area just above the elbows) against the slightly curved edges of the long mental piece.
Assume a comfortable foot stance and retract your shoulder blades (squeeze them together).
Take a deep breath and flex your abs.
Curl the weight until your wrists are slightly higher than your elbows, and squeeze your biceps at the top.
Slowly lower your arms, feeling your biceps stretch on the way down—exhale during this portion of the rep.
Inhale again and repeat.
Note: These instructions are for bicep curl variations but you can also use the arm blaster for cable tricep extension.
Positioning The Arm Blaster For The Best Results
Adjusting the arm blaster to the perfect position against your torso allows for a more comfortable and effective training experience. In contrast, improper placement can make the arm blaster less effective and more awkward to use.
A simple way to determine if the arm blaster is in a good position is to examine how your arms lie against the curved ends while standing tall with your shoulders retracted. The ideal position for most people is one where the back of the upper arms (just above the elbows) lies against the curved edges.
The neck strap should lie comfortably against your neck without feeling like it’s pulling your head forward or causing discomfort.
4 Common Arm Blaster Mistakes
Wearing the arm blaster may seem straightforward, but you’d be surprised at how often I see the arm blaster positioned incorrectly.
The most common arm blaster positioning mistakes I see include:
Mistake #1: Positioning the Arm Blaster too High
Wearing the arm blaster too high (closer to the shoulders) makes it more uncomfortable and places additional stress on your elbows.
This is because with the arm blaster positioned higher, your upper arms are supported but your elbows are less protected (as the point of support is further away). If you happen to swing the weight up or lower the weight quickly it will stress the elbow joints.
How To Fix
Tighten the next strap so that the area just above the elbows fits snugly in the curved sides. That position will ensure adequate elbow support and the necessary restriction without limiting the joint’s ability to flex or extend fully.
Mistake #2: Having the Arm Blaster too Low
I’ve also seen people position the arm blaster too low by having their elbows in contact with the arm blaster when fully extended, rather than their lower triceps.
This position would be extremely uncomfortable and limit the tool’s ability to stabilize the elbows as they bend and flex.
How To Fix
Position the arm blaster slightly higher on the torso by tightening the neck strap, so that your lower triceps (rather than your elbows) are in contact with the arm blaster when your arms are fully extended and flexed.
Mistake #3: Elbows Not Feeling Secure
Even if the arm blaster is in the right position, you can still compromise your results if you fail to secure your elbows in place as you curl the weight up (bicep curl) or pull the weight down (tricep extension).
If your elbows are lifting up off the support as you move your arms, then you’re limiting your ability to isolate the target muscles (which is the entire purpose of using an arm blaster).
How To Fix
Take your time to prepare for your training sets by positioning your lower triceps in the curved edges of the arm blaster and focusing on keeping them firmly pressed throughout the entire set to keep tension on the working muscles.
The position should feel secure, as if you’ve placed the back of your upper arms on a preacher bench.
Mistake #4: Improper Posture
That last mistake is usually a result of making one of the other positioning mistakes listed above because the improper placement of the arm blaster can cause your posture to shift.
For instance, placing the arm blaster too low on your torso can force you to round your upper back, limiting activation of the biceps and triceps and encouraging bad posture.
Similarly, having the arm blaster too high can cause you to hyperextend your lower back in an effort to position your lower triceps against the curved edges, which can increase your risk of injury.
How To Fix
Be mindful of your arm blaster positioning and how it’s affecting your posture. You should be able to maintain an upright posture without straining your neck against the pull of the arm blaster.
The Gymreaper arm blaster is my go-to choice because of its excellent design, inclusive size for larger and smaller lifters, and fair price.
The Gymreapers arm blaster is made of heavy-duty aluminum that is sure to stand the test of time and provide all the support your elbows need during many bicep and some tricep activities. The blaster is shaped to fit comfortably against your torso, promoting stability and optimizing your performance.
The two sides of the arm blaster are capped, allowing for more friction between the back of your arms and the aluminum frame, reducing the risk of slipping during more intense sets. This effect is further magnified by the curved edges, allowing for a snug fit.
Plus, the nylon strap is adjustable, which means you can comfortably position the arm blaster at the ideal height, regardless of your proportions. The strap comes with a padded piece for the neck, making it feel more comfortable and preventing bruising.
To top it off, you can pick from three colors: classic black, red, and green. You also get to enjoy a 1-year replacement guarantee.
]]>
https://www.gymreapers.com/blogs/news/types-of-resistance-bands2023-08-31T22:54:46-06:002024-07-18T12:12:31-06:00Types of Resistance BandsRoc PilonResistance bands, available in various types and resistance levels, can help improve your strength, mobility, and flexibility, making them a staple for any fitness enthusiast.
To help you decide which type of band you should use, I’ll discuss the benefits and potential drawbacks of each type of resistance band and explain how to incorporate them into your exercise routines.
Key Takeaways
Resistance bands are made of elastic material that increases in resistance when stretched. They can be used for strength training, warming up, or even rehabilitation.
There are 3 main types of resistance bands: looped bands, floss bands, and hip bands.
Gymreapers loop resistance bands, floss bands, and hip bands are my favorites because they come in a variety of resistance levels and they have a 1-year replacement guarantee.
Resistance Bands: 3 Types
As you dive into resistance band training, you’ll come across three main types of bands: looped bands, floss bands, and hip bands.
1. Looped Resistance Bands
Looped Resistance Bands are a versatile and essential piece of equipment for any fitness enthusiast.
They're made of a strong, durable material that's designed to provide different levels of resistance for your workouts. They are widely used in strength training, and rehabilitation exercises, and can even serve as a portable gym when you're on the go.
Benefits Of Looped Resistance Bands
Looped resistance bands offer many benefits:
Enhance strength and flexibility. Resistance bands allow for a wide range of motion, enabling you to improve both your strength and flexibility.
Portable and convenient. Lightweight and compact, you can carry them wherever you go, encouraging consistency with your exercise routine.
Suitable for all fitness levels. Whether you're a beginner or an advanced athlete, resistance bands cater to all fitness levels with varying levels of resistance.
Drawbacks Of Looped Resistance Bands
While I recommend a set of looped resistance bands to any athlete focused on strength training, they won’t do everything for you, and as with any product, come with a few drawbacks to consider.
Lack of stability. Unlike weight machines, resistance bands require you to stabilize your body during workouts, which might be challenging for some.
Wear and Tear. Over time, resistance bands can lose their elasticity or even snap due to heavy use.
2. Floss Bands
Floss Bands are primarily used for mobility and recovery purposes. These bands help improve joint mobility and circulation, reducing pain, and enhancing overall athletic performance.
You’re most likely to see these types of bands used by physical therapists helping clients with a variety of needs to work on rebuilding strength and mobility after an injury.
Benefits Of Floss Bands
The benefits of floss bands include:
Improves Mobility. Floss bands help increase the range of motion in your joints, which is essential for athletes in various sports.
Injury Prevention. Regular use of floss bands can help prevent injuries by keeping your muscles and joints healthy.
Drawbacks Of Floss Bands
Floss bands also have a few downsides to consider:
Requires Proper Knowledge. Using floss bands incorrectly can lead to discomfort or injury, so understanding how to use them properly is crucial.
Temporary Discomfort. Initial use of floss bands may cause some discomfort due to the increased pressure on the muscles, depending on how you apply them.
3. Hip Bands
Hip Bands are a fantastic tool for activating and strengthening your glutes and hips. They can also improve your form and stability during squats and deadlifts, as well as provide meaningful activation of the smaller hip and glute muscles.
Targets Glute Muscles. Hip bands are excellent for activating your glute muscles, making them perfect for any leg day routine.
Improves Technique. They can help keep your knees pushed out during a squat or deadlift, which can improve your form and reduce the risk of injury.
Easy to Use. They are simple to use and suitable for both gym workouts and home-based exercises.
Drawbacks Of Floss Bands
Hip bands come with their own drawbacks as well:
Limited Exercises. While great for lower-body workouts, hip bands aren't as versatile as regular resistance bands.
Size Constraints. Depending on their size and strength, hip bands may not fit or provide the desired resistance for all users.
How To Determine What Type Of Band You Need
As you think about which type of band you’ll need, consider the intended use and level of resistance.
Intended Use
The primary step in choosing the right resistance band is determining your goals and how you plan to use the band. The intended use significantly influences which type of band would be most suitable for you.
Dedicated Strength Training and Powerlifting
For dedicated strength training and powerlifting, looped resistance bands would be the best fit because they offer various resistance levels and can be used for a variety of exercises.
Resistance bands offer the same benefits as free weights but also provide constant tension throughout the exercise movement, challenging your muscles in ways that weights typically cannot.
Loop bands can be used on their own to provide resistance or added to a loaded barbell to dynamically change the resistance as the bar moves (less tension as the bar is close to the band’s anchor point, and more tension as it moves away from it).
Warm Ups and Hip/Glute Activation
When it comes to warm-ups or activating your hip/glute muscles, hip bands are your best bet because they are designed to prepare your lower body for a more intense workout.
They are also ideal for improving your form and preventing injury during squats, deadlifts, and other lower-body exercises by cueing your glutes to keep your knees in proper alignment.
Mobility and Rehabilitation
If your goal is to enhance mobility or for rehabilitation purposes, floss bands are the best choice because they improve joint mobility, reduce pain, and aid in recovery. Floss bands are often used in physical therapy or during warm-up routines to improve flexibility and range of motion.
Level Of Resistance Required
The level of resistance required is another key factor to consider while choosing a band. This depends on your current fitness level and your goals.
Little To No Resistance: If you’re looking for a band to work on mobility and joint health, then resistance isn’t necessarily a priority. In which case, floss bands would be your best option.
Lighter Resistance:For beginners, it's best to start with bands that offer less resistance, and as you grow stronger, you can gradually shift to bands with higher resistance levels.
Hip bands and lower-resistance loop bands (i.e. Desert Tan) are typically a good starting point for beginners or those using bands strictly for warm-up or activation.
Heavier Resistance: Experienced athletes or those focused on strength training or powerlifting, would likely require bands with higher resistance.
In this case, looped resistance bands that offer heavier levels of resistance (i.e. Coyote Brown) would be more suitable.
It's important to note that regardless of your fitness level or goals, the bands should provide a challenging, but manageable level of tension throughout your exercises. This will ensure that you get the most benefit from your workouts while minimizing the risk of injury.
By activating these crucial muscles, hip bands help ensure proper form and alignment during more strenuous exercises, thereby reducing the likelihood of injury.
Another great choice for warm-ups are the Gymreapers Floss Bands for those who struggle with aches and pains in their joints or movement restrictions before warming up.
The Gymreapers floss bands come in a pack of two with one thinner band with less resistance and one thicker band with more resistance for increased pressure on challenging areas.
Their bands provide varying levels of resistance and can facilitate a wide range of exercises that target different muscle groups.
These bands are ideal for compound movements like the banded deadlift or squat; however, they’re likely too heavy for upper body or isolation movements.
If you plan to use bands for a wider variety of movements, I highly recommend the Gymreapers Military Band Set, which comes with 5 different resistance bands ranging from 20-150 lbs to accommodate tons of exercises and all strength levels.
]]>
https://www.gymreapers.com/blogs/news/kettlebell-split-squat2023-08-11T12:33:12-06:002024-09-06T14:05:07-06:00Kettlebell Split Squat: Perfect Form, Benefits, and Common MistakesRoc PilonHow to Perform the Kettlebell Split Squat for Strength and Stability
Kettlebell split squats are great for building lower body strength, improving balance, and correcting muscle imbalances.
The kettlebell split squat is an effective exercise that builds up the quadriceps, glutes, and hamstrings. It works one leg at a time, allowing trainees to identify and address muscle imbalances. The movement’s potential for progression is excellent, as trainees can use increasingly more weight to challenge themselves.
While the split squat offers many benefits, trainees must know how to perform it and what mistakes to avoid to get the most out of each rep and keep injuries at bay.
Key Takeaways
The split squat is useful because of its potential for improving core strength, its ability to strengthen the lower body, and its potential uses in a rehab setting.
Most of the common mistakes that lifters make with kettlebell split squats involve setting the feet incorrectly, which leads to balance issues and less force output.
Muscles Worked in Kettlebell Split Squats
The kettlebell split squat is an effective lower-body exercise. Here is a look at the muscles involved in the exercise and their functions:
Quadriceps
The quadriceps are a large muscle group that makes up the front portion of the things and consists of four heads: the rectus femoris, vastus lateralis, vastus medialis, and vastus intermedius.
Their primary function is knee extension (straightening of the knees), which makes them the primary movers during a kettlebell split squat.
Glutes
The gluteal muscle group consists of three muscles: gluteus maximus, medius, and minimus. Together, these muscles are involved in hip extension, thigh rotation, and abduction (moving the leg away from your body’s midline).
Given the greater stability demands of the split squat, the glutes contract isometrically (without changing position) to provide hip stability. Additionally, the gluteus maximus works alongside the quadriceps by driving the hips forward (hip extension), allowing trainees to get out of the bottom position.
Hamstrings
The hamstrings, which make up the back portion of the thighs, produce knee flexion (bending of the legs) and assist the glutes with hip extension.
During split squats, these muscles assist the glutes and quadriceps to promote knee and hip stability while producing some of the force needed to get out of the bottom position.
Given the stance and greater stability demands, these and other muscles must flex isometrically to promote torso rigidity, allowing trainees to maintain their balance throughout each set.
Benefits of Kettlebell Split Squats for Beginners and Advanced Lifters
The benefits of performing split squats with a kettlebell include:
Strengthens the Lower Body
The most apparent benefit of the split squat with a kettlebell is that the movement strengthens the entire lower body. This leads to better performance on other leg movements and during activities like running and jumping.
Builds Impressive Quads and Glutes
The split squat does a fantastic job of developing the quadriceps and glutes simultaneously. If you’re looking to build muscle in these two areas, then the kettlebell split squat should be a staple in your workout routine.
The quads and glutes work hard in the split squat because the movement requires you to lower yourself down into deep hip and knee flexion, so the quads (knee extensors) and glutes (hip extensors) must work harder to bring you back up to a standing position.
Reduces the Risk of Muscle Imbalances
Unlike bilateral exercises like the barbell back squat, where both legs work together, split squats are unilateral. This means one side of the body does most of the work on any given rep, allowing trainees to give equal attention to both legs.
Doing so makes it easier to spot imbalances (e.g., you can do 12 reps with your right leg but only 7 with your left) and subject both legs to the same amount of physical stress.
“This means you’ll be less prone to injuries that could be caused by muscular compensations — that is, a discrepancy in form due to one leg making up for the other leg’s incompetence.”
-Mike Dewar, strength coach with a master's degree in exercise physiology
Improves Core Stability
Maintaining stability during a split squat is more difficult because most of your weight is shifted onto the front leg. As such, your core muscles must work extra hard to promote whole-body stability to maintain your balance.
Additionally, these greater balance demands can promote improved ankle, knee, and hip stability.
Requires Minimal Equipment
There is something great about simple movements that don’t require much equipment. Unlike other leg exercises, where you need a gym machine, squat rack, barbell, weight plates, and other gear, you can do the split squat with a single kettlebell.
For instance, you can pick up a couple of Gymreapers kettlebells (ranging from 4 to 40 kilograms) and do the exercise at home to build and strengthen your lower body.
How to Progress with Kettlebell Split Squats
Split squats with a kettlebell are fantastic because trainees can continue to progress the movement over time to continue seeing results.
For example, a beginner can start with a single 4-kilo kettlebell and gradually work up to a 40-kilo one.
If that stops being enough, the trainee can start holding two kettlebells (one in each hand) for additional resistance.
Plus, there is always the option to modify the split squat to increase the difficulty. For instance, the Bulgarian split squat is a more advanced variation, where trainees must elevate their rear leg on a gym bench, chair, or similar.
Doing so allows for a slightly larger range of motion, stretches the glutes more, and places more tension on the front quadriceps.
How To Do A Kettlebell Split Squat
The following instructions are for the split squat with one kettlebell held at the side of the body:
With a kettlebell in your left hand, stand tall, puff your chest out, and have your feet in a comfortable stance. Your left arm should be straight and close to your body.
Step back with your left leg (the same side as the hand holding the weight) and plant the ball of the left foot on the ground. Your stance width should be long enough for your front shin to be relatively upright and your knee angle to be 90 degrees in the bottom position.
Inhale, engage your abs, and descend into a squat, bending both knees.
Lower yourself down until your front thigh is roughly parallel to the floor and your back knee is almost on the ground. Keep your torso upright and the kettlebell close to your side.
Pause briefly and push from the heel of your front foot to extend your knee—exhale near the top.
Take another breath and repeat.
Once finished training your right leg, grab the kettlebell with your right hand, extend your right leg back, and repeat for the same number of reps.
Common Kettlebell Split Squat Mistakes and How to Fix Them
To get the most out of your kettlebell split squats, it’s important to avoid the following mistakes.
Mistake #1: Using the Wrong Stance
Placing your front foot too close or far from your body is a mistake that could affect the movement pattern, your stability, and the overall effectiveness of the exercise.
Keeping your front foot too close to the back foot would force your knee to travel in front of your toes at the bottom position, potentially placing more stress on your joints if you’re unable to keep your heel on the ground.
In contrast, using too long of a stance makes it more challenging to maintain your balance.
How To Fix
The ideal stance is generally a stance that allows both knees to be at a 90-degree angle when you’re in the bottom position of your split squat. Experiment with your stance to see what works best, and consider videoing some of your training sets from the side for additional feedback.
Mistake #2: Keeping Your Feet In Line
Keeping your feet in line is another significant mistake that can make it feel like trying to balance yourself on a tightrope. This makes it much harder to maintain your position during the exercise and could force you to re-adjust multiple times during a set.
How To Fix
Start with a comfortable stance and extend your front foot forward and out. That way, your feet end up in a diagonal and much stabler position.
Mistake #3: Not Descending Enough
In their obsession to use as much weight as possible, trainees often sacrifice the range of motion in favor of loading.
The problem is that not descending enough reduces the overall effectiveness of the exercise, allowing trainees to skip the most challenging part of each repetition.
How To Fix
Pick a lighter kettlebell and focus on your range of motion. Descend until your front thigh is roughly parallel to the floor, pause briefly, and push through your front foot to extend the knee.
Mistake #4: Lifting Your Front Heel off the Floor
Heels coming up from the ground is another common training mistake, especially if your feet are set too close together. Letting your heel lift places more stress on the knee joint, causes instability, and limits the amount of force you can exert to return to a standing position.
How To Fix
Plant your front foot flat on the ground and always push through the heel when moving up from the bottom. Doing so will reduce the risk of lifting your heels off the floor.
Mistake #5: Not Engaging Your Abs
Forgetting to engage the midsection is a common error in many resistance exercises, not just the split squat. Doing so hinders performance and can put trainees at risk of injury, making it more difficult to maintain stability.
How To Fix
Squeeze your abs at the start of the set and maintain the position until you’re done.
Mistake #6: Not Breathing Correctly
Holding your breath or breathing irregularly can affect your performance and force you to stop the set before you’ve trained your legs enough.
How To Fix
Make sure to breathe on every repetition. Inhale before descending and exhale as you straighten your knee.
Frequently Asked Questions
What muscles do kettlebell split squats work?
Kettlebell split squats primarily target the quadriceps, glutes, and hamstrings. They also engage the core for stability and help strengthen the lower body while improving balance and coordination.
Are kettlebell split squats good for beginners?
Yes, kettlebell split squats are great for beginners! They are simple to learn, require minimal equipment, and can be easily adjusted for different fitness levels by starting with lighter weights and perfecting form before increasing resistance.
Best Kettlebells For Split Squats
The Gymreapers kettlebells are a fantastic option for split squats and other resistance exercises.
These kettlebells are durable, affordable, and look great. One of my favorite features is their smooth finish, which reduces hand friction during training, keeping calluses at bay.
Another benefit is that trainees can pick from 4 to 40 kilograms (9 to 88 lbs), which means lifters of all levels can choose a weight that suits their abilities and needs.
]]>
https://www.gymreapers.com/blogs/news/kettlebell-hang-clean2023-08-11T12:29:49-06:002024-05-01T16:20:17-06:00Kettlebell Hang Clean: How-To, Muscles, Benefits, MistakesRoc PilonAs a personal trainer, I often program dynamic movements like the kettlebell hang clean to help lifters develop more strength and power.
Kettlebell hang cleans are a dynamic unilateral (training one side of the body) exercise that trains multiple muscle groups, boosts core stability, builds power and explosiveness, improves muscle coordination, and develops grip strength.
That said, mastering the hang clean is easier said than done, as multiple mistakes could affect the movement’s overall effectiveness and safety.
Key Takeaways
The hang clean is primarily a lower body exercise, where the objective is to leverage hip extension to generate force and swing the kettlebell to the top position.
One of the most common mistakes with the kettlebell hang clean is trying to lift with the upper body rather than generating force through the lower body.
My favorite kettlebells to use for hang cleans are the Gymreapers Kettlebells because they have a smooth finish that allows for a better transition into the catch phase.
Kettlebell Hang Clean: Anatomy Overview
The kettlebell hang clean trains the following muscles:
Glutes
The glutes are a group of three muscles (maximus, minimus, and medius) that make up the buttocks and play a role in numerous hip-related movements.
The gluteus maximus is the primary muscle involved in the hang clean, as its main function is to drive the hips forward, allowing trainees to stand upright and receive the kettlebell at the top position.
Hamstrings
The hamstrings make up the rear portion of the thighs. Their functions are knee flexion (bending) and hip extension.
During a kettlebell hang clean, the hamstrings assist the glutes in driving the hips forward.
Quadriceps
The quadriceps comprise the front portion of the thighs, and their primary function is knee extension (straightening of the legs).
These muscles play an important role in kettlebell hang cleans by straightening the legs and allowing the trainee to transition from a bent-over to a standing position.
Erector Spinae
The erector spinae is a group of long muscles that run along both sides of the spine. Their primary role is to extend the back and keep the spine in a healthy position.
These muscles play a crucial isometric role (contract without changing position) during the kettlebell hang clean as they engage to maintain a neutral back position.
Latissimus Dorsi
The latissimus dorsi, also known as ‘lats,’ are the largest muscles in the upper body. They cover a significant percentage of the upper and middle back and are involved in some arm and torso motions.
In the context of kettlebell hang cleans, the lats produce some of the force needed to thrust the kettlebell to the top position.
Trapezius
The trapezius is a large muscle that makes up a significant portion of the upper back. It plays crucial roles in shoulder stability and scapular elevation, which are important during the kettlebell hang clean.
Midsection
The abs, obliques, and transverse abdominis promote torso stability and a healthy spinal position. These and other muscles flex isometrically to keep you in a strong position and prevent spinal flexion or hyperextension at any point.
Biceps
The biceps make up the front portion of the upper arms and are primarily responsible for elbow flexion (bending of the arms). These muscles produce some of the force necessary to thrust the kettlebell to the top position.
Deltoids
The deltoids (shoulders) are involved in a wide range of arm motions and play a crucial role in joint stability. These muscles control the kettlebell during the upward swing and promote shoulder and arm stability during the catch phase.
Benefits Of Hang Cleans With A Kettlebell
The benefits of kettlebell hang cleans include:
Power and Explosiveness
The hang clean is a dynamic compound lift that requires fast and controlled execution to accelerate the kettlebell to the top position. As such, it recruits more fast-twitch muscle fibers and improves your ability to generate force quickly, promoting power and explosiveness.
Balance and Stability
The kettlebell hang clean can promote balance and stability in a few ways. First, the movement recruits and strengthens the core, which must engage to promote torso stability.
Second, given the movement’s complex movement pattern, it can improve proprioception (your ability to sense your body, its position, and how it moves). This can also help you control your body more effectively.
Third, the hang clean is a unilateral exercise. It requires you to hold a single kettlebell in one hand, which means the stability requirements are greater, forcing you to work harder to maintain your balance.
Muscle Growth
As discussed above, the kettlebell hang clean recruits multiple major muscle groups, which could lead to more efficient training and hypertrophy.
Core Strength
The core musculature (abs, obliques, erector spinae, glutes, etc.) engages to promote stability and generate some of the force necessary to thrust the kettlebell to the top. As such, the kettlebell hang clean is an effective core-strengthening movement.
Muscle Coordination
Given its complex movement pattern, the hang clean takes time to master, but the advantage is that the movement promotes muscle coordination.
Trainees must move various parts of their body in a coordinated way and learn to blend slower and quicker movements to execute each rep.
Overloading Potential
While it’s best to use a light kettlebell when learning the hang clean, the potential for overload is quite good. Trainees can gradually work up to heavier kettlebells as they build strength and power, and improve their skills with the movement.
Grip Strength
Kettlebells have thick handles, which are more difficult to grip. As such, trainees must exert more force to hold onto the weight, directly translating to a firmer grip and more muscular forearms.
How To Do A Kettlebell Hang Clean
Follow these steps to perform the kettlebell hang clean properly:
Stand with your feet shoulder-width apart, your toes pointing slightly out, and a kettlebell on the floor before you.
Lean forward and grab the kettlebell with your right hand.
Stand up and have the kettlebell in front of your body with your palm facing you and your arm extended.
Retract your shoulder blades, take a deep breath, and engage your abs.
Initiate the swing by bending your knees slightly and pushing your buttocks back to lower the kettlebell between your legs. The movement should be small and quick.
Immediately reverse the direction, drive your hips forward, and extend your hips as you pull the kettlebell up and shrug your shoulders. Keep your elbow close to your body and allow your forearm to rotate around the weight.
As the kettlebell reaches shoulder level, quickly rotate your wrist so the weight ends up on the outside of your arm and lands in the crook of your arm. Exhale just as you catch the weight. Your palm should be facing forward.
Swing the kettlebell back to the bottom position. Keep your elbow close to your body and control the descent instead of letting the weight drop to hip level.
Once finished training one side, set the kettlebell on the floor, grab it with the opposite hand, and repeat for the same number of reps.
7 Common Mistakes With Kettlebell Hang Cleans
To maximize the benefits of the kettlebell hang clean and reduce your risk of injury, avoid the following mistakes.
Mistake #1: Lifting Mostly With the Arms
The kettlebell hang clean is primarily a lower body exercise, and the arms serve to guide the weight and control it during the catch phase.
Lifting mainly with the arms is a common mistake that limits trainees’ performance and generally happens because of a lack of power from the lower body when initiating the movement.
“The kb clean, just like all the other deadlift movements, comes from the hips. It is that explosive little HIP SNAP that sends the kettlebell up and on its way to the chest. It is not an arm exercise. You could have arms like pencils and still clean a heavy kettlebell.”
-Greg Brookes, personal trainer, and fitness writer
How To Fix
Focus on the dip and hip drive at the start of each repetition to generate enough momentum to thrust the kettlebell to the top position. Use your arms to guide the weight and get it to the correct top position.
Mistake #2: Forgetting About the Core
The kettlebell hang clean is a technical lift with many moving parts, so trainees are often worried about getting the kettlebell to the catch position, neglecting other aspects of the lift.
The problem with being so focused on elevating the kettlebell is that it makes you ignore other essential parts of the lift, such as maintaining a tight midsection for explosive and controlled execution.
How To Fix
Take a deep belly breath and engage your abs at the start of each set. Maintain that rigid position until you set the weight on the floor to stay safe and reduce the injury risk.
If you can’t maintain tension in your midsection because you’re too focused on the path of the kettlebell, then choose a lighter weight until you get more comfortable with the movement.
Mistake #3: Swinging the Kettlebell too Far Forward
Swinging the weight too far in front of your body makes it more challenging to maintain balance because the kettlebell will pull you forward.
As a result, you might not be able to lift as much weight safely and the kettlebell is more likely to crash on your wrist and forearm in the catch position.
How To Fix
The path of the kettlebell to the top position should be more vertical than horizontal. You should only pull the weight forward to clear enough room to avoid hitting yourself; anything beyond that would make the movement less efficient.
Drive through your hips at the start of the repetition, and keep your elbow close to your body. Doing so will make lifting the kettlebell in a relatively straight line easier and allow for a smoother catch.
Mistake #4: Skipping the ‘Dip’
The dip is essential to the kettlebell hang clean because it allows you to produce the necessary hip drive to generate momentum. Skipping that portion of the lift forces you to use your upper body muscles to hoist the weight, turning the exercise into a modified front raise.
How To Fix
Initiate each rep by bending your knees several degrees and pushing your buttocks back while keeping your chest out. This allows you to engage your posterior chain and gives you room to extend your hips to generate the necessary force to complete each rep.
Mistake #5: Incorrect Catch
Not catching the kettlebell correctly can be quite unpleasant because it can place more stress on your elbows and shoulders, as well as bruise your forearms.
How To Fix
The kettlebell should land softly in the front rack position and rest against the crook of your arm––right in the middle of the forearm and bicep.
To ensure a ‘soft landing,’ keep your bicep and shoulder engaged to guide the kettlebell as it moves to the top position and quickly rotate your wrist to guide the kettlebell into the receiving position rather than letting the kettlebell go up and over to the rack position.
Mistake #6: Rounding the Lower Back
Lower back rounding is less common during kettlebell hang cleans than other hip hinge activities because the degree of hip flexion is smaller. That said, there is still a risk for people unfamiliar with the hip hinge.
Instead of pushing the buttocks back to load the hamstrings, some trainees might simply round their lower back to swing the kettlebell between the legs.
How To Fix
Keep your chest out, bend your knees, and push your buttocks back at the start of each repetition. Be mindful of your lower back position, and make sure you feel the tension in your hamstrings and glutes.
Mistake #7: Forgetting to Breathe
The kettlebell hang clean is difficult to master because it combines several movement patterns and cues. As such, trainees can often feel overwhelmed and forget to breathe, which inevitably limits their performance.
How To Fix
Take a deep breath and squeeze your abs before initiating each repetition and exhale forcefully as you receive the kettlebell at the top position.
Best Kettlebells For Hang Cleans
One notable advantage is that these kettlebells have a smooth finish, which means less friction during training. This allows you to rotate your wrist at the right time to get the kettlebell in the correct position while keeping calluses at bay.
Another benefit of these kettlebells is that you can pick from many weights, ranging from 4 to 40 kilograms (9 to 88 lbs). That means you can select the weight that fits your current abilities across many exercises.
]]>
https://www.gymreapers.com/blogs/news/kettlebell-single-arm-swing2023-08-11T12:26:19-06:002024-05-01T16:18:20-06:00Kettlebell Single Arm Swing: How-To, Muscles, Benefits, MistakesRoc PilonIf you’re looking for more exercises to do with your kettlebell then a single-arm swing is a great option. As an experienced personal trainer, I’ve taught the single-arm kettlebell swing countless times, so I can teach you how to do it the right way.
The one-arm kettlebell swing should be a staple in your routine because it develops many major muscle groups at once, builds full-body strength, power, and stability, burns calories, improves endurance, reduces the risk of muscle imbalances, and promotes better posture.
The benefits of the single arm kettlebell swing can only be unlocked if you’re performing the movement correctly and avoiding the 7 most common mistakes. To help set you up for success, I’ll teach you exactly how to perform the movement and how to fix these mistakes.
Key Takeaways
Some primary muscle groups involved in kettlebell swings include the glutes, hamstrings, quadriceps, midsection, erector spinae, lats, and shoulders.
Two of the most common mistakes with the movement are using your arms to lift the weight and rounding your lower back. Fortunately, both are easy to fix.
Kettlebell Single Arm Swing: Anatomy Overview
Single-arm kettlebell swings are fantastic for building whole-body strength, power, and stability by targeting multiple major muscle groups. Let’s take a look:
Gluteus Maximus
The gluteus maximus is the largest and most powerful muscle in the body. Its primary role during kettlebell swings is to produce hip extension (driving the hips forward and allowing trainees to stand tall at the top of each repetition).
The quads make up the front part of the thighs, and their primary function is knee extension (straightening of the legs). One of the four quad heads, the rectus femoris, also crosses the hip joint and contributes to hip flexion as the kettlebell travels back and between the legs.
Erector Spinae
The erector spinae are long muscles that run along both sides of the spine. Their primary function is to straighten the back and keep it in a strong position, especially during dynamic compound lifts like kettlebell swings.
Latissimus Dorsi
The latissimus dorsi (or ‘lats’) are the largest muscles in the upper body, making up a significant portion of the mid and upper back.
Their primary functions are to promote shoulder stability, help control the kettlebell as it swings back, and produce force to thrust the kettlebell forward.
Trapezius
The trapezius is a large upper back muscle that stabilizes the shoulder girdle and is necessary for scapular elevation (i.e., shrugging your shoulders).
In the context of single-arm swings, the traps primarily support the shoulders, ensuring a strong and stable position.
Shoulders
The shoulders, also known as the deltoids, work with the lats to control the kettlebell as it swings backward and produces force to lift it in front of the body at the top of each repetition.
Rotator Cuff
The rotator cuff consists of four small muscles (supraspinatus, infraspinatus, teres minor, and subscapularis) that are essential for shoulder stability and health. Along with the deltoids, these muscles control the movement at the shoulder joint, reducing the risk of injuries.
Midsection
The midsection includes the rectus and transversus abdominis, obliques, and other muscles that promote torso rigidity and keep the spine in a healthy position.
7 Benefits Of Single-Arm Kettlebell Swings
The benefits of single-arm kettlebell swings include:
1. Trains Multiple Muscles At Once
The single-arm kettlebell swing helps you maximize your time in the gym by targeting multiple muscle groups (discussed above) at once. This makes it ideal for those who are training less frequently or have a limited amount of time to spend at the gym.
The single-arm kettlebell swing effectively trains most of the upper and lower body, promoting a solid training stimulus for whole-body strength and hypertrophy.
2. Builds Endurance & Promotes Fat Loss
High-rep training works well for kettlebell swings, which allows trainees to build endurance, improve their aerobic capacity, and burn extra calories.
As such, the movement is fantastic for everyone looking to develop functional fitness and lose excess body fat.
3. Improves Core Stability
The rectus and transversus abdominis, obliques, glutes, erector spinae, and other major muscles engage during kettlebell swings to promote torso stability and to keep the spine in a healthy position.
As a result, core stability improves, translating to better overall training performance, reduced risk of injury, and more athleticism.
Plus, doing the exercise with one arm at a time is a great way to build anti-rotational strength, which means you can more effectively resist external forces trying to pull you in a specific direction.
4. Strengthens the Shoulders
We can move our arms freely in almost all directions thanks to the exceptional mobility of the shoulder joint. Sadly, that freedom of movement also means the shoulders are less stable and more prone to damage, especially during sudden movements.
“Swinging the kettlebell with one arm rather than two puts extra demands on the shoulder and also attempts to pull the body into rotation. Your shoulder stabilizing muscles will have to work much harder in order to keep your shoulder in good position and prevent the arm from being pulled from its socket. ”
Controlled kettlebell swings strengthen the deltoids and rotator cuff muscles, resulting in more stable and resilient shoulders.
5. Develops Power and Explosiveness
The kettlebell swing is a dynamic exercise that requires a rapid change of direction, which helps you develop power and explosiveness, especially in the posterior chain. These athletic characteristics are valuable and can enhance your performance in and out of the gym.
6. Addresses Muscle Imbalances
Performing the exercise with one arm at a time allows trainees to work both sides of the body more effectively, reducing the risk of side-to-side muscle imbalances.
7. Improves Posture
Strengthening the posterior chain and midsection musculature by performing single-arm kettlebell swings promotes better posture and spinal alignment, which could reduce the risk of nagging back or neck pain down the road.
How To Do Kettlebell Single Arm Swings
Follow these steps to perform single-arm swings properly:
Stand with your feet roughly hip-width apart and toes pointing slightly out.
Position a kettlebell in front of you.
Squat down to grip the kettlebell’s handle with one hand. Keep your chest out, your back in a neutral position, and your arm straight.
With your body in a tight position, inhale, and engage your abs.
Initiate the swing by pulling the kettlebell back between your legs.
Immediately drive your hips forward to stand up and allow that momentum to propel the kettlebell out in front of you.
Keep your arm straight and allow the kettlebell to reach chest height, but not higher. Exhale as the weight reaches the top of the rep.
Control the kettlebell’s free fall in the opposite direction, guiding it between your legs as you bend your knees and hips. Maintain a neutral back throughout the motion.
Inhale immediately and rapidly change the weight’s direction, moving it forward as you extend your hips.
Once finished training one side, grab the weight with your other hand and repeat.
7 Common Mistakes With Kettlebell Single Arm Swings & How To Fix Them
To ensure you’re getting the most out of your swings and staying injury-free, it’s important to be aware of these common mistakes and how to fix them.
1. Using Your Arms to Swing the Kettlebell
One of the most common mistakes with the kettlebell swing is trying to lift the kettlebell up by bending and extending the arms.
Doing so can lead to excessive joint stress, kill your momentum, and limit how much weight you can use. The secret to a proper kettlebell swing comes from generating momentum at the hips rather than lifting with the arms.
How to Fix
Generate the force for the swing by forcefully extending your hips immediately after the kettlebell moves between your legs. Focus on elevating the kettlebell using momentum from your hips and using your arms simply to follow through.
2. Bending Your Knees Too Much
Some degree of knee flexion and extension is normal and to be expected during a kettlebell swing, but this is still primarily a hip hinge activity rather than a squat. The majority of the movement should occur at the hips, and you should feel the tension in your posterior chain.
Feeling too much tension in your quadriceps likely means you’re bending your knees more than necessary.
How to Fix
Video yourself performing the movement from a side view and watch to see how much you’re bending your knees. If the movement resembles a squat more than a hinge at the hips, then work on shifting your hips backward and keeping your knees more stable during the swing.
3. Raising the Kettlebell Too High
The kettlebell swing is a hip hinge movement that primarily targets the posterior chain. Lifting the weight above chest level is unnecessary because you achieve full hip extension and peak posterior chain activation when the kettlebell is at chest height.
Raising the weight higher doesn’t offer any additional benefits but it can affect your technique and make it more difficult to control the kettlebell on the way back.
How to Fix
Keep each repetition controlled and avoid using your arms to raise the weight above chest level. If you’re generating so much momentum on the swing upward that you’re naturally going above chest level, then choose a heavier kettlebell.
4. Arching Your Lower Back at the Top
Trainees often allow their lower back to arch at the top of the swing through hyperextension (driving the hips too far forward). Hyperextension places unnecessary stress on the spine and can result in nagging aches or serious injury.
How to Fix
Keep your repetitions controlled by engaging your abs as you lock out your hips, this will help keep you in a stacked position at the top of each swing rather than hyperextended.
5. Not Keeping Your Working Arm Straight
No elbow flexion or extension should occur in the working arm at any point during a kettlebell swing. If your elbow is bending during the swing, this would indicate that you’re not engaging your posterior chain effectively and are instead trying to lift the weight with your arms and shoulders.
How to Fix
Flex your tricep to keep your arm almost entirely straight, and engage your posterior chain to drive your hips forward and create momentum.
6. Allowing Your Lower Back to Round at the Bottom
Lower back rounding is common during hip hinge exercises, including more dynamic ones like the kettlebell swing. Lower back rounding means that your spine is flexing, which can lead to nagging aches or more serious injuries.
How to Fix
Engage your abs and erectors at the start of each set and maintain that tightness until the last rep. Also, learn to hinge at the hips and load your hamstrings effectively.
If you lack body awareness and have not yet mastered the hip hinge, then take a step back from kettlebell swings until you have.
7. Not Breathing Correctly
Breathing can be difficult during more dynamic exercises because repetitions often blend together. As a result, trainees often aren’t sure when to inhale and exhale.
Unfortunately, irregular breathing can affect performance, especially on high-rep sets, and impact trainees’ ability to maintain core tightness.
How to Fix
Start with slower, less explosive repetitions to sync your breathing with each repetition. Inhale as the kettlebell swings back, and forcefully exhale as you drive your hips forward and the weight reaches the top of each rep.
Once you've mastered the breathing technique, you can push yourself harder in your single arms swings.
Kettlebells For Single Arm Swings
You can pick from multiple weight options of kettlebells, ranging from 4 to 40 kilograms (9 to 88 lbs), which means there is a kettlebell for you, no matter how experienced (or inexperienced) you are.
Kettlebells can also be used for far more than swings. They are ideal for other dynamic exercises like snatches and more traditional gym activities like overhead presses and goblet squats.
To top it all off, kettlebells look great and come with kilogram and pound imprints, allowing you to easily see how much weight you’ve picked up and track your progress over time.
]]>
https://www.gymreapers.com/blogs/news/best-kettlebell-back-exercises2023-08-11T12:23:44-06:002024-07-18T16:13:50-06:0010 Best Kettlebell Back Exercises + Sample WorkoutsRoc Pilon
As a strength coach, I’m a big fan of programming kettlebell back exercises to help my athletes develop bigger and stronger back muscles.
In this article, I will guide you through each of these kettlebell back exercises and provide you with a sample 4-week workout that you start implementing today. Here are the 10 best kettlebell back exercises:
Kettlebell single-arm row
Kettlebell chest supported row
Kettlebell deadlifts
Kettlebell single-leg RDL
Kettlebell pullover
Kettlebell farmers carry
Kettlebell alternating renegade row
Kettlebell swing
Kettlebell clean
Kettlebell back extensions
Key Takeaways
Kettlebells can be used for a variety of back exercises where the back is working to stabilize the upper body or as a prime mover in a rowing motion.
Training your back with kettlebells can improve your power output and strength level, and encourage hypertrophy (muscle growth).
Anatomy of the Back Muscles
The muscles used during back exercises are:
1) Latissimus dorsi (lats). The lats are responsible for internal rotation, adduction of the shoulder (bringing the arms back to center), and extension of the shoulder (bringing the arms back behind the body).
2) Erectors (Erector Spinae and Spinalis). The erector spinae is responsible for extension and side-to-side bending of the back.
3) Multifidus. The multifidus is responsible for extension and side-to-side bending of the back.
4) Rhomboids (rhomboids major and minor). The rhomboids are responsible for retraction of the shoulder blades (squeezing them together) and holding them in place.
5) Trapezius (traps). The trapezius is responsible for elevation, depression, and retraction of the shoulder blades.
6) Teres major (a small muscle near the shoulder blade). The actions of the teres major are internal rotation, extension, and adduction of the shoulder joint.
7) Biceps brachii. The biceps brachii performs elbow flexion and supination (rotation of the forearms).
Depending on the type of row, pull, or exercise there will be a different type of back muscle contraction. Vertical rows will involve the lats, biceps, and teres major, horizontal rows will increase back thickness and involve the traps, rhomboids, and lats, and diagonal rowing motions will target the teres major and lats. Other back exercises recruit the stabilizer muscles of the back including the erectors, spinalis, multifidus, and lats.
Benefits of Training the Back With Kettlebells
The benefits of training the back muscles with kettlebells include:
Variety Of Exercises To Target Back Musculature.
There are numerous exercise variations that you can perform with kettlebells to strengthen your back muscles. Exercises like deadlifts, cleans, and farmer’s carry can strengthen the back stabilizers, whereas exercises like renegade rows, chest-supported rows, and kettlebell single-arm rows can strengthen rowing of the back.
Ideal For Strength, Hypertrophy, And Power Development.
The ergonomic design of the kettlebell allows you to focus on strength, hypertrophy (muscle growth), and power when designing your workouts.When using a dumbbell, it is difficult to perform exercises like the clean or the kettlebell swing to promote power and athleticism. Kettlebells are ideal for explosive movements for power development, as well as heavier movements that will strengthen and grow your back muscles.
Safer To Perform And Encourage Injury Prevention.
The kettlebell design makes it more accessible and easier to use, especially for those with movement restrictions. Performing back exercises can also strengthen the structures of the back and improve posture, making you more resilient and resistant to injury.
10 Best Kettlebell Back Exercises
The top 10 kettlebell back exercises are:
1. Kettlebell Single Arm Row
As a bodybuilder and powerlifter, single-arm kettlebell rows have always been a staple exercise in my workouts to strengthen my back and reduce muscle imbalances.
How to do Kettlebell Single Arm Row
Position yourself off to one side of a bench and hold a kettlebell on the side furthest from the bench.
Plant the knee and hand closest to the bench on the bench for stability. Your torso should be parallel with the floor and the arm holding the kettlebell should be straight.
Initiate the movement by driving your elbow back until it is at a 90-degree angle and in line with your torso.
Return the rowing arm to the fully extended position to complete the repetition.
Pro Tip
To increase the range of motion of the movement and intensity of the contraction you can let the shoulder roll forward as you straighten your arm between reps and really emphasize driving the shoulder blade back as you row the weight toward you.
2. Kettlebell Chest-Supported Row
Kettlebell chest-supported rows are a great horizontal row option for upper back isolation because having your chest supported minimizes the involvement of secondary muscle groups that could otherwise help you “cheat” the movement.
How to do Kettlebell Chest-Supported Row
Lay face down on a 45-degree incline bench with your chest firmly planted on the bench and your head hanging off the end.
Holding onto two kettlebells, row towards your lower chest/abdomen bringing your elbows in line with your torso.
Focus on squeezing the armpits and shoulder blades together at the top to get a maximal contraction.
Extend the elbows and return the kettlebells to the starting position.
Pro Tip
At the top of each repetition, control and slowly lower the weight back down to increase time under tension and encourage better muscle growth.
You can also use this as a burnout exercise by doing alternating single arm reps and then once you’ve achieved 8 reps on each side, do two arm reps until complete exhaustion.
For example: x 8 each side @60% then AMRAP with both arms.
3. Kettlebell Deadlifts
Kettlebell deadlifts are going to give you the most bang for your buck by targeting the entire back, as well as the glutes and hamstrings.
Kettlebell deadlifts are the strongest movement for targeting your back muscles, so use them as an opportunity to train your back with heavier loads.
How to do Kettlebell Deadlifts
Stand over the kettlebell with your feet hip-width apart.
Let the arms hang as long as possible while sitting the hips back to load the glutes and hamstrings.
Build as much tension as possible in your upper back by focusing on squeezing the armpits shut.
Grab the corners of the kettlebell with both hands and engage your core to keep your spine neutral.
Push with your legs to initiate the movement off the floor and then use your glutes and hamstrings to bring your hips back underneath you to stand tall.
In a controlled fashion, push the hips back and let the kettlebell come back to the floor.
Pro Tip
Focus on keeping the kettlebell close to your body throughout the movement by engaging your back muscles; this will also reduce the strain on the lower back and your risk of injury.
4. Kettlebell Single-Leg RDLs
Kettlebell single-leg RDLs are great for developing single-leg strength while improving the total stability and strength of the upper back muscles.
How to do Kettlebell Single-Leg RDLs
Hold a kettlebell in one hand and shift your weight onto the opposite leg.
Keeping the arm with the kettlebell straight, initiate the movement by pushing the hips back and letting the un-loaded leg kick back behind you for balance.
As you sit back into your hips, allow your chest to approach the floor and lower the kettlebell to the middle of your shin.
Extend at the hips and return to a standing position to complete the rep.
Pro Tip
Keep your back engaged to maintain a neutral spine throughout the movement, prevent your shoulders from rounding forwards, and keep the kettlebell traveling along your leg (rather than further away from your body).
5. Kettlebell Pullover
Kettlebell pullovers are a diagonal rowing motion that targets the teres major and lats in a unique way, making them one of my favorite exercises to keep in my programming.
How to do Kettlebell Pullover
Firmly place your upper back on the side of a bench so that your body is perpendicular to the bench.
Bridge up off the bench until the hips and torso are completely parallel to the ground.
Have your feet firmly planted on the ground with the knees bent at 90 degrees.
Hold the kettlebell with both hands, keep your arms straight, and position the kettlebell over the upper abdomen/lower chest to start.
At a controlled pace, lower the kettlebell behind your head until the arms are straight above your head.
Using your lats, pull the kettlebell back to the starting position over the upper abdomen/lower chest to complete the repetition.
Pro Tip
The kettlebell pullover is an extremely light, low-stress movement, so it is best trained with higher repetitions.
Here is an example of how you could program high-repetition kettlebell pullovers: 3 sets of 20-30 repetitions @50%.
6. Kettlebell Farmer’s Carry
The kettlebell farmer’s carry is great for developing grip strength while improving the stabilizer muscles in the back that are responsible for posture.
How to do Kettlebell Farmer’s Carry
Hold a kettlebell in each hand.
Maintain an upright posture with the shoulder blades retracted (squeezed together).
Walk forward while maintaining an upright posture and a level gaze.
Walk for the desired amount of distance.
Pro Tip
Keep the kettlebells from resting on your thighs as you walk to ensure your upper back is doing its job throughout the entire movement.
7. Kettlebell Alternating Renegade Row
The kettlebell alternating renegade row encourages total body stability and improves rowing strength because it requires you to maintain a plank-like position as you row the kettlebell toward you.
How to do Kettlebell Alternating Renegade Row
For this exercise, you will grab the handles of two kettlebells either shoulder width apart or a bit wider out.
From this position, you will lower yourself until you are almost touching the ground.
You will then push the ground away from you until your elbows are at complete extension.
At complete extension, you will row one of the kettlebells while driving the elbow back.
Then you will row the opposite arm.
Repeat the push up then the rowing motions for the desired amount of repetitions.
During this exercise, make sure that your hips don’t drop or shift excessively.
Pro Tip
If you feel limited by your ability to perform the push-up rather than the rowing portion of this movement, then remove the push-up and focus on the row itself.
8. Kettlebell Swing
Kettlebell swings are a compound movement that strengthens the muscles that stabilize the back and improves the explosiveness of the lower body muscles.
How to do Kettlebell Swing
Stand with your feet a bit further than shoulder-width apart.
Grab the corners of the kettlebell with each hand.
Hinge at your hips and push the kettlebell back between your legs.
Focus on loading the hips and the hamstrings.
Snap the hips forward and let the kettlebell explode forward in front of you.
Try not to use your shoulders to raise the kettlebell up, and avoid letting the kettlebell travel above shoulder level.
Pull the weight back between your legs forcefully to complete the repetition.
Repeat these steps for multiple repetitions.
Pro Tip
You can change the nature of this movement by standing over a band while tying the band to the head of the kettlebell. The implementation of a band will make this movement more elastic and explosive.
9. Kettlebell Clean
Kettlebell cleans are a great bang for your buck exercise by improving total body movement while strengthening the back, glutes, hamstrings, triceps, and core.
How to do Kettlebell Clean
Stand with your feet slightly wider than hip-width apart.
Hold a kettlebell between your legs with one hand.
Load your glutes and hamstrings while hinging back.
Snap your hips forward while letting the kettlebell glide up, as you aggressively jump and shrug the weight up.
Let the kettlebell roll back into your wrist.
Let the kettlebell fall back between your legs and then repeat the previous steps for the desired amount of repetitions.
Pro Tip
Focus on keeping the kettlebell close to you throughout the entire movement by activating your back muscles. If you allow the kettlebell to travel too far away from you, it will crash on your wrist when you receive it in the racked position.
10. Kettlebell Back Extensions
Kettlebell back extensions can increase back thickness and stability. These are one of my favorites to program since they are so easy to load up.
How to do Kettlebell Back Extensions
Securely fasten your feet to the leg lock of the back extension.
Hold a kettlebell in both your hands to make this exercise more difficult.
Start with your knees straight and your torso upright.
Lower your torso until completely bent. Your body should be making an “L” shape.
Pull yourself back by pulling your heels into the leg locks to return to the starting position.
Pro Tip
During kettlebell back extensions you are at an advantage from a leverage standpoint. For this reason, you can really load up this exercise with minimal risk.
Sample Back Workout Routine With Kettlebells
Here is a sample week-to-week kettlebell back workout that you can implement:
Week 1
Monday
Kettlebell deadlifts: 3 x 5 @75%
Kettlebell single-arm rows: 3 x 8 each side @60%
Kettlebell back extensions: 2 x Failure
Thursday
Kettlebell cleans: 4 x 10 @60%
Kettlebell pullovers: 4 x 12 @50%
Kettlebell chest supported rows: 4 x 15 @50%
Week 2
Monday
Kettlebell deadlifts: 4 x 5 @75% + 5-10 lbs
Kettlebell single-arm rows: 3 x 8 each side @60% + 5-10 lbs
Kettlebell back extensions: 3 x Failure @30-40% + 5-10 lbs
Kettlebells are ideal for my dynamic back exercises, since they are ergonomically built to do movements such as cleans, snatches, and swings and for strength and hypertrophy movements like different row variations.
]]>
https://www.gymreapers.com/blogs/news/kettlebell-deadlift2023-08-11T12:15:24-06:002024-05-01T16:19:30-06:00Kettlebell Deadlift: How-To, Muscles, Benefits, MistakesRoc PilonAs a personal trainer, I use the kettlebell deadlift on a daily basis to teach clients how to master deadlifting mechanics before progressing to barbell and trap bar deadlifts.
Kettlebell deadlifts are beneficial because they train multiple muscle groups, build full body strength, are more accessible and beginner-friendly, and allow for progression over time. They can also be performed unilaterally (gripping the weight with one hand) to prevent muscle imbalances.
To help you reap the benefits of the kettlebell deadlift, I’ll teach you exactly which muscles it works and how to do it properly. I’ll also explain some common mistakes that you should avoid to keep yourself injury-free.
Key Takeaways
Kettlebell deadlifts are great for building strength and muscle in your posterior chain (glutes, hamstrings, lats, traps) and for teaching you how to pick things up from the floor as safely as possible.
The kettlebell deadlift has good overloading potential because you can use progressively heavier weights, manipulate the tempo, do more reps, or upgrade to a more challenging variation.
Some common kettlebell deadlift mistakes include lifting with the back, not positioning the weight correctly, and squatting the weight up instead of performing a hip hinge.
Kettlebell Deadlift: Anatomy Overview
The kettlebell deadlift is an effective whole-body exercise. Here is a closer look at the muscles it trains and their functions:
Gluteus Maximus
The gluteus maximus is the largest and most powerful muscle group in the body. Their primary function is hip extension, which occurs when the hip joint opens up and the angle between the upper and lower body increases.
Your glutes play an essential role during kettlebell deadlifts as they contract to drive the hips forward, allowing you to move from a bent-over to a standing position.
Hamstrings
The hamstrings make up the back portion of the thighs, and their primary role is assisting the gluteus maximus with hip extension.
Strong hamstrings can also promote knee and hip stability, which is vital during activities like deadlifts, as well as more dynamic movements like the kettlebell swing.
Quadriceps
The quads make up the front portion of the thighs, and their primary function is knee extension (straightening of the legs). The quads initiate the movement off the floor and work to straighten your legs as you drive your hips forward. They also assist the hamstrings in promoting knee stability.
Erector Spinae
The erector spinae is a group of muscles that run along both sides of the spine. Their primary function is to extend the back and keep it in a healthy, neutral position during exercise.
These muscles are heavily involved during kettlebell deadlifts because they must work hard to resist spinal flexion (rounding).
Midsection (Core)
The rectus abdominis, transverse abdominis, obliques, and other midsection muscles must flex isometrically (contract without changing position) to support the torso during the kettlebell deadlift.
These muscles work as stabilizers, providing the stability needed to move the kettlebell safely through the entire range of motion.
Latissimus Dorsi
The latissimus dorsi, also known as the ‘lats,’ are the largest muscles in the upper body and make up a significant percentage of the mid and upper back.
These muscles contribute to a stable torso position, keeping the kettlebell close to the body during the pull. When the lats do their job properly, there is much less risk of spinal flexion and trainees can lift the weight more efficiently in a straight line.
Trapezius
The trapezius makes up the upper back, and one of its primary roles is stabilizing the scapulae (shoulder blades).
Your traps play an essential role during kettlebell deadlifts as the muscle promotes shoulder stability and reduces the risk of excessive upper back rounding during the pull.
Benefits Of Deadlifts With A Kettlebell
The benefits of performing deadlifts with a kettlebell include:
More Accessible and Convenient
Barbell and trap bar deadlifts might not always be an option for trainees because these require special equipment.
For example, folks working out at home must purchase a barbell (or trap bar), enough weight plates for proper loading, and barbell clips. They would also need enough space at home to store and use all that equipment.
In contrast, kettlebells are far more affordable and don’t take up as much space. Plus, even at the gym, these weights are typically plentiful and not in use, so nobody is going to ask, “How many sets have you got left?”
Good For Grip Strength
The traditional kettlebell handle is thicker than a barbell, making it more difficult to grip for extended periods. That extra challenge can translate to stronger hands, forearms, and grip, which is highly beneficial for various gym and everyday activities.
Great for Unilateral Training
Kettlebells are ideal for unilateral training, where the goal is to work one side of the body at a time. In addition to building core strength, unilateral training addresses side-to-side muscle imbalances.
Great Overloading Potential
While it’s impossible to deadlift 300, 400, or even 500+ lbs when using a kettlebell, that doesn’t mean you cannot overload your muscles and build strength for a long time.
One option is to use a progressively heavier kettlebell. For example, the Gymreapers kettlebells range from 4 to 40 kilograms (9 to 88 lbs), which means beginners can gradually increase the load for months if not years.
Another option is to grip the kettlebell with one hand at a time. Doing so would instantly make the exercise twice as challenging and train one side at a time. This is ideal when you’re limited by the amount of weight you have access to.
You can also experiment with tempo, rep ranges, and intensity techniques (e.g., drop sets) to provide a new stimulus and keep progressing over time.
Possibly Improved Proprioception
Proprioception refers to awareness of one’s body and how it moves through space. Any deadlift variation will positively affect proprioception because these exercises are complex and require a lot of focus to execute correctly.
Performing the deadlift with a kettlebell could be even more beneficial because the goal is to hold the weight with one hand. Unlike a barbell deadlift, where the weight is spread evenly between both sides of the body, holding a kettlebell with one hand allows trainees to focus on one side.
The lack of stability forces lifters to be more aware during each set and pay closer attention to the position of their knees, hips, spine, and shoulders.
How To Do A Kettlebell Deadlift
To perform a kettlebell deadlift properly, follow these steps:
Position a kettlebell between your feet.
Have your feet hip-width apart or slightly wider with your toes pointing forward and out.
Bend your knees and lean your torso forward to reach the kettlebell.
Grab the kettlebell handle with both hands, keeping your arms straight.
Puff your chest out to straighten your back.
Take a deep breath and engage your abs.
Push the floor away with your legs as you pull the kettlebell in a straight line.
Simultaneously extend your knees and hips to stand up.
Squeeze your glutes at the top to bring your hips underneath you without hyperextending your lower back.
Pause briefly and lower the kettlebell to the floor in the same straight line by pushing your buttocks back and slowly bending your knees.
Exhale as you reach the bottom and prepare for the next repetition.
5 Common Mistakes With Kettlebell Deadlifts & How To Fix Them
To maximize your kettlebell deadlifts and reduce your risk of injury, watch out for these common mistakes that lifters typically make.
Mistake #1: Rounding the Lower Back
Back rounding, also known as spinal flexion, is one of the most common deadlift mistakes. It typically happens as a result of improper positioning due to a lack of body awareness; however, it can also happen if you’re attempting to lift more weight than you can handle.
The problem with back rounding is that it can place significant stress on the spine and eventually result in an injury.
How To Fix
Prioritize proper form above all else. Ensure that your starting position is good and your back is in a healthy, neutral position. Ensure your is puffed out and your lats are engaged as this will help you achieve a neutral spine.
I highly recommend filming some of your sets from the side to see if your back rounds at any point.
Mistake #2: Lifting With Your Back
This might not seem like a mistake because deadlifts are a back exercise. However, that subtle error can affect your performance and increase the risk of back rounding as you get tired.
The problem results from the hips being too high and the torso being too horizontal in the bottom position. That setup forces trainees to engage their back more than their glutes and hamstrings, turning the kettlebell deadlift into a stiff-leg deadlift that puts more stress on the erectors than they may be able to handle.
How To Fix
Set yourself up correctly at the bottom by puffing your chest out and lowering your hips. You should also be able to feel your legs initiating the movement off the floor.
If you’re videoing your sets then watch it back and ensure your hips are below your shoulders in the start position.
Mistake #3: Having the Kettlebell too Far Forward
Deadlifts are about efficiency. A strong and safe deadlift follows one fundamental rule: lifting and lowering the weight in a straight line.
Having the kettlebell too far forward throws a wrench in that fundamental requirement, making the movement less efficient and increasing the risk of losing your balance or allowing your spine to flex under load.
How To Fix
Position the kettlebell between your feet at the start of the set. The kettlebell should roughly align with the middle of your feet when you look at it from the top. That way, the weight will remain within your center of gravity, allowing you to lift more and maintain your balance.
Additionally, focus on keeping your lats engaged to keep the kettlebell close to your body as you stand up and lower back down. The closer the kettlebell is to your body, the more weight you’ll be able to lift and the safer it will be.
Mistake #4: Hyperextending or Not Extending Enough
Hyperextension or a lack of full hip extension at the top position are common and somewhat similar mistakes, so we are discussing them together.
Hyperextension happens when you drive the hips too far forward and it causes the lower back to arch at the top position. It places more stress on your spine and increases the risk of injury.
In contrast, not extending your hips enough at the top of the movement would prevent you from engaging your posterior chain (i.e. glutes & hamstrings) as much as possible, making each repetition less effective and placing more stress on other supporting structures.
How To Fix
Extend your hips at the top of each repetition by squeezing your glutes and keeping the core engaged. Ensure your glutes are stacked underneath your shoulders. When viewed from the side, your body should be in a straight line.
Mistake #5: Squatting the Weight Up
In contrast to lifting with your back, squatting the weight up is a mistake that causes the quads to do more work than the posterior chain.
Trainees often squat the movement because they set up with their hips too low in the start position, which causes the quads to perform more of the movement rather than the glutes and hamstrings.
How To Fix
Get used to setting up so your hips are high enough that you feel the tension in your glutes and hamstrings but not so high that they are in line with your shoulders (mistake #2).
Your quads should initiate the movement from the floor, but you should feel your hamstrings and glutes working after that. If you don’t, then be sure to video your lift to see if your hips are set correctly in the start position.
Best Kettlebells For Deadlifts
For starters, you can pick from multiple weight options to suit your needs. Start with the 4-kilo kettlebell if you’re new to resistance exercise, and gradually work up to 40 kilograms as you get stronger.
Secondly, the handle is smooth, which allows for a comfortable grip, less friction, and fewer calluses. The handles of these kettlebells are also thicker than a traditional barbell, which can promote grip strength.
To top it off, these kettlebells look great and come with kilogram and pound imprints, allowing you to see how much weight you’ve picked up so you can track your progress over time.
]]>
https://www.gymreapers.com/blogs/news/kettlebell-russian-twist2023-08-11T12:07:23-06:002024-05-01T16:24:25-06:00Kettlebell Russian Twist: How-To, Muscles, Benefits, MistakesRoc PilonAre you interested in taking your core strength to the next level? If so, the kettlebell Russian twist is one of the best exercises to include in your training routine.
The kettlebell Russian twist is a core exercise that develops the obliques through torso rotation. It also engages the rectus abdominis, transverse abdominis, and hip flexors to maintain a semi-upright torso position. Performing this movement with a kettlebell allows for continued progression over time.
To help you get the most out of the kettlebell Russian twist, I'll walk you through the proper technique, and explain which common mistakes to avoid to reduce the risk of injury.
Key Takeaways
When done correctly, Russian twists promote core strength and resiliency and improve muscle coordination.
Common Russian twist mistakes include rounding the back too much, using the arms to move the weight, and not breathing correctly. Learn how to avoid these and other errors below.
Kettlebell Russian Twist: Anatomy Overview
The kettlebell Russian twist is an advanced core exercise that mainly works the obliques, but also recruits other muscles for positional strength and stability. Here is a breakdown of the muscles involved:
Rectus Abdominis
The rectus abdominis, also known as the six-pack abs, promotes stability and helps maintain the semi-upright torso position. This flat, superficial muscle spans from just below the ribcage to the pelvis, bringing the two closer as it contracts.
Internal and External Obliques
The internal and external obliques flank the rectus abdominis and are responsible for twisting the upper body from side to side. They also play a role in maintaining torso stability throughout the movement.
Transverse Abdominis
The transverse abdominis is a deep core muscle that loops over the abdomen like a lifting belt, providing support alongside the obliques and abs. Its primary function is to promote stability in the hips and lower back, allowing for more controlled twisting motions.
Hip Flexors
The hip flexors and iliopsoas, specifically, are also involved in Russian twists. These muscles are responsible for hip flexion (bringing the knees closer to the chest) and assist the abdominal muscles to help you maintain the proper position.
Erector Spinae
The erector spinae is a group of muscles that run along both sides of your spine. Their primary function is to extend (straighten) the back and maintain a stable spine position.
In Russian twists, the erector spinae muscles flex isometrically (contract without changing position) to support a healthy torso position, allowing you to move from side to side with more control.
Glutes
The glutes make up the buttocks and serve numerous roles related to pelvic stability, hip extension, internal/external hip rotation, and leg abduction.
These muscles stabilize the hips during Russian twists by flexing isometrically.
Biceps/Deltoids/Pecs/Upper Back
I’m bundling these upper body muscles together because they work similarly during a kettlebell Russian twist. Specifically, these muscles flex isometrically to promote upper body stability, allowing trainees to hold onto a kettlebell while twisting from side to side.
Benefits Of Russian Twists With A Kettlebell
The benefits of Russian twists with kettlebells include:
Promotes Core Strength
The main benefit of the kettlebell Russian twist is that it develops core strength.
As discussed above, the movement targets the rectus and transversus abdominis, the obliques, erector spinae, and glutes, all of which are part of the core and play an essential role in stability and injury prevention.
Develops the Obliques
Most popular ‘core’ exercises do a poor job of training the obliques because there is little to no lateral flexion of the torso (side bending) and twisting, which is their main function.
Common movements that neglect the obliques include sit-ups and crunches, knee and leg raises, and glute bridges.
In contrast, Russian twists include a torso rotation that forces the obliques to engage and contract forcefully on each rep.
Potential For Progression
The great thing about performing Russian twists with a kettlebell is that you can continually challenge your body as you gain core strength, which will lead to better results over time.
You can start with the bodyweight version if you’re new to core training, introduce a kettlebell at some point, and gradually increase the weight you lift.
For example, the Gymreapers kettlebells range from 4 to 40 kilograms (9 to 88 lbs), giving trainees room to increase the resistance for Russian twists and other activities.
Improves Coordination
While the Russian twist is not the most complex exercise, trainees must still focus on their lower body and torso position while twisting from side to side in a controlled way. Doing so can promote kinesthetic awareness and muscle coordination.
How To Do A Kettlebell Russian Twist
Follow these steps to perform the kettlebell Russian twist properly:
Place an exercise mat on the floor and sit down with your knees bent, your heels on the ground, and a kettlebell at your side.
Grab the kettlebell with both hands and lift it to your chest.
Squeeze your abs, lean your torso back, and lift your heels a couple of inches off the floor, forming a wide V-shape between your thighs and upper body.
Take a deep breath and bring the kettlebell to the left by twisting your torso. Exhale forcefully.
Rotate your torso in the opposite direction as you inhale, moving the weight to your right. Squeeze your obliques momentarily and exhale before switching direction again.
Alternate from left to right until you’re done. Keep the movements controlled, especially as you start to fatigue.
6 Common Mistakes With Kettlebell Russian Twists
To ensure you’re performing the movement correctly and reducing your risk of injury, it’s important to be aware of these common mistakes (and how to fix them).
Mistake #1: Rounding The Back Too Much
A degree of spinal flexion (rounding of the spine) is expected during Russian twists with a kettlebell. However, too much flexion can place unnecessary stress on the spine.
How To Fix
Engage your abs at the beginning of the movement to encourage a neutral spine (no arching or bending), particularly for the lower back, and aim to maintain this position as you twist.
Additionally, keep the upper back muscles engaged to keep your chest “proud” rather than allowing it to cave in as you get fatigued.
Mistake #2: Twisting Too Quickly
Doing quicker reps would allow you to get through each set faster and allow you to perform more reps before you fatigue, however, it will also reduce the effectiveness of the exercise and increase the risk of injury.
How To Fix
Maintain a consistent tempo on all reps, as during other exercises. Twist slowly to one side, pause briefly as you squeeze your obliques, and rotate in the opposite direction, breathing steadily as you do.
Ensure you’re getting a full range of motion with every twist so you’re maximizing the benefits of the exercise.
“The Russian Twist can also improve your flexibility, as long as you do it right. It’s important to do it mindfully, so you can feel the muscles being worked.”
-Julien Raby, co-owner of BoxLife and CrossFit coach
Mistake #3: Using The Arms To Move The Weight
Like many other kettlebell exercises, using the arms to move the weight means you’re missing the point. The goal is for the torso to do the work and for the arms to simply support the weight.
If your arms fatigue before your core while performing the movement, then you’re using them too much. Using the arms likely means you’re not engaging your core as well as you should be, making the exercise less effective.
How To Fix
Keep your arms fixed by gluing your elbows to your sides. The kettlebell should move from side to side only as a result of twisting your torso.
Mistake #4: Lifting Your Feet Too High
The primary objective during the activity is to twist the torso from side to side, not to raise the legs as high as possible. Lifting the feet even an inch from the floor is enough to add a layer of difficulty, making each repetition more beneficial.
That said, if elevating your legs is limiting you from performing the twisting motion, then you’re not making the most of this movement.
How To Fix
Raise your heels just an inch or two from the floor to keep your abs engaged. If that position feels too challenging, do Russian twists with your heels on the floor until you build up more core strength.
Mistake #5: Using Too Much Weight
This mistake is relatively straightforward and common, not just with Russian twists.
Using too much weight will affect movement mechanics and increase the risk of compensatory movement patterns that reduce the effectiveness of Russian twists and increase the injury risk.
How To Fix
Start with a 4-kilogram kettlebell and see how it feels. You should feel sufficiently challenged, but not to the point where you can’t smoothly twist your torso from side to side.
Mistake #6: Not Breathing Correctly
Holding your breath can cause you to fatigue more quickly and force you to stop the set before you’ve trained your core to the point where it is challenged.
How To Fix
Breathe on every repetition you do. Inhale as you initiate the twisting motion, and exhale as you complete the twist to one side and squeeze your obliques.
Best Kettlebells For Russian Twists
These kettlebells range from 4 to 40 kilograms (9 to 88 lbs), allowing beginners and advanced lifters alike to challenge themselves appropriately.
For instance, those new to Russian twists might use a 4-kilo kettlebell, whereas more advanced trainees could use a 10, 12, or even 14-kilo bell.
Another notable benefit of these kettlebells is their smooth finish, which means there is less friction that occurs between your hands and the kettlebell during exercise. As a result, calluses are less likely to occur, allowing for a more comfortable workout experience.
To top things off, you can use these kettlebells for far more than Russian twists. Whether you’re in the mood for a classic muscle-building session or a dynamic fat-burning workout, a couple of kettlebells are all you need.
]]>
https://www.gymreapers.com/blogs/news/kettlebell-figure-82023-08-11T12:04:15-06:002024-09-06T14:44:42-06:00Kettlebell Figure 8: How-To, Muscles, Benefits, MistakesRoc Pilon
The kettlebell figure 8 is an advanced exercise that challenges your coordination, strengthens multiple muscle groups, and enhances overall stability. When performed correctly, it’s a highly effective movement that targets your core, shoulders, glutes, and grip strength. However, improper form can lead to injury or reduced effectiveness, so understanding the nuances is essential.
In this article, we’ll walk through the correct technique, benefits, and common mistakes to help you get the most out of your kettlebell figure 8s.
Key Takeaways
What It Is:A full-body exercise that involves passing a kettlebell in a figure-8 motion between your legs.
What It Trains:Core, glutes, hamstrings, quadriceps, shoulders, back, and grip strength.
Avoid These Mistakes:Standing too upright, rounding the back, and relying on your arms to swing the kettlebell.
Muscles Worked in the Kettlebell Figure 8
The kettlebell figure 8 is a dynamic movement that recruits multiple muscle groups simultaneously:
1. Core
Your abs, obliques, and lower back play a critical role in stabilizing your torso. The twisting motion of the figure 8 activates your obliques, while the isometric contraction of your abs and back keeps your spine in a neutral position, protecting you from injury.
“Kettlebell figure 8s are a core blaster that’ll have your abs, obliques, and back extensors working overtime to stabilize the trunk, rotate the torso and bend in different directions repeatedly.”
The glutes, especially the gluteus maximus, are activated during the hip hinge and extension phases of the movement. They provide the necessary power for the upward swing of the kettlebell.
3. Hamstrings
Located on the back of your thighs, the hamstrings work alongside the glutes to extend your hips and stabilize your lower body as the kettlebell moves through the figure 8 motion.
4. Quadriceps
The quadriceps support knee extension and stability throughout the movement. They also assist in maintaining balance and positioning as you pass the kettlebell from hand to hand.
5. Shoulders
The shoulders, also known as deltoids, are another major muscle group with a crucial role in figure 8s. The shoulders guide the kettlebell and help control its momentum, playing a crucial role in stabilizing the upper body during the figure 8.
6. Back
Your latissimus dorsi and trapezius muscles help stabilize the torso and control the weight of the kettlebell, while the erector spinae keep your spine aligned.
7. Forearms
The thicker handle of the kettlebell challenges your grip strength as you continuously pass the weight from one hand to the other.
Benefits of the Kettlebell Figure 8
1. Core Stability
The dynamic twisting motion of the kettlebell figure 8 places significant demands on your core, improving overall stability and helping to prevent injury during other movements.
2. Grip Strength
The repeated hand transitions in this exercise make it excellent for developing forearm strength, which can translate to better performance in other lifts like deadlifts and pull-ups.
3. Lower Body Strength
Your glutes, hamstrings, and quads are all engaged during the figure 8, making it a great addition to your lower body training routine.
4. Shoulder Stability
The shoulders must work hard to guide the kettlebell from side to side, improving both strength and stability in these joints.
5. Muscle Coordination
Figure 8s require multiple muscle groups to work together, improving coordination and functional movement.
6. Proprioception
Performing complex movements like the kettlebell figure 8 enhances proprioception—the awareness of your body’s position in space—leading to better overall movement control.
How to Perform the Kettlebell Figure 8
Set Up: Stand with your feet slightly wider than hip-width apart. Hold a kettlebell in front of you with both hands.
Squat Position: Lower into a half-squat position with your back straight and chest up. Grip the kettlebell with your right hand.
Begin the Motion: Swing the kettlebell between your legs from the front, passing it behind your right leg. Transfer the kettlebell to your left hand.
Complete the Figure 8: Swing the kettlebell around your left leg and back through your legs, transferring it back to your right hand. This completes one figure 8.
Repeat: Continue alternating sides, keeping your back straight, and driving the movement from your hips, not your arms.
Pro Tip: Think of your arms as a pendulum, guiding the kettlebell but not doing the heavy lifting. The movement should come from the momentum generated by your hips.
5 Common Mistakes to Avoid
1. Rounding Your Back
Rounding your back during the exercise can strain your spine and increase injury risk.
Fix: Focus on maintaining a neutral spine throughout the movement by engaging your core and hinging at the hips.
2. Using Your Arms to Swing the Kettlebell
Relying on your arms reduces the effectiveness of the movement.
Fix: Keep your arms relaxed and let your hips generate the power for the kettlebell swing.
3. Standing Too Upright
An upright posture limits your range of motion and can lead to poor form.
Fix: Bend your knees and hinge at your hips to create space for the kettlebell to move freely between your legs.
4. Narrow Stance
A narrow stance restricts movement and can make it difficult to perform the figure 8 properly.
Fix: Stand with your feet slightly wider than hip-width apart for better balance and freedom of movement.
5. Poor Grip Control
Losing control of the kettlebell during transitions can increase the risk of injury.
Fix: Start with a lighter kettlebell and focus on firm, controlled hand transitions before moving up in weight.
Best Kettlebells For Figure 8s
For a movement like the kettlebell figure 8, you want a kettlebell with a smooth handle and a weight that allows for full control. Gymreapers kettlebells are ideal, offering a range of weights from 9 to 88 pounds with ergonomic handles that minimize friction.
Best Kettlebells For Figure 8s
The kettlebell figure 8 is a powerful exercise that targets multiple muscle groups, improves coordination, and enhances functional strength. With proper form, it’s a great addition to any strength or conditioning program. Remember to focus on technique, avoid common mistakes, and start with a manageable weight to perfect your movement.
Ready to add kettlebell figure 8s to your routine? Grab a kettlebell and get started!
]]>
https://www.gymreapers.com/blogs/news/best-hamstring-kettlebell-exercises2023-08-11T11:56:52-06:002024-05-01T16:13:32-06:0012 Best Hamstring Kettlebell Exercises + Sample WorkoutRoc Pilon
If you want to strengthen and grow your hamstrings using kettlebells, then it’s important to choose the right movements and know how to incorporate them into a program.
The 12 best hamstring exercises are:
Standing single leg kettlebell hamstring curls
Lying kettlebell hamstring curls
Kettlebell glute bridges
Kettlebell single leg glute bridge
Kettlebell swings
Kettlebell single leg RDL
Kettlebell deadlift
Kettlebell B-Stance deadlift
Kettlebell good morning
Kettlebell reverse lunges
Kettlebell goblet squats
Kettlebell back extensions
To help you make the most of your hamstring training with kettlebells, I’ll walk you through each of these exercises and provide you with a sample 4-week workout that you start implementing today.
Key Takeaways
There are a wide variety of kettlebell hamstring exercises to choose from to strengthen knee flexion, promote knee stability, and encourage hamstring growth.
Kettlebell hamstring movements are ideal for beginners, those rehabbing an injury, and advanced lifters.
The Gymreapers kettlebells were my go-to option due to their sturdy, compact design, that allows for dynamic hamstring exercises such as kettlebell swings, good mornings, and goblet squats. Gymreapers kettlebells are sold out.
Anatomy of the Hamstring Muscles
The hamstring muscles are located on the posterior thigh and consist of 3 main muscles:
Biceps femoris (long head & short head)
Semitendinosus
Semimembranosus
Together the hamstring muscles are primarily responsible for knee stabilization as well as the bending of the knee (knee flexion). The hamstrings also cross the hip joint, allowing them to assist in hip extension (straightening the hips from a bent position).
The hamstring muscles are important for daily functions like walking and bending over, but they’re most taxed in loaded exercises like the squat and deadlift.
Benefits of Training the Hamstrings with Kettlebells
The benefits of training your hamstrings with kettlebells include:
Kettlebells are highly mobile and allow you to train hamstrings anywhere. Often, we find ourselves with limited equipment whether it's at home, a gym, or a hotel. Kettlebells are very small and can fit in a gym bag. This allows you to take your own weight with you on the go to whichever setting you’re training at.
Kettlebells are extremely versatile for training hamstrings. Kettlebells are designed to be versatile, so you can use them for a variety of movements to target your hamstrings effectively (i.e. swings, hinges, squats).
Kettlebell hamstring training has a lower risk of injury than other variations. The ergonomic design of the kettlebell allows for more accessibility to all populations. This accessibility can help aid in better performance and technique, which further decreases the risk of injuring the hamstrings.
12 Best Hamstring Kettlebell Exercises
1. Standing Single Leg Kettlebell Hamstring Curls
Standing single leg hamstring curls put direct tension on your hamstrings, and oftentimes allow for a stronger hamstring contraction due to being in the standing position.
How To
Stand upright on an elevated box with one foot on the box and one foot fully extended off the box.
Have a kettlebell wrapped around the handle of the kettlebell and placed over the back of your ankle.
While holding on to the rack bend the knee and curl the weight up with your ankle.
Extend the flexed knee to complete the repetition.
Repeat steps 3 and 4 for the desired amount of repetitions, and then switch to the other leg.
Pro Tip
An important component of standing single leg kettlebell hamstring curls is posture. Using supporting structures such as the rack can help increase stability, which will subsequently allow you to hamstring curl more weight. Increase the duration of the lowering phase to increase the intensity of the contraction which will promote additional hamstring progress.
2. Lying Kettlebell Hamstring Curls
Kettlebell hamstring curls are the most effective kettlebell variation for hamstring isolation.
How To
Lay down on the edge of a bench or elevated surface with your lower thighs coming off the end.
Squeeze a kettlebell between your ankles with your legs fully extended.
Curl your feet back until your knees are completely bent.
Extend both your knees to complete the repetition.
Repeat steps 3 and 4 for the desired amount of repetitions.
Pro Tip
Use a slower tempo to get more out of each repetition; the more time your hamstrings spend under tension, the greater the potential for muscle growth.
3. Kettlebell Glute Bridges
Kettlebell glute bridges are a great option for targeting the hamstrings and the glutes. Kettlebell glute bridges can be great for warming up for a squat session, or a great finishing exercise to target the hamstrings.
How To
Lay on the floor with the kettlebell placed on top of your hip.
Feet should be flat on the floor with your knees bent 90 degrees.
While firmly holding the kettlebell over your hip, extend your hips towards the ceiling until they are completely extended.
Flex your hips to return to the starting position.
Pro Tip
Take advantage of the versatility of kettlebell glute bridges to make complete workouts that revolve around them. You can add tempos, pauses, technique variation, varying intensities, and reps to create a diverse and challenging workout.
Here is an example:
Heavy kettlebell glute bridges: 5 x 5 @75-85% (challenging weights)
High repetition finisher kettlebell glute bridges: 3 x as many reps as possible @50% (lightweight)
4. Kettlebell Single Leg Glute Bridge
Kettlebell single leg glute bridges are great for developing single leg strength, as well as diminishing hamstring muscular imbalances. The kettlebell single leg glute bridge is one of my favorite exercises for glute and hamstring activation before a squat or a deadlift workout.
How To
Lay on the floor with the kettlebell placed on top of your hip.
One foot should be flat on the floor bent 90 degrees, and the other should be completely extended off the floor.
While firmly holding the kettlebell over your hip, extend your hips towards the ceiling until they are completely extended.
Flex your hips to return to the starting position.
Switch legs and perform the previous steps on the other leg.
Pro Tip
The further you bring your heels out for this movement the more intense the hamstring contraction will be. Conversely, the closer you bring your feet in, the greater the isolation of the glutes. If you want to target the hamstrings and the glutes, then include both variations in your training (feet out & feet in).
5. Kettlebell Swings
Kettlebell swings are a good option for developing hamstring explosiveness, which can promote power development for compound movements, or explosive sports such as throwing, basketball, or volleyball.
How To
Stand with your feet a bit further than shoulder-width apart.
Grab the corners of the kettlebell with each hand.
Push your hips and the kettlebell back between your legs.
Focus on loading the hips and the hamstrings.
Snap the hips forward and let the kettlebell explode forward in front of you.
Try not to use your shoulders to raise the kettlebell up, and avoid letting the kettlebell travel above shoulder level.
Pull the weight back between your legs forcefully to complete the repetition.
Repeat these steps for multiple repetitions.
Pro Tip
Kettlebell swings can be performed as a warm-up or as a core part of your programming. If you want to prime your workout to be more explosive I would suggest adding kettlebell swings before your squats or deadlifts. For example, you could add a 2 x 10 @50% before a lower body workout.
Alternatively, you can load up kettlebell swings to be a more fundamental movement in your workout. For example, you could program 5 x 5 @ 75% for a strength option, or you could program 4 x 12 @ 60% for a hypertrophy option.
6. Kettlebell Single Leg RDL
Single leg RDLs are great for developing balance and are effective for loading the hamstrings up to a greater degree. Single leg RDLs are a less stressful hinge pattern that is great for promoting hamstring health and resiliency.
How To
Hold a kettlebell in one hand.
Let the arm hang in front of the opposite balancing leg.
Initiate by pushing the hips back and letting the non-balancing leg kick back.
Sit back until the dumbbell is just below the knee.
Extend at the hips and return to a standing position to complete the rep.
Pro Tip
Single-leg RDLs are lower in intensity than regular deadlifts. Implementing a single leg RDL can allow for greater training frequency or training volume.
For example, to allow for proper recovery throughout the week it is typically advised to train conventional barbell deadlifts 1-2x a week, however with single leg kettlebell RDL you could potentially train more than 2x a week.
7. Kettlebell Deadlift
Deadlifts are a fundamental part of a good workout, and kettlebell deadlifts are a simple and effective way to implement them. Kettlebell deadlifts can also be used in the rehabilitation setting as well.
How To
Stand over the kettlebell with your feet hip-width apart.
Let the arms hang as long as possible while sitting the hips back to load the glutes and hamstrings.
Build as much tension as possible in your upper back by focusing on squeezing the armpits shut.
Grab the corners of the kettlebell with both hands.
Pull yourself into the kettlebell as you stand up with the weight.
In a controlled fashion, push the hips back and let the kettlebell come back to the floor.
Pro Tip
You can make this exercise easier by elevating the surface you are pulling from with a box. A higher or lower box will make this exercise easier or harder. When you’re first starting out you can use a higher box and then slowly work your way to the ground.
A way to make this exercise more difficult would be to add in a pause off the floor, or to stand on a box with the weight being further away from you on the ground. The paused variation will help you build more tension, while standing on the box will increase the range of motion.
8. Kettlebell B-Stance Deadlift
The kettlebell B-stance deadlift allows you to place greater focus on one hamstring while maintaining the stability of your other leg. This variation is also great for diminishing muscular imbalances and loading the desired leg to a greater degree.
How To
For this exercise, you are going to have a staggered stance with one leg, and one leg slightly bent.
To load this movement, hold a kettlebell in either both or one of your hands with your arms completely straight in front of you.
While maintaining a soft bend in both knees, hinge back while allowing the kettlebell to lower below your knee.
Stand back up with the weight until the hips are completely extended.
Pro Tip
Implementing slower lowering phases during the kettlebell b-stance deadlift can promote greater time under tension, leading to more intense contractions, and subsequently more muscular gains.
9. Kettlebell Good Morning
Kettlebell good mornings are a great hinge movement that can effectively target the hamstrings and posterior chain.
How To
Hold the kettlebell in front of your upper chest with both hands.
While maintaining a neutral spine, initiate the rep by pushing the hips back until the upper torso is almost parallel with the floor.
Lift the torso to return to the starting position.
Pro Tip
Similar to other exercises good mornings can be done slowly with a tempo to achieve intense contractions. Alternatively, they can be performed with a more snappy motion to develop explosiveness; however, it’s important to master the technique before attempting to do this movement explosively.
10. Kettlebell Reverse Lunges
Kettlebell reverse lunges are a compound movement that places a greater emphasis on the glutes and hamstrings while minimizing stress on your joints.
How To
Hold the kettlebell with both your hands while you’re in the upright position.
To begin the rep, step back with one foot.
Bend the back knee toward the floor and allow your front knee to bend and travel forward over your toes.
Descend until the front knee is bent at 90 degrees, with your heel still planted firmly on the ground.
To complete the repetition, return the back leg to the starting position by pushing through the front leg.
Repeat the previous steps until you have achieved equal repetitions for both sides.
Pro Tip
To target your hamstrings effectively, ensure you are pushing through the front leg rather than launching yourself up with the back leg.
You can also experiment with multi-directional lunges to challenge your hamstrings in different lunge movement patterns. For example:
Forward lunge: x10 each leg
Side lunge: x10 each leg
Reverse lunge: x10 each leg
11. Kettlebell Goblet Squats
Kettlebell goblet squats target the glutes, hamstrings, and quads, and are a great exercise for total body muscular development. These are a great alternative for barbell squats for beginners or when you need a low-fatiguing squat option to get in some extra volume.
How To
Hold a kettlebell at chest level with both hands.
Initiate with the hips and bend the knees to sit back until the thighs are at or below parallel to the ground.
Try not to let the weight drop or allow your chest to cave during the rep.
Stand up until your hips and knees are completely extended.
Pro Tip
A wider stance and hinge-focused kettlebell goblet squat can promote greater hamstring recruitment.
Additionally, performing this exercise for multiple sets of 10-20 reps or doing slow and controlled 4-count lowered reps can increase the difficulty for intermediate to advanced lifters.
12. Kettlebell Back Extension
Back extensions are one of my top exercises for targeting the hamstrings. Furthermore, we can utilize a kettlebell to make this exercise more challenging. However, this requires access to a back extension and is quite challenging to perform.
How To
Securely fasten your feet in the leg lock of the back extension.
Hold a kettlebell in both your hands to make this exercise more difficult.
Start with your knees straight and your torso upright.
Lower your torso until completely bent.
Pull yourself back by pulling your heels into the leg locks to return to the starting position.
Pro Tip
If this exercise is difficult, you can begin with either a bodyweight or band assistance until you become strong enough to incorporate kettlebell resistance.
To integrate band assistance you can anchor it to a sturdy point behind you and hold it with both your hands. If band assistance is too easy you can progress to a body weight progression, then subsequently load the exercise with a kettlebell.
Sample Hamstring Workout Routine With Kettlebells
Here is a sample week-to-week kettlebell hamstring workout that you can implement:
Week 1
Monday
Kettlebell goblet squat: 3 x 5 @75%
Kettlebell single leg RDL: 3 x 8 each side @60%
Standing single leg kettlebell hamstring curls: 2 x Failure
Thursday
Kettlebell deadlift: 4 x 10 @60%
Kettlebell reverse lunges: 4 x 12 @50%
Kettlebell glute bridges: 4 x 6 @50%
Week 2
Monday
Kettlebell goblet squat: 4 x 5 @75% + 5-10 lbs
Kettlebell single leg RDL: 3 x 8 each side @60% + 5-10 lbs
Standing single leg kettlebell hamstring curls:: 3 x Failure @30-40% + 5-10 lbs
Thursday
Kettlebell deadlift: 4 x 10 @60% + 5-10 lbs
Kettlebell reverse lunges: 4 x 12 @50% + 5-10 lbs
Kettlebell glute bridges: 4 x 6 @50% + 5-10 lbs
Week 3
Monday
Kettlebell goblet squat: 4 x 5 @75% + 5-10 lbs
Kettlebell single leg RDL: 3 x 8 each side @60% + 5-10 lbs
Standing single leg kettlebell hamstring curls:: 3 x Failure @30-40% + 5-10 lbs
Thursday
Kettlebell deadlift: 4 x 10 @60% + 5-10 lbs
Kettlebell reverse lunges: 4 x 12 @50% + 5-10 lbs
Kettlebell glute bridges: 4 x 6 @50% + 5-10 lbs
Week 4
Monday
Kettlebell goblet squat: 4 x 5 @75% + 5-10 lbs
Kettlebell single leg RDL: 3 x 8 each side @60% + 5-10 lbs
Standing single leg kettlebell hamstring curls:: 3 x Failure @30-40% + 5-10 lbs
Thursday
Kettlebell deadlift: 4 x 10 @60% + 5-10 lbs
Kettlebell reverse lunges: 4 x 12 @50% + 5-10 lbs
Kettlebell glute bridges: 4 x 6 @50% + 5-10 lbs
Best Kettlebells For Training Your Hamstrings
Kettlebells are ideal for a variety of dynamic movements to increase hamstring strength, endurance, and power. This involves exercises such as kettlebell RDLs, goblet squats, and good mornings. Having these kettlebells at your disposal is a game changer for achieving well-rounded gains.
]]>
https://www.gymreapers.com/blogs/news/best-lower-back-kettlebell-exercises2023-08-11T11:46:38-06:002024-05-01T16:15:37-06:006 Best Lower Back Kettlebell Exercises + Sample WorkoutRoc PilonAs someone who's worked with patients and athletes for the past 8 years, I often use lower back kettlebell exercises to enhance the quality of life and performance of my clients.
The 6 best lower back kettlebell exercises are:
Kettlebell back extensions
Kettlebell deadlifts
Kettlebell good mornings
Kettlebell J curl
Kettlebell single-leg RDL
Kettlebell goblet squat
To maximize training your lower back with kettlebells, I’ll guide you through each of these exercises and provide you with a sample 4-week workout that you start implementing today.
Key Takeaways
Lower back kettlebell exercises can help improve daily function, reduce the risk of injury, and increase sports performance.
The kettlebell deadlift is the best exercise for building and strengthening the lower back.
Anatomy of the Lower Back Muscles
The lower back muscles are attached to the ribs, vertebrae, spine, and sacrum. These muscles include:
Multifidus
Erector spinae
Spinalis
Latissimus dorsi
The lower back includes large muscles that help hold up the spine. These muscles allow us to flex, bend forward, lift, and arch the lower back.
Lower back strength is fundamental for daily life (picking up objects off the floor, reaching overhead), and high-performance movements such as the squat and deadlift.
Benefits of Training the Lower Back With Kettlebells
The benefits of training your lower back with kettlebells include:
Prevents and treats lower back pain. Lower back pain is highly prevalent and is often associated with poor posture, muscle imbalances, herniated discs, and arthritis.
Strengthening the lower back muscles can help minimize low back pain by improving posture, increasing stability, and increasing mobility
Strengthens and mobilizes the core. A strong core allows you to stabilize your entire body, which allows for better balance and posture. Also, a strong core increases the efficiency at which muscles are recruited throughout the body.
Improves your squats and deadlifts. Having a strong lower back is fundamental to improving other lifts as well. The barbell squat and deadlift rely on the strength of the lower back for proper execution at heavier loads.
The best kettlebell exercises for your lower back are:
1. Kettlebell Back Extensions
Kettlebell back extensions are great for strengthening the muscles of the lower back to improve posture and mobility, which translates to better athletic performance and a reduced risk of injury.
How To
Securely fasten your feet to the leg lock of the back extension.
Hold a kettlebell in both your hands to make this exercise more difficult.
Start with the hips fully extended and an upright torso.
In a controlled fashion lower yourself until your hips are flexed to 90 degrees or you are close to the ground.
Raise your torso to return to the starting position.
Repeat these steps for the desired amount of repetitions.
Pro Tip
Tempo repetitions can increase the challenge of this exercise. Increased time under tension places more stress on the lower back muscles, which encourages muscle growth.
Here is how I would program tempo kettlebell back extensions:
4-count lower kettlebell back extensions 4 x 5 @50%
2. Kettlebell Deadlifts
Kettlebell deadlifts are my favorite exercise for strengthening the lower back muscles and for total body muscular development.
How To
Stand over the kettlebell with your feet hip-width apart.
Let the arms hang as long as possible while sitting the hips back to load the glutes and hamstrings.
Build as much tension as possible in your upper back by focusing on squeezing the armpits.
Grab the corners of the kettlebell with both hands.
Pull yourself into the kettlebell as you stand up with the weight.
In a controlled fashion, push the hips back and let the kettlebell come back to the floor.
Pro Tip
Kettlebell deadlifts can be modified in difficulty by placing the kettlebell on a box (to make it easier) or standing on an elevated platform (to make it more difficult)
Furthermore, you can use bands to increase the resistance, while changing the nature of the movement to focus on speed off the floor.
3. Kettlebell Good Mornings
Kettlebell good mornings are a hinge movement pattern that directly targets and strengthens the lower back muscles.
How To
Hold the kettlebell in front of your upper chest with both hands.
While maintaining a neutral spine, initiate the rep by pushing the hips back until the upper torso is almost parallel with the floor.
Lift the torso to return to the starting position.
Pro Tip
Good mornings can be performed either explosively (quickly) or with a tempo (slowly). A slower tempo can result in a muscle-building focus, while faster repetitions can place a greater emphasis on explosiveness.
4. Kettlebell J Curl
The kettlebell J curl is a more advanced unconventional exercise that can simultaneously stretch and strengthen the muscles of the back.
How To
Stand over the kettlebell with your feet hip-width apart.
Let the arms hang as long as possible.
Reach for the kettlebell by pushing your hips back and rounding the back as much as possible.
Grab the corners of the kettlebell with both hands.
Pull yourself into the kettlebell as you stand up with the weight.
In a controlled fashion, push the hips back, round the back, and let the kettlebell come back to the floor.
Pro Tip
When performing the J curl the primary focus should be technique and not load. Too much load too soon can increase the risk of injury, therefore really emphasize body mechanics before adding weight.
5. Kettlebell Single Leg RDL
The kettlebell single-leg RDL is a more functional option that develops balance and stability while building strength and muscle through the hips and lower back.
How To
Hold a kettlebell in one hand.
Let the arm hang in front of the opposite balancing leg.
Initiate by pushing the hips back and letting the non-balancing leg kick back.
Sit back until the dumbbell is just below the knee.
Extend at the hips and return to a standing position to complete the rep.
Pro Tip
If you struggle to maintain your balance, try holding onto a PVC pipe or something stable to focus more on loading rather than balance.
Single-leg RDLs with assistance are one of my favorite exercises because this variation helps to address muscle imbalances.
6. Kettlebell Goblet Squat
Kettlebell goblet squats are my favorite kettlebell exercise that increases total body musculature alongside the kettlebell deadlift.
How To
Hold a kettlebell at chest level with both hands.
Initiate with the hips and bend the knees to sit back until the thighs are at or below parallel to the ground.
Try not to let the weight drop or allow your chest to cave during the rep.
Stand up until your hips and knees are completely extended.
Pro Tip
Kettlebell goblet squats are extremely versatile. This means that you can change the nature of this exercise in a variety of ways to influence the performance outcome.
If you want to build explosiveness you can perform faster reps, while slower reps will allow you to place a greater emphasis on building muscle. Here is an example of how you would program them differently:
Kettlebell Goblet Squats for Hypertrophy:
4-count lowering: 5 x 5 @65%
Kettlebell Goblet Squats for Explosiveness:
Speed reps: 10 x 3 @70%
Sample Lower Back Workout Routine With Kettlebells
Here is a sample week-to-week kettlebell lower back workout that you can implement:
Week 1
Monday
Kettlebell goblet squat: 3 x 5 @75%
Kettlebell single leg RDL: 3 x 8 each side @60%
Kettlebell good mornings: 2 x 12 @30-40%
Thursday
Kettlebell deadlift: 4 x 10 @60%
Kettlebell back extensions: 4 x 5 @50%
Kettlebell J curl: 4 x 6 @20%
Week 2
Monday
Kettlebell goblet squat: 4 x 5 @75% + 5-10 lbs
Kettlebell single leg RDL: 3 x 8 each side @60% + 5-10 lbs
Kettlebell good mornings: 3 x 12 @30-40% + 5-10 lbs
Thursday
Kettlebell deadlift: 4 x 10 @60% + 5-10 lbs
Kettlebell back extensions: 4 x 5 @50% + 5-10 lbs
Kettlebell J curl: 4 x 6 @20% + 2.5-5 lbs
Week 3
Monday
Kettlebell goblet squat: 4 x 5 @75% + 5-10 lbs
Kettlebell single leg RDL: 3 x 8 each side @60% + 5-10 lbs
Kettlebell good mornings: 3 x 12 @30-40% + 5-10 lbs
Thursday
Kettlebell deadlift: 4 x 10 @60% + 5-10 lbs
Kettlebell back extensions: 4 x 5 @50% + 5-10 lbs
Kettlebell J curl: 4 x 6 @20% + 2.5-5
Week 4
Monday
Kettlebell goblet squat: 4 x 5 @75% + 5-10 lbs
Kettlebell single leg RDL: 3 x 8 each side @60% + 5-10 lbs
Kettlebell good mornings: 3 x 12 @30-40% + 5-10 lbs
Thursday
Kettlebell deadlift: 4 x 10 @60% + 5-10 lbs
Kettlebell back extensions: 4 x 5 @50% + 5-10 lbs
Kettlebell J curl: 4 x 6 @20% + 2.5-5
Best Kettlebells For Training Your Lower Back
Gymreapers kettlebells are extremely durable, and affordable, and come in a variety of loads. They are currently sold out.
The range of loads available allows you to perform a variety of exercises and encourages progression over time.
Additionally, the ergonomic design of the Gymreapers kettlebell allows you to comfortably perform all of the exercises necessary to build a strong lower back. I highly recommend purchasing a set of these to take your training to the next level.
]]>
https://www.gymreapers.com/blogs/news/best-arm-blaster-exercises2023-08-11T11:34:34-06:002026-02-24T08:56:53-07:008 Best Arm Blaster Exercises + Sample WorkoutRoc Pilon
As a strength coach and bodybuilder, I’m often asked about the arm blaster and which arm blaster exercises are most effective for growing the biceps.
The 8 best arm blaster exercises are:
Arm blaster hammer curlsArm blaster side curlsArm blaster supinated dumbbell curlsArm blaster barbell curlsArm blaster EZ bar curlsArm blaster dumbbell curlsArm blaster banded curlsArm blaster reverse curls
To help you get the most out of your arm blaster, I’ll explain how to use it, which exercises to do, and share a sample workout program that you can follow for the next 4 weeks.
Key Takeaways
Using an arm blaster can improve bicep curl technique, increase bicep isolation, reduce injuries, and allow for versatility in arm workouts. To maximize your bicep training with an arm blaster you should include a conventional curl, a hammer curl variation, and a finisher (i.e. banded curls). The Gymreapers arm blaster is my favorite arm blaster on the market due to its durability, look, adjustability, and comfort.
Benefits of Using An Arm Blaster
The main benefits of an arm blaster include:
Better bicep curl technique. The design of the arm blaster anchors your arms in place while promoting an upright posture. Altogether this makes it difficult to swing or use momentum to “cheat” the curls up. This encourages better technique for higher quality gains. Improves bicep isolation. Another function of the arm blaster is that it allows for greater bicep isolation by decreasing the recruitment of secondary muscle groups. Reduces the risk of injury. When fatigued or performing bicep curls with heavier loads without an arm blaster there may be additional stress placed on the elbows, wrist, low back, or secondary muscle groups.
Injury risk is typically due to technical breakdown, which may be mitigated with the addition of an arm blaster.
Increased versatility for bicep training. With the implementation of an arm blaster, one can use a variety of equipment: EZ-bar, barbell, dumbbell, and bands. This allows for a variety of stimuli to encourage progression over time and could help to keep lifters from getting bored with their training.
The primary muscle groups involved during the arm blasters:
Biceps brachii long headBiceps brachii short headBrachioradialis
The biceps brachii long head is located on the outer side of the biceps, while the short head is located on the inner arm. The biceps muscles are responsible for elbow flexion (bending) and help to prevent elbow hyperextension.
The brachioradialis is responsible for flexing the forearm and supinating (rotating inward) and pronating (rotating outward) the wrist.
How To Use An Arm Blaster Properly
To get the most out of your arm blaster, it’s important to use it properly.
Here is how to set yourself up for arm blaster curls:
1. Securely fasten the neck strap in a way that allows the metal plate of the arm blaster to comfortably sit at your upper abdomen/stomach.
2. Your arms should sit in the grooves on both sides of the arm blaster and fix them in place.
3. Either seated or standing, hold your weight in your hands (dumbbells, barbell, EZ curl, bands, etc).
4. Raise the weight while keeping your body stable.
5. Lower the weight at a controlled rate to complete the repetition.
6. Repeat steps 4 and 5 for the desired amount of repetitions.
Top Arm Blaster Exercises
1. Arm Blaster Dumbbell Curls
Arm blaster dumbbell curls are the most traditional and tried and true approaches to training the biceps with an arm blaster.
How To
Securely fasten the neck pad around your neck, with the metal arm blaster plate resting over your upper abdomen.
From the starting position, you will hold the dumbbells in your palms facing up.
Apply upper arm pressure against the arm blaster, while focusing on bending the elbows to raise the dumbbells up.
In a controlled fashion, lower both dumbbells until you return to the starting position.
Repeat steps 4 and 5 for the desired amount of repetitions.
Pro Tip
Tempo sets can make arm blaster dumbbell curls even more difficult. Focus on raising the weight as fast as possible, and then lowering the weight at a slow rate. Lowering the weight at a controlled rate will increase the difficulty of the exercise while promoting more intense muscle contractions.
Here is an example set that you can perform:
4-count lowering arm blaster curls: 3 x 8 / side
2. Arm Blaster Hammer Curls
Arm blaster hammer curls target the long head of the biceps and the brachioradialis. Every comprehensive bicep curl program should include a hammer curl bicep variation.
How To
Securely fasten the neck pad around your neck, with the metal arm blaster plate resting over your upper abdomen.
From the starting position, you will hold the dumbbells in your hands with your palms facing each other.
Apply upper arm pressure against the arm blaster, while focusing on raising both dumbbells up to contract your biceps.
In a controlled fashion, lower both dumbbells until you return to the starting position.
Repeat steps 4 and 5 for the desired amount of repetitions.
Pro Tip
Arm blaster hammer curls allow one to leverage more weight, so it’s best to use heavier loads for this exercise for a more effective bicep stimulus.
That said, hammer curls only target part of the bicep and should always be paired with a conventional bicep curl.
3. Arm Blaster Side Curls
Similar to hammer curls, arm blaster side curls target the biceps brachii short head and the brachioradialis. However, the arm blaster side curls are more difficult and require a lot more control. I recommend the arm blaster side curls as an alternative when progress has stalled with hammer curls.
How To
Securely fasten the neck pad around your neck, with the metal arm blaster plate resting over your upper abdomen.
From the starting position, hold the dumbbells with your palms facing down.
Curl the right arm from the right hip to the left shoulder.
Control the weight back down until the elbow is fully extended.
Repeat these steps for the desired amount of repetitions.
To target the other side, curl with your left arm from the left hip to the right shoulder.
Control the weight back down until the elbow is fully extended.
Repeat these steps for the desired amount of repetitions.
Pro Tip
Arm blaster side curls are more effective when using slow and controlled technique. Controlled movement allows for a more intense muscle contraction and increases the difficulty of lighter weights. Here is an example to implement into your program:
4-count lowering arm blaster side curls: 3 x 8 / side
4. Arm Blaster Supinated Dumbbell Curls
Hands down my favorite bicep curls are the arm blaster supinated dumbbell curls. As a competitive bodybuilder, this exercise intensely contracts all of the bicep heads, as well as the thick forearm muscle.
How To
Start with both elbows fully extended with the upper arms comfortably sitting on the grooves of the arm blaster.
Stand holding two dumbbells with a neutral grip (palms facing each other).
Upon initiation of the curl, you will begin to rotate your wrist facing up, as you flex your arm at the top.
Continue to raise both your arms till they are fully flexed at the top.
From the top, you will lower both your arms and rotate your wrists back to the starting neutral position.
Pro Tip
My focus with this exercise is to train to absolute failure. One way to go about this is to start with alternating supinated curls, and then do supinating curls with both hands till absolute failure.
Here is an example of how to program arm blaster supinated curls to failure:
Alternating supinated curls: x 8/side
Bilateral supinated curls: x failure
5. Arm Blaster Barbell Curls
Arm blaster barbell curls are my primary strength exercise for the biceps. Including bicep movements with heavier weights is paramount for building big biceps.
How To
Start with both elbows fully extended with the upper arms comfortably sitting on the grooves of the arm blaster.
Hold the barbell in your hands with your palms facing up.
Curl the weight up until the arms are completely flexed.
Lower the weight until the arms are fully extended to complete the repetition.
Repeat the previous steps for the desired amount of repetitions.
Pro Tip
Arm blaster barbell curls can be done for higher repetitions and lighter weights, and also lower repetitions with heavier loads. I prefer to implement heavier loads on the barbell curls while saving my higher rep exercises for dumbbell and cable variations.
Here is an example of how I would program barbell curls:
Arm blaster barbell curls: 5 x 5 @70-80% or @RPE 7-8
6. Arm Blaster EZ Bar Curls
EZ bar curls with the arm blaster may be one of the most underrated curl exercises for developing the biceps. The inner grip of the EZ bar curls hit a very unique angle, emphasizing the bicep peak, while allowing you to use heavier loads.
How To
Hold the inner handles of the EZ bar with the palms facing up.
Curl the weight up until the arms are completely flexed.
Lower the weight until the arms are fully extended to complete the repetition.
Repeat the previous steps for the desired amount of repetitions.
Pro Tip
You can either grip the inner or outer handles depending on which head of the biceps you want to prioritize. If you want to improve the bicep peak then I would suggest gripping the inner handles of the EZ bar.
If you want to target the outside of the bicep, then I would grip the outer handles of the EZ bar. The versatility of the EZ bar allows you to target the complete bicep.
Here is an example workout to target both heads of the bicep:
Inner handle EZ bar curls: 2 x 8
Outer handle EZ bar curls: 2 x 8
7. Arm Blaster Banded Curls
Arm blaster banded curls are a non-fatiguing option for your biceps. For this reason, you can implement arm blaster banded curls to increase the volume of work your biceps are doing without increasing your risk of injury.
How To
Anchor a band to the bottom of a pillar.
Facing away from the pillar, hold the bands with both hands.
Curl the band up until the arm is fully flexed.
Control the band down until the elbow is completely extended.
Repeat steps 3 and 4 for the desired amount of repetitions.
Pro Tip
There are many ways to increase the intensity and difficulty of arm blaster banded curls.
First and foremost, you may start with a lighter band and then increase the number of repetitions and sets each week. Once this becomes too easy, you may increase banded resistance.
Due to the non-fatiguing nature of the banded variation of arm blaster curls, I would recommend incorporating higher repetitions towards the very end of your workout.
Here is an example of how I would program and progress these:
Arm Blaster Banded Curls:
Week 1: 3 x 12
Week 2: 3 x 15
Week 3: 4 x 15
Week 4: 4 x 12 (Increase banded resistance)
8. Arm Blaster Reverse Curls
Arm blaster reverse curls place an extra emphasis on the brachialis, the forearms, and both heads of the biceps.
How To
Hold a straight bar with the palms facing down or away.
Curl the weight up until the arms are completely flexed.
Lower the weight until the arms are fully extended to complete the repetition.
Repeat the previous steps for the desired amount of repetitions.
Pro Tip
With reverse curls, using too much weight can often place you in a disadvantageous position, resulting in bad form or an ineffective bicep stimulus.
For this reason, tempo reps are going to be a more effective route for increasing intensity. Count to 4 during the lowering portion of reverse curls for a more intense contraction.
Tips For Maximizing Your Arm Blaster Workout
Here are some pointers for you to maximize your arm blaster workout:
Implement a total of three exercises to target the complete bicep and forearm for a comprehensive arm workout.
Of these three exercises, it is good to implement a lower repetition strength movement at the start, a higher repetition movement second, and finally a finisher to burn out the biceps. This allows for a movement to drive strength progression and a couple of movements to drive fatigue.
Adding tempo reps can always be a great way to increase the quality of your repetitions, furthermore, it's another way to drive progression week to week.
Diversity is extremely important for exercise selection. Here is how you pick your exercises:
Exercise 1: Select a conventional curl to target the entire bicep
Exercise 2: Some variation of a hammer curl to target the brachialis (deep bicep muscle) and the brachioradialis (forearm muscle).
Exercise 3: Select a finisher to further detail the bicep muscles.
Sample Arm Blaster Workout Routine
Here is a sample week-to-week arm blaster routine that you can implement:
Week 1
Tuesday
Arm blaster barbell curls: 3 x 5 @75%
Arm blaster hammer curls: 3 x 8 @60%
Arm blaster seated dumbbell curls: 2 x Failure
Thursday
Arm blaster supinated curls: 4 x 10 @60%
Arm blaster EZ-bar curls (inner grip) 4 x 12 @50%
4 count lower arm blaster reverse curls: 4 x 6 @50%
Week 2
Tuesday
Arm blaster barbell curls: 4 x 5 @75% + 5-10 lbs
Arm blaster hammer curls: 3 x 8 @60% + 5-10 lbs
Arm blaster seated dumbbell curls: 3 x Failure @30-40% + 5-10 lbs
Thursday
Arm blaster supinated curls: 4 x 10 @60% + 5-10 lbs
Arm blaster EZ-bar curls (inner grip) 4 x 12 @50% + 5-10 lbs
4 count lower arm blaster reverse curls: 4 x 6 @50% + 5-10 lbs
Week 3
Tuesday
Arm blaster barbell curls: 4 x 5 @75% + 5-10 lbs
Arm blaster hammer curls: 3 x 8 @60% + 5-10 lbs
Arm blaster seated dumbbell curls: 3 x Failure @50% + 5-10 lbs
Thursday
Arm blaster supinated curls: 4 x 10 @60% + 5-10 lbs
Arm blaster EZ-bar curls (inner grip) 4 x 12 @50% + 5-10 lbs
4 count lower arm blaster reverse curls: 4 x 6 @50% + 5-10 lbs
Week 4
Tuesday
Arm blaster barbell curls: 4 x 5 @75% + 5-10 lbs
Arm blaster hammer curls: 3 x 8 @60%+ 5-10 lbs
Arm blaster seated dumbbell curls: 3 x Failure @50% + 5-10 lbs
Thursday
Arm blaster supinated curls: 3 x 10 + 5-10 lbs
Arm blaster EZ-bar curls (inner grip) 3 x 12 + 5-10 lbs
4 count lower arm blaster reverse curls: 3 x 6 + 5-10 lbs
Due to its comfort, durability, and look, the Gymreapers arm blaster is the ultimate option. Its heavy-duty aluminum build is a quarter of an inch thick and allows for extra wear and tear.
The padded ends allow for your arms to comfortably lock in so that you can maintain technique and posture.
Furthermore, the adjustable neoprene padded strap reduces the amount of tension on the neck which adds extra comfort.
Of all the arm blasters on the market, the Gymreapers arm blaster has my favorite silhouette.
Frequently Asked Questions
Did Arnold Schwarzenegger Use An Arm Blaster?
There is a lot of footage of Arnold Schwarzenegger using an arm blaster. He has mentioned that he would use it at the end of his workouts as a finisher. It is also noted that he implemented cheating bicep curls as well to be a part of his arm workouts.
How Does The Use of An Arm Blaster Affect Muscle Activation Compared to Traditional Bicep Curls?
Traditional bicep curls will target the complete bicep; however, they also recruit secondary muscle groups for stabilization. The arm blaster places a greater emphasis on targeting the musculature of the bicep and reduces the involvement of secondary musculature.
Can arm blaster exercises benefit individuals with specific fitness goals, such as bodybuilding or rehabilitation?
If your goal is bodybuilding, implementing an arm blaster is a no-brainer because it introduces new and novel stimuli to get even more muscle growth out of your workouts. In a rehab setting, one may be able to use the arm blaster to strengthen their forearms and biceps with lighter loads.
What are some signs that I might be using the arm blaster incorrectly, and how can I correct them?
You might be using the arm blaster incorrectly if your elbows are digging uncomfortably into the pad and you're not controlling the descent. Make sure that the pad is in line with your upper abdomen so you can rest your upper arms on the arm blaster and add tempo work to decrease cheating reps.
How can I incorporate arm blaster exercises into a broader upper body workout routine?
Typically, workouts will begin with compound movements with isolation movements to follow. Arm blaster exercises are bicep isolation movements that should be implemented after your compound exercises.
]]>
https://www.gymreapers.com/blogs/news/are-arm-blasters-worth-it2023-08-11T11:19:50-06:002023-08-16T17:55:49-06:00Are Arm Blasters Worth It? Do They REALLY Work?Roc Pilon
As someone who has been bodybuilding for more than 10 years, I’ve used an arm blaster to break through plateaus and increase the quality of my arm workouts.
So, is the arm blaster worth it? The arm blaster is absolutely worth your investment. The arm blaster promotes proper posture, technique, and biceps isolation during bicep curls. For this reason, the arm blaster is a very effective piece of equipment to take your biceps to the next level.
To help you decide whether to invest in an arm blaster, I’ll explain exactly how it works, if it’s effective, and who I think it’s best for.
Key Takeaways
The arm blaster is a bicep curl variation that has been around since the 1970s and used by bodybuilding legends to encourage bicep growth.
Arm blaster manufacturers claim that arm blasters will prevent you from cheating your curls, encourage better muscle contractions, and lead to increased strength and growth.
An arm blaster would be best for those who have plateaued in their training, need to work on their technique, or simply want to switch up their routine.
What Is An Arm Blaster?
An arm blaster is a narrow plate with two grooves for your arms that you wear around your neck. This piece of equipment holds your upper arms in place so that you can’t “cheat” while performing bicep curls, which may allow you to target and isolate the biceps more effectively.
Arms blasters have been around since the 1970s and became popular when Arnold Schwarzenegger started using it for his bicep training. Now they can be found in home gyms, specialty gyms, and perhaps a few commercial gyms all over the world.
What Claims Do Arm Blasters Make?
Common claims about the arm blaster (pulled directly from arm blaster manufacturers' websites) include:
“By requiring you to keep your elbows tight against your body, the arm blaster stimulates a stronger muscle connection, promotes proper form, and aids in overall isolation of the biceps — taking full advantage of a grueling arm workout.”
“Our arm blaster provides an innovative, unique way to prevent sloppy form and the recruiting of secondary muscles by solely targeting the two bicep heads.”
“The arm blaster is essential for bicep isolation, bicep growth, and can be used to perform dumbbell or barbell curls.”
“If you’re looking to target the upper arms, this tool is a time-tested way to isolate the biceps for a very intense, difference-making workout.”
Are these claims legit or just another marketing ploy? Let’s dive into it.
Are Arm Blasters Effective?
Arm blasters can be effective for bicep isolation and growth because they prevent your arms from shifting backward during the concentric (curl) and eccentric (lowering) portions of a bicep curl, which keeps the emphasis on your biceps rather than shifting the load to other muscles.
Arm blasters are also beneficial for the following reasons:
Arm blasters promote good technique. Fatiguing sets or heavy loads often lead to the recruitment of secondary muscle groups to help lift the weight.
Arm blasters can help prevent excessive technical breakdown as you get tired, which reduces the involvement of secondary muscle groups and allows you to train your biceps to failure.
Arm blasters can help improve posture during curls. Proper posture is extremely important during curls because many lifters tend to lean backward to try and swing the weight up while doing curls.
This places unnecessary stress on the lower back and also takes the emphasis off the biceps by using momentum. Using an arm blaster can help fix both of these mistakes.
Arm blasters can help prevent injuries during bicep curls. As mentioned in the previous points, as you get tired, you may try to swing the weight, shift the load to other muscles, and stress the lower back, all of which can increase your risk of injury. Using an arm blaster can help improve posture and technique and reduce your risk of injury.
Altogether, these are well-known benefits that seem to match the claims that are made by the companies that are selling them.
Can You Get Similar Benefits Without Using An Arm Blaster?
Arm blasters are a fantastic piece of equipment, but if you don’t have access to an arm blaster then you may be able to achieve similar benefits with other movements that lock the upper arms in place to prevent cheating.
Some examples of arm blaster alternatives are:
Concentration curls: a variation where you perform single-arm bicep curls while resting your upper arm against your inner upper thigh. This recreates the isolation effects of the arm blaster, while requiring only dumbbells, making it a perfect variation at a hotel gym, garage gym, or commercial gym.
The incline bicep curl: is where you rest your upper arm against the head of an incline bench to simulate the effects of an arm blaster. This is a great variation that is very similar to the arm blaster, by isolating the biceps and restricting the technique to strict repetitions.
Preacher curls: very similarly isolate the biceps while promoting consistent technique from the seated position. This is a great alternative to the arm blaster, however, access to equipment (preacher curl bench) is dependent on where you train.
Are There Any Drawbacks To Using An Arm Blaster?
Although the arm blaster has many benefits, there are some reasons why you may not want to add them to your program.
The arm blaster can be quite uncomfortable. Regular bicep curls have more range of motion and freedom and tend to feel more comfortable; however, they’re typically performed incorrectly because of this freedom.
By fixing the arms to the arm blaster pad, we are restricting our movement to keep tension on the biceps, but this does come at a cost as it can be quite uncomfortable.
The arm blaster costs money and needs to be brought to the gym. While the arm blaster is extremely effective, it does cost money as most commercial gyms don’t have them available for use. Furthermore, the arm blaster may not fit in your gym bag, and lugging it around can be a nuisance.
The arm blaster is difficult to load. What makes the arm blaster such a good piece of equipment is that it makes lower loads feel more difficult (because you can’t cheat), which may not align with your goal of lifting more weight.
The arm blaster is so restrictive you won’t be able to use heavier loads; however, you’re likely better off putting your ego to the side and focusing on proper technique anyway.
4 Signs You Should Get An Arm Blaster
1. You Are Experiencing Aches and Pains With Regular Curls
Improper bicep curl technique can lead to aches and pains in the elbow, as well as other muscle groups. Adding the arm blaster to your program can place more of an emphasis on bicep isolation and proper technique to take the stress off of your joints.
2. You Have Hit A Plateau In Your Biceps Growth
If you notice that progress has stalled, then it may be time to switch up your stimulus to give your body a reason to have to put on more muscle. You can do this by switching from the standard curls to an arm blaster variation.
3. You Are Bored With Your Current Bicep Program
Bicep training is very straightforward so it can easily become mundane. Adding new exercises that challenge you in different ways, like arm blaster bicep curls, can help keep you motivated and consistent with your training.
4. You Want To Improve Your Curl Technique
If you notice that you’re often swinging or using momentum to lift the weight or you’re struggling to feel your biceps working when performing curls, then it’s time to focus on improving your technique. Using an arm blaster can help you learn how to perform curls properly and reduce your risk of injury before it’s too late.
Who Shouldn’t Use Arm Blasters
The only people who shouldn’t use an arm blaster are beginners because there are already costs and barriers to training for beginners. Furthermore, there are many free exercises and alternatives to arm blaster curls that may produce similar effects.
That said, if you’re a beginner and you have free access to an arm blaster, then there is no harm in incorporating arm blaster curls as they are a safe and effective movement.
If you don’t have free access to an arm blaster then it may not be worth it, especially if you have limited space in your gym bag or don’t have an option to store it.
Preacher curls and arm blasters are exercises I never really take out of my training, but the light and ergonomic design of the arm blaster makes it more favorable for me.
Arm blasters can be used seated or standing, with one or two arms, and with barbells, dumbbells, bands, and an EZ bar. Altogether, this makes the arm blaster one of my favorite bicep curl variations.
If you are in the market for an arm blaster, you can’t go wrong with the Gymreapers Arm Blaster. The Gymreapers Arm Blaster is made of heavy-duty aluminum and builds off of the already innovative old-school bodybuilding classic arm blaster design.
I especially like how sturdy the Gymreapers Arm Blaster is, being a quarter of an inch thick and made of heavy aluminum. This makes me feel as though I can get some mileage out of the arm blaster without there being extra wear and tear.
The padded ends also make it extremely comfortable against the arms, which is unusual for an arm blaster but greatly appreciated. The adjustable neoprene padded strap reduces the amount of tension on the neck which adds extra comfort.
There are also three colors to choose from. Personally, the red one is my favorite, and I like the look and design.
Frequently Asked Questions
Do arm blasters make a difference?
Arm blasters can make a huge difference in improving bicep curl technique and bicep isolation. It is also much smaller and cheaper than a preacher curl bench, so it's one of the most effective exercises of its kind.
Where should an arm blaster sit?
The neck strap should comfortably wrap around the neck while sitting in front of the upper abdomen or stomach.
When should I use an arm blaster?
An arm blaster can be used if you have plateaued in your arm training or are looking to boost your bicep curl performance.
]]>
https://www.gymreapers.com/blogs/news/resistance-bands-vs-weight2023-08-11T10:47:00-06:002024-07-08T16:39:11-06:00Resistance Bands vs Weight: What Are The Differences?Roc PilonAs a personal trainer with years of experience, part of my job has been to educate my clients on whether to train with free weights and/or resistance bands.
The main difference between bands and free weights is the type of resistance they provide. Bands offer constant tension and increasing resistance as the band stretches, resulting in greater peak contractions. In contrast, free weights offer the same resistance throughout the entire movement and have a relaxation point.
Understanding how these differences in resistance will impact your results is important so that you can determine whether bands or free weights are better or if you should be using both.
Key Takeaways
Resistance band training is best for those who want to build strength and muscle with minimal gym equipment.
Free weight training is ideal for those who want to build muscle, get stronger, and improve their quality of life.
Training with resistance bands and free weights allows you to challenge your muscles in different ways and maximize your ability to progress over time.
Differences Between Resistance Bands & Free Weights
To understand whether bands or free weights are better, it’s important to understand how they differ.
Type Of Resistance. Bands provide linear variable resistance (LVR), which means the tension they offer increases as they lengthen. This offers unique advantages, such as the ability to contract your muscles slightly harder at the top of each repetition.
Free weights (barbells, dumbbells, and kettlebells) provide the same level of resistance from start to finish.
Level Of Resistance. The heaviest resistance band that you can get is 60-175lb, so to increase the resistance beyond this for compound movements like squats and deadlifts, you would have to double up on bands. With free weights, you can lift as much as you want based on what you have access to and how much you’re able to lift.
Use Cases. Bands are ideal for hypertrophy training, warming up, and mobility work. Free weights are ideal for compound lifts that train multiple major muscle groups and promote whole-body stability. They also promote intermuscular coordination and develop grip strength.
Skill Level. Bands are beginner-friendly and have a lower risk of injury, whereas free weights typically require more skill, which could pose some risks for inexperienced trainees.
Portability. Bands are lightweight and compact, making them the ideal companion for training at home, outside, and while traveling, whereas free weights are bulky and heavy, and inconvenient to travel with.
Price. Bands are cheaper and more cost-effective than bands because they come in ranges of resistance (i.e. 20-35lbs) rather than being a set load (i.e. 25lbs). Both bands and free weights are valuable tools that offer unique benefits, which we’ll dive into next.
Resistance Bands
Resistance bands are long pieces of elastic material designed for physical activity.
The main types are:
Loop bands, which are typically flat and made of latex. These go around in a continuous loop and are ideal for warming up, doing mobility work, and working out.
Open-ended bands, also known as tube bands. These generally have handles attached to both sides and are designed for compound and isolation exercises like bicep curls, lateral raises, overhead presses, etc.
Hip bands, also known as mini or booty bands. These also go around in a continuous loop but are smaller and designed to be wrapped over the thighs or lower legs for exercises like lateral leg raises, donkey kicks, lateral walks, etc.
Benefits
The benefits of training with resistance bands include:
Bands allow you to do various exercises to warm up, improve your mobility, build strength, and gain muscle
You can use a loop band to make bodyweight exercises easier or more challenging; for example, do band-assisted pull-ups if you lack the strength for the unassisted version
Bands offer different levels of resistance, which makes them useful for beginners and advanced lifters alike
Bands have linear variable resistance (LVR), which means the tension they provide increases as they lengthen, making the top of each repetition more challenging
Similar to cable machines, bands offer constant tension, which, in combination with LVR, can result in stronger muscle contractions and better mind-muscle connection
Bands are affordable and compact, which makes them the ideal workout tool for people who exercise at home; for example, the Military five-band set from Gymreapers only costs $75.99
Bands are light and compact bands, so you can take them with you when traveling for fun and effective hotel room or outdoor workouts
Drawbacks
The drawbacks to training with resistance bands are:
Bands from generic bands are more likely to break or snap after a while
The resistance you get from bands increases as they stretch, which means the bottom of each repetition will feel easy and won’t challenge your muscles in that range of motion.
It can take trainees a while to get used to performing certain exercises with bands if they are used to the even resistance from cable machines and free weights
Tracking your performance and progress on resistance band exercises can be trickier because the band resistance isn’t constant.
Although some bands can offer up to 150 lbs of resistance, there is a progression limit, which can be problematic for more advanced trainees
Who Should Use Them
Resistance bands are ideal for:
Those who need a new stimulus to overcome a plateau or avoid staleness.
Those who are new to resistance training.
Those working out at home or while traveling.
Those who want to improve muscle activation before training.
Those who want to work on their mobility.
Free Weights
Free weights are training equipment not attached to a machine or frame. You can freely pick them up and lift them in any direction you choose. The most popular free weights include:
Barbell - a long metal shaft with sleeves on both ends for weight plates
Bar - a short version of a barbell that weighs less and is suited for isolation exercises like bicep curls
EZ bar - similar to bars, but curved to resemble a wide letter ‘W’ for wrist comfort during curls, tricep extensions, etc.
Dumbbell - a short metal bar with weights on both ends; dumbbells can also be adjustable, which means trainees can change the weight to suit their needs
Kettlebell - a metal ball with a handle on top; like dumbbells, kettlebells can also be adjustable
Weight plates - flat disks made of different materials (most commonly metal) used in combination with barbells and adjustable dumbbells
Benefits
The benefits of free weight training include:
Free weights are incredibly versatile, as trainees can lift light or heavy, do countless exercises, and manipulate the tempo to emphasize muscle gain, power development, etc.
Performing free-weight exercises is an effective way to activate and strengthen the stabilizing muscles, promoting whole-body stability
Compound lifts with free weights allow trainees to target multiple major muscle groups simultaneously and load them more efficiently
Free weights make it easy to progressively overload your muscles (i.e., make your workouts more challenging), as it is easy to monitor progress by writing down variables like load used, reps done, and number of sets
Free weights develop grip strength, which is beneficial in training and everyday life
Drawbacks
The drawbacks of free weight training include:
Free weights tend to pose a greater risk of injury because there is a higher potential for user error
It’s generally best to have a spotter around when attempting to lift heavy weights, which might not be possible for people working out at home
Trainees find it more challenging to use free weights as they require more skill to maneuver, especially on compound lifts (bench, squat, deadlift, etc.)
Maintaining stability while lifting free weights is more challenging, especially for beginners
Free weights are more intimidating for inexperienced lifters, who tend to shy away and gravitate toward ‘safer’ options like gym machines, cardio equipment, and bodyweight movements
For those interested in building home gyms, free weights are more expensive to get (even second-hand) and take up more space
Who Should Use Them
Despite some shortcomings, free weights are a fantastic option for almost everyone, but they’re particularly beneficial for:
Those who want to improve their health (i.e. heart health, bone strength, mental health)
Those who want to build muscle
Those who want to get stronger
Those who want to lose fat (would also require a calorie deficit)
Those who want to improve their athleticism
Should You Use Resistance Bands And Free Weights?
You can and should use free weights and resistance bands in your training program to get the best of both worlds. You can include resistance bands and free weights into your training routine by:
Training with bands some days and free weights others
Training compound movements with free weights and isolation movements with bands
Warming up with bands and using free weights for the workout
Performing your working sets with free weights and adding a burnout set with bands
Adding bands to your free weights to increase the resistance at the top end
The Military Resistance Band Set by Gymreapers is my top recommendation because they are perfect for warming up, mobility exercises, and strength and hypertrophy training.
This set includes five bands, each covering a specific tension range:
Desert Tan: 20-35 lbs.
OD Green: 30-60 lbs.
Dark Earth: 40-80 lbs.
Ranger Green: 50-120 lbs.
Coyote Brown: 60-150 lbs.
The thinner ones are best for isolation exercises and warm-up activities. In contrast, Dark Earth, Ranger Green, and Coyote Brown work great for strength activities: lat pulldowns, horizontal rows, overhead presses, deadlifts, banded squats, and more.
You can also use two or more bands to get the resistance you need.
For example, if you want to do band deadlifts and Coyote Brown isn’t enough, combine it with Ranger Green and Dark Earth to bump the resistance to 350 lbs.
Weight Recommendation
Kettlebells are incredibly versatile, and even a single one can be enough for you to do multiple exercises to strengthen and develop most major muscle groups in your body.
Take one 14-kilo (31 lbs) kettlebell as an example. With it, you can do traditional gym activities like:
Bent over rows
Upright rows
Goblet squats
Overhead presses
Tricep extensions
Front raises
Floor presses
Romanian deadlifts
You can also use kettlebells for more dynamic activities like:
Swings
Thrusters
Snatches
Clean and presses
Sumo high pulls
]]>
https://www.gymreapers.com/blogs/news/banded-squats2023-08-11T10:43:47-06:002023-08-11T10:43:47-06:00Banded Squats: Benefits, How-To, Common MistakesRoc PilonIf you’ve reached a plateau with your squats or you just want to add more variety to your workouts to stay motivated to train, then I highly recommend incorporating the banded squat.
So what is a banded squat? A banded squat is a variation of the traditional squat exercise where a lifter squats against the added resistance of elastic bands. The resistance of the bands increases as the bands are stretched, which forces your muscles to work harder as you get closer to completing the rep.
To help you get the most out of your banded squats, I’ll explain which muscles this exercise targets, the benefits it offers, and how to perform it correctly. I'll also cover common mistakes and provide tips on how to incorporate them into your workout routine.
Key Takeaways
Banded squats can enhance muscle strength and endurance, improve balance and stability, and increase your range of motion. They also add variety to your workout, keeping things interesting and challenging.
Banded squats can be programmed for strength and hypertrophy with 3-5 sets of 5-12 reps or for power development with 6-8 sets of 2-3 reps with maximum acceleration.
GymReapers resistance bands are the perfect bands for adding accommodating resistance to your squats and other compound lifts.
What Is A Banded Squat?
There are two different types of banded squats: one involves adding a band to a bodyweight squat to make it more challenging, and the other involves attaching resistance bands to a barbell to make barbell squats more challenging.
Regardless of the variation that you choose, the bands add increasing resistance to the standard squat, which forces your muscles to work harder the closer you get to the top of the movement.
This enables lifters to work on their lockout, increase the difficulty of the movement without adding more weight, and focus on acceleration and maximal force output.
In this article, I’ll touch on both banded squat variations but I will focus primarily on the barbell banded squat as it is more technical and requires more instruction.
Muscles Used In A Banded Squat
That accommodating resistance of a banded squat hits all the same muscles as a standard squat but puts more emphasis on the lockout.
The muscles worked include:
Quadriceps
The quadriceps, or quads, are the prime movers in any squat, as they are responsible for extending your knees. Your quads work to help you maintain control as you lower into the bottom position of a squat and then propel you out of the bottom position to return to a standing position.
Glutes
The gluteus muscles (gluteus maximus, medius, and minimus) play a significant role in hip extension during the squat. The tension from the bands in a banded squat demands more force from the glutes, making it a great glute-building exercise.
Hamstrings
While the hamstrings act primarily as stabilizers in a squat, the additional resistance from the bands also engages these muscles, particularly when you reach the bottom of the squat.
Core Muscles
Your abdominal and lower back muscles are also active to help maintain balance and stabilize your torso during the lift, which becomes increasingly more difficult as the band is stretched.
Benefits Of Banded Squats
Banded squats offer a variety of benefits, which include:
Increased Strength and Power: The variable resistance provided by the bands can enhance strength and power, especially at the top of the squat where the tension is highest.
Improved Stability and Form: Banded squats demand greater control and stability, leading to improved squat form and overall body awareness.
Versatility: Bands can be used with or without additional weights, making banded squats a versatile option that is suitable for a variety of fitness levels and equipment access.
Acceleration Training: The added resistance promotes faster acceleration and power during the upward phase of the squat, which is beneficial for athletic performance and overall force output while lifting (a key component for powerlifting training).
How To Perform Banded Squats Correctly
The following instructions are for setting up a barbell banded squat.
Step 1: Choose The Right Band
Before you begin, select a suitable resistance band from Gymreapers' collection. The band should provide sufficient resistance to challenge you, but not so much that it compromises your form.
It should be used in combination with at least 40-60% of your working weight loaded onto the bar.
Ensure you use matching bands on each side of the barbell so the resistance is even and doesn’t throw you off balance.
Step 2: Set Up The Band
Anchor your chosen band to a sturdy cross support at the bottom of a squat rack. Ensure the band is anchored directly underneath where you will be standing when you squat, rather than where the bar is racked.
If the band isn’t anchored underneath you when you’re squatting, then it will pull you forward or backward while you squat.
If your rack doesn’t have cross supports then you could anchor the band to heavy dumbbells (100 lbs+) on the floor outside of your squatting area. Ensure these anchors are safe and effective by starting with an empty barbell and working your way up before attempting your full working weight.
Step 3: Position The Barbell
Wrap the other end of the band around the barbell sleeves at the same distance on each side, so that the tension on the bar is evenly distributed. The band should either be just inside the sleeves/collars of the barbell, or outside of the weight plates.
Step 4: Get Into Position
Step under the barbell and position it across your shoulders as you would in a regular squat. Take a few steps back to clear the pins and set your feet shoulder-width apart with your toes slightly pointed out.
Step 5: Prepare For The Squat
Before you initiate your squat, brace your core, pull your shoulder blades together, and ensure your chest is up and your back is straight.
Step 6: Perform The Squat
Lower your body into a squat position by bending at your knees and hips, going as deep as your mobility allows (usually until your hips are slightly below the top of your knee).
Keep your knees in line with your toes to prevent them from caving in and maintain tension in your core and upper body.
Step 7: Return To Starting Position
Push through your legs to extend the knees and return to a standing position.
The tension from the band will increase as you stand, so keep your core and upper body tightly braced to allow the force from your legs to push up against the resistance to return you to a standing position.
Step 8: Repeat
Perform the desired number of sets and reps while maintaining form and control.
With the increased challenge that the bands provide, comes new mistakes that you can make that compromise the effectiveness of the exercises and your safety.
Here are several common mistakes and how to avoid them.
Mistake #1: Improper Band Selection
Selecting a band that is either too strong or too weak for your current strength level can lead to ineffective workouts or even injuries.
How to Fix It
Choose a band that provides sufficient tension to challenge your muscles, but not so much that it compromises your form or makes the exercise unsafe. As a general rule, the band should be added to about 40-60% of your working weight that you’d use for a given set/rep range.
For example, if you usually squat 225 for sets of 5, you’d want to use 90-135 lbs on the barbell and then add resistance bands that make the squat feel like 225-275 at the top. You’ll only “feel'' 90-135 lbs at the bottom of your squat, and feel the full tension of 225-275 at the top.
Mistake #2: Improper Band Setup
If the band is placed too far forward or backward, it can throw you off balance, leading to improper form and potential injuries.
How to Fix It
Ensure that the band is evenly secured on both sides of the barbell and the anchor point. The band should be centered on the barbell, and the anchoring points should be sturdy and reliable. Always double-check the setup before starting your squats.
Mistake #3: Adding/Removing the Bands Individually
The tension from a band can be quite strong, and adding or removing a band from one side without assistance can cause the barbell to be pulled aggressively off the rack to one side, flinging the barbell and dumping plates. This can be dangerous and could lead to serious injury to yourself or others.
How to Fix It
Always have a spotter assist you when adding or removing bands from the barbell. If a spotter is not available, use a method that allows for a balanced adjustment, such as unloading the bands before removing the weights. Safety should always be your first priority.
Mistake #4: Over-Reliance on Banded Squats
While banded squats are an excellent exercise, they shouldn’t completely replace other types of squats or leg exercises as this would limit your strength development and lead to muscular imbalances over time.
How to Fix It
Banded squats are just one tool in your training toolbox. They should complement, not replace, your regular squat routine or other leg exercises. A well-rounded workout routine will ensure balanced muscle development and overall strength.
Mistake #5: Not Progressing Your Banded Squats
As with any exercise, your body will adapt to the challenge of banded squats over time. If you don't progress the exercise, whether through increased band tension, additional weight, or more repetitions, your strength gains may plateau.
How to Fix It
Make a point to continually challenge yourself by adding more tension, increasing the weight, or doing more reps as your strength improves. Keep track of your progress to ensure that you're consistently pushing your limits. This progressive overload will ensure that you continue to make strength gains over time.
How To Incorporate Banded Squats Into Your Workout Plan
If you’re ready to add banded squats to your program, then you’ll need to consider the following variables:
Frequency
Including any kind of squats in your routine 1-2 times a week is generally a good starting point. This gives your muscles adequate time to recover between sessions while still maintaining the stimulus required for growth and strength gains.
Banded squats would best be incorporated into one of these two squat days, allowing you to enjoy the variation that comes with it, while still having another day to dedicate to a different squat variation.
Sets and Reps
There are two primary methods to structure your sets and reps for banded squats.
The first is to perform your normal sets (typically 3-5) with your desired rep range (often 5-12) using bands for added resistance. This method is best for those pursuing muscle and strength gain.
The second is following the Dynamic Effort Method. This involves performing 6-8 sets of 2-3 reps with maximum acceleration using loads that are 40-60% of your one-rep max. This method focuses on speed and acceleration in an effort of improving maximal force output, and less on pure strength or muscle growth.
Load/Weight
The load or weight you use will largely depend on your strength level and the particular goal of the workout. If you're following the Dynamic Effort Method, stick to 40-60% of your one-rep max as previously mentioned.
For other workouts, choose a load that allows you to complete your desired number of reps with good form but is still challenging, especially for the last few reps.
Timing/Placement in a Workout
Banded squats are a compound, multi-joint exercise that requires a lot of energy to perform correctly. Therefore, it's often best to do them towards the start of your workout, after a warm-up, when you're most fresh.
However, if you're pairing them with heavy, non-banded squats, you might prefer to do the banded squats later in the workout to use them as a burnout or finisher exercise. Remember, there's no one-size-fits-all answer here – the best placement depends on your workout routine and goals.
]]>
https://www.gymreapers.com/blogs/news/best-calf-exercises-with-resistance-bands2023-08-11T10:37:26-06:002023-08-11T10:37:26-06:006 Best Calf Exercises With Resistance Bands (+ Sample Workout)Roc Pilon
If you want to take your calf training to the next level so that you can finally wear shorts to the gym with pride, then incorporating bands into your workout routine is the way to go.
Some of the best resistance band calf exercises include banded ankle pumps, banded calf raises, soleus raises, and marching with calf raises. Adding these exercises into your calf routine is a great way to stimulate the main 2 muscles that make up your calves and encourage muscle gain.
In this article, I'll explain the science behind calf training, share 6 of my personal favorite banded calf exercises, teach you how to perform the movements properly and give you a sample calf workout that you can try today.
Key Takeaways
Your calves are composed of 2 main muscles that are mainly responsible for pointing your foot down and helping you run and jump.
Training your calves with resistance bands is a great way to reduce your risk of injury and increase muscle activation to encourage growth.
Having a variety of bands at your disposal will ensure that you can attack your calves from every angle, and with every exercise variation so that you can get the best possible gains over time.
Anatomy of the Calf Muscles
The calf is the primary group of muscles that make up your lower leg and is composed of 2 major muscles. These muscles make up the portion of your leg between your knee and your ankle, on the posterior (back) of your leg.
Your calves are primarily responsible for:
Plantar flexion (pointing the foot downwards).
Aids your legs and feet in running and jumping activities.
Can help flex your knee, although this is mainly the job of your hamstrings.
The calf muscles include the gastrocnemius and the soleus.
Gastrocnemius
The Gastrocnemius is the larger of your two calf muscles. It is very powerful, and functions in movements that require going up onto your toes, like running and jumping.
It originates from the bottom of the femur, which is the thigh bone, and inserts by the Achilles tendon on the back of the heel.
It has two “heads” which are primarily what people think of when they are training to develop their calf muscles. These heads are simply called the medial (inside) and lateral (outside) heads.
Soleus
The soleus muscle is the smaller of the two calf muscles, and it is located lower and deeper than the gastrocnemius. It functions similarly to the gastrocnemius and is targeted in all of the same movements.
Unlike the gastrocnemius, the soleus originates below the knee at the top of the fibula and upper part of the tibia (your shin bones). It then also inserts into the back of the heel via the Achilles tendon, with the gastrocnemius.
Targeting One Calf Muscle Over the Other
It is interesting to note that your gastrocnemius and soleus are referred to as “synergists,” which means that they mainly serve the same function. However, you can manipulate your training to target one muscle more than the other based on the degree of knee flexion you have.
Since the gastrocnemius crosses both the knee and ankle joint, while the soleus only crosses the ankle, your gastrocnemius is primarily active during standing calf raises, whereas your soleus is more heavily recruited when doing bent knee calf raises (seated).
Later on, I’ll share my top 6 banded calf exercises that work both of these muscles to maximize your calf training and development.
Benefits of Training the Calves With Bands
The benefits of training the calves with bands include:
Perfect way to warm up. Plenty of people warm up their quads, glutes, and hamstrings before they workout, but they rarely warm up their calves. Failing to properly warm up your calves can increase your risk of injury.
Using bands to perform some of the exercises below is a great way to very quickly warm up your calves and Achilles tendon. Getting just a bit of blood flow in will help you perform optimally, and will keep you healthy in the long run.
Constant tension. Unlike free weight or bodyweight movements, the elasticity of banded resistance means your muscles are under constant tension.
This keeps them working throughout the entire range of motion, which will increase time under tension, increase muscle activation, and encourage more growth.
Can help train the top range of motion. This benefit is due to the principle of linear variable resistance (LVR), which basically means that bands provide more resistance as the band is stretched.
Since your band will be the most stretched out at the top of your range of motion in most of these exercises, you will be working harder to complete each rep. This will increase your pump and help you stimulate more growth.
Minimal equipment required. To train your calves effectively without any specialty equipment (calf machines, weights, monkey foot attachments, etc.) you would need to do a billion bodyweight reps.
With these exercises, you can effectively train your calves from anywhere, using only a resistance band (which is extremely lightweight and compact).
Better form. Finally, I see plenty of people with great form on calf exercises when they are just performing bodyweight movements, but that form often goes out the window when they add some weight.
When you use bands for resistance, the tension is not so heavy that you start performing the movements incorrectly but you’ll get a much better stimulus than doing endless bodyweight calf raises.
6 Best Calf Exercises With Bands
The 6 best calf exercises to perform with bands include:
1. Banded Ankle Pumps
This is a great exercise that you can perform seated on the ground to target your gastrocnemius, and soleus, and even improve your ankle mobility. I prefer doing banded ankle pumps one leg at a time to focus on each calf separately.
How To
Begin seated on the ground with your right knee bent and your right foot on the floor. Your left leg should be extended straight. Loop a band around the ball of your left foot.
Holding the other end of the band in your hands, press the toes of your left foot away from you. Pretend you’re pumping a gas pedal.
Pause for a few seconds with your foot extended like this. Fight the urge to let the band bring your toes back towards you as you pause.
Bring your toes back towards you so that they are facing the ceiling. Do this slowly and controlled, fighting the band tension.
Perform the same on your other foot.
Pro tip: Make sure that when you’re pressing the gas pedal, you keep your foot straight rather than letting your foot roll to one side or the other. Depending on your ankle mobility, this may be difficult.
2. Banded Standing Single Leg Calf Raise
This is a great banded variation of the traditional standing single-leg calf raise. It is a staple for a reason, as you will feel a great burn in both of your calf muscles. Using a band increases the difficulty of the traditional calf raise so that you can build strength and muscle more effectively.
How To
Step on the band with one foot. Make sure that the band is under the ball of your foot, and not your heel.
Keep your other foot off of the band and instead hold this foot up in the air so that you’re loading one leg at a time.
Grab the band with both hands, raise the band up, and place it on your shoulders. If it does not stretch this far, just hold it in your hands high enough that there is noticeable tension.
Balancing on the foot that is pinning the band down, raise your heel and bring yourself up on your toes.
Stay in the top position for a moment, flexing your calf muscles and fighting the band tension.
Slowly lower yourself back to start (foot flat on the ground).
Repeat for reps, and then switch legs.
Pro tip: For a deeper stretch, perform this movement on an elevated surface like the first step of your stairs. This will allow you to drop your heel lower than where the floor would be, and get a better stretch in the bottom position.
3. Banded Seated Calf Raise
The first two movements have been gastrocnemius dominant, whereas this exercise will target your soleus muscle. The soleus is emphasized in this exercise because your knees will be bent at approximately 90 degrees.
How To
Sit in a chair that allows you to place both feet flat on the ground with your knees bent at approximately 90 degrees.
Step on a resistance band with both feet, placing it underneath the balls of your feet.
Cinch the band around your knees in a way that it will fight you when you raise your heels up and go on your toes.
Perform the calf raise by lifting your heels off the floor as high as you can, pausing for a second at the top against the band resistance, and then slowly lowering your heels back to the floor.
Pro tip: If your band is too loose to feel a significant burn when it is pinned below your feet, you can loop it once so that the band has a smaller circumference. This will effectively cut the band in half and should give it much more tension.
4. Banded Soleus Raise
A banded soleus raise is similar to the seated calf raise listed above but requires a smaller mini band (otherwise known as a hip band) that you step through and loop around your thighs to perform the movement.
How To
Stand with your feet at hip-width apart. Make sure you have a flat back and brace your core.
Loop a resistance band above your knees. You should feel it trying to pull your knees together, and it should be tight enough that you actively have to work to keep your knees apart (without it being impossible).
Push your hips back and squat down until your knees are bent to about 90 degrees.
Holding this squat, slowly raise yourself onto the balls of your feet. Essentially doing a calf raise in a squat position.
Pause at the top and feel your calves contract.
Slowly lower your heels back to the floor and then repeat.
Pro tip: If you don’t have a mini band, you can loop your longer resistance band multiple times until it is a small enough circle that you can loop it around your thighs and it will provide resistance.
Also, if you struggle to maintain your balance on this exercise, feel free to hold onto a stable surface.
5. Banded March with Calf Raise
This is a great exercise that not only works your calf muscles but will elevate your heart rate and serve as a form of cardio. It’s another exercise that would best be performed with a mini band, rather than a full-size loop band.
Note that in the video, this lifter does not perform the calf raise portion and is instead focused on working their psoas muscle in their hip. This is a great variation where your calves can simply be targeted by pausing at the top of the movement and performing a single leg calf raise against band tension.
How To
Start by standing tall with your feet hip-width apart.
Loop a mini resistance band around the balls of your feet.
Raise one knee up towards the ceiling.
While doing this, come up onto the balls of your other foot.
Pause in this position for a moment and try to contract your calf on your foot that is on the ground. Don’t let the band pull your other foot back down.
Return to the start position and then switch sides, alternating back and forth.
Pro tip: if you have trouble balancing, perform this exercise near a wall so that you can put your hands on it for support.
6. Banded Tibialis Pull
This final exercise isn’t a calf exercise but should be included in your calf workouts because it helps to maintain the balance between the lower leg muscles.
This exercise targets the lower leg muscle on the front of your shin, your tibialis. A strong tibialis is crucial for a strong and healthy lower leg, and this exercise is a great way to make sure it is not neglected.
How To
This exercise will feel like the opposite of the banded ankle pumps.
Tie your band around a stable anchor surface (pole, squat rack, heavy dumbbell, etc). Make sure that it is only about 6-12 inches off the ground.
Sit on the ground and loop the band around the top of your foot, near your toes.
Make sure you are far enough away from your anchor point that the band is taut when your toes are pointed to the ceiling, and you can feel the band trying to pull your toes away from you.
Keeping the same pace as you would for your banded ankle pumps, slowly let the band lower your toes down (away from you), pause, and then fight the band and bring your toes back up to face the ceiling.
Hold this position for a second before performing another rep. You should feel a contraction in the muscles on your shin.
Pro tip: if you don’t train your tibialis frequently, you might have side-to-side imbalances. To sort this out, start with your weaker leg and then be sure to only perform the same amount of reps with your strong leg that you could do with your weaker one.
Sample Calf Workout Routine With Bands
Now that you’re familiar with the best banded calf exercises, it’s time to combine them into a program.
Here is an effective resistance band calf routine that you can do with some of the above exercises:
Exercise
Sets
Reps
Rest
Notes
Banded Standing Single Leg Calf Raises
4
15-20
60 seconds
Go close to failure on your sets here
Banded Tibialis Pull
3
8-12
60 seconds
Do these one leg at a time, start with your weaker leg.
Banded Ankle Pumps
3
15
90 seconds
Your calves should be fatigued, so you can rest longer. Make sure to get a good contraction
Banded Soleus Raise
3
15-20
60 seconds
Slow and controlled, do these both legs at a time.
Note that I did not include all 6 exercises. This is because some of them are very similar in how they target the calves.
It would be redundant to perform all of them on the same day, and they are better viewed as options that you can swap in and out depending on your training preferences.
Best Bands For Training Your Calves
My favorite bands for calf exercises are the Gymreapers Military Resistance Band Set because the set comes with bands that range in resistance from 20-150 lbs to satisfy every strength level.
When looking to incorporate banded exercises into your calf training, I highly recommend purchasing multiple bands so that you have different levels of resistance to choose from.
Depending on your exercises and if you are performing them unilaterally or not, or standing, crouched, or seated, you may find that you’ll need to be swapping out bands frequently.
Having a full set of bands will be the best way to make sure you are properly equipped as you get stronger, and buying them as a pack is a great way to save money.
In addition to the longer loop bands, the Gymreapers Hip Bands will be very helpful for exercises like the Banded March and Soleus Raises, and the Gymreapers Floss Bands are perfect for banded ankle pumps and tibialis pulls.
]]>
https://www.gymreapers.com/blogs/news/face-pulls-with-bands2023-08-11T10:30:39-06:002024-06-07T11:05:19-06:00How To Do Face Pulls With Bands (The Proper Way)Roc Pilon
If you’re training with limited equipment, trying to heal some shoulder pain and discomfort, or are sick and tired of dumbbell rear delt flies, banded face pulls are a great exercise that you need to try.
Banded face pulls are a phenomenal exercise for developing the muscles in your upper back and shoulder blades.
They can be implemented to improve your posture and shoulder stability or to stimulate muscle growth; however, they’re often performed incorrectly which minimizes their effectiveness.
To ensure you get the most out of your banded face pulls, I’ll teach you how to properly perform the movement with a step-by-step guide, highlight some common mistakes (and how to fix them), and discuss how you can implement them into your current routine to best support your goals.
Key Takeaways
Banded face pulls are a great exercise that mainly targets your rear delts, traps, rhomboids, and rotator cuff muscles.
The main mistakes when performing banded face pulls are using too much momentum, using too much banded resistance, and not keeping the band taut.
Banded face pulls can be used to build stability or to grow your muscles, but they will be implemented differently based on the outcome you desire.
Muscles Worked With Face Pulls
Face pulls are a great upper body exercise where the primary focus is to strengthen and build muscle in your upper back and rear shoulders, while also improving your posture and joint health.
When performed properly, face pulls engage the following 4 muscle groups:
Trapezius
Your “traps” are a large muscle in your upper back that gets heavily activated when performing this movement. They are a broad, triangular muscle that spans from the base of your skull to the middle of your back.
Since face pulls mainly work the upper back muscles near your shoulder blades, your traps are getting plenty of work in this movement.
Rear Delts
Your rear delts make up the back of your shoulders and are activated in the face pull to stabilize the shoulders by pulling them backward rather than letting them round forward.
This can be helpful long-term, as having strong rear delts can reduce your risk of developing shoulder injuries caused by too many pressing movements.
Rhomboids
Your rhomboids are the muscles that retract, elevate, and stabilize your scapula (shoulder blade). They are located in your upper back and are mainly targeted when you are retracting (squeezing together) and stabilizing your shoulder blades.
Having strong rhomboids is important for improving posture, preventing injuries, and increasing the pressing power in your chest and shoulders.
Rotator cuff
Your rotator cuff muscles surround the shoulder joint and help stabilize the arm in its socket. These muscles are not as visible as some of those mentioned above, so they are often neglected until they become a problem.
Face pulls are a great way to activate and strengthen these muscles to improve the overall stability and function of your shoulder joint.
How To Do Face Pulls With Bands: Step-By-Step Guide
Here are step-by-step instructions as to how to properly perform face pulls with a resistance band:
Grab a looped resistance band. Choose a band that has enough resistance to challenge you, but not so much that you sacrifice your form and can’t control your movements.
Set your band. Wrap the band around any stable anchor point (usually a pillar or squat rack) at face level. You can raise or lower your anchor point based on your preferred angles, but the default height should be at face level.
Take your grip on the band. I recommend an overhand grip, making sure your hands are about 12 inches apart. If an overhand grip is uncomfortable on your shoulders, you can switch to a neutral grip where your palms are facing each other and your thumbs are pointed toward the ceiling.
Step away from your anchor point. Stand far enough away that there is tension on the band even when you have your hands fully extended in front of you. Make sure that you are standing upright, facing the anchor point, and you have a very slight forward lean.
Slowly pull your hands towards you. When pulling the band towards you, make sure you first start the movement by retracting your shoulders and then following with your elbows. Keep your upper arm parallel to the floor.
Rotate your arm externally. As you pull, rotate your arm so that the back of your hand is pointing behind you. You should end up in a stance that looks like a front double bicep bodybuilding pose, making sure that your shoulder blades are still retracted.
Return to the starting position. Slowly release the band tension and resume your start position. Let your shoulders get pulled forward, and then start another rep.
Common Face Pull Mistakes With Bands
Here are the 3 most common mistakes that I see lifters make with banded face pulls:
Mistake #1: Using Too Much Momentum
The first mistake that I see very frequently with banded face pulls is using too much momentum. By this, I mean letting your upper body rock back and forth with the band to try and force extra reps or letting your biceps take over instead of focusing on performing the movement with your upper back.
People may make this mistake for a variety of reasons, but the most common mistakes are: the band tension is too heavy, they have not been taught proper technique, or they are trying to squeeze out extra reps that they cannot actually perform properly.
I understand these reasons, but this is a fairly critical mistake. Face pulls are meant to be performed strictly so that the smaller and often under-developed muscles in your upper back and shoulder blades can be targeted properly.
If you become lazy with your technique, you will reduce the muscle activation of the areas you are actually trying to train, and you may increase your risk of injury by moving in an uncontrolled manner.
How to Fix Face Pull Mistakes
To fix this mistake, you should first be aware of the proper technique.
With this in mind, you need to make sure that your feet stay planted on the floor throughout the entire set, and you do not allow your body to create momentum by rocking back and forth with the face pulls.
Instead, be sure to brace your core and lock your torso in place, so that you can only move the band as desired by retracting your scapula and recruiting the proper muscles.
If you are being mindful of the exercise and whether or not you are actually feeling a squeeze in the right muscles, you should have solved this problem. If not, you might need to lower the resistance band tension by grabbing a lighter band or standing closer to your anchor point.
Mistake #2: Using Too Much Weight
This mistake goes hand in hand with using too much momentum.
It's pretty common for lifters to select a band that’s tension weight that is just too heavy for this exercise. Remember, you are training your rear delts, traps, and rotator cuff muscles. You are NOT performing a high row, where you’re looking for your lats and biceps to take over.
The rear delts are a smaller muscle group, and if you're not used to working them, you will need to go lighter than you would with other shoulder exercises.
How to Fix Using Too Much Weight
If you find you're using momentum to pull the attachment toward your body, if you can't control the weight as it returns to the stack, or if the resistance is pulling your body forward, then you should probably reduce the amount of weight you're trying to lift.
To target the rear delts effectively, you need to make sure you're not inadvertently recruiting additional muscle groups to take over to perform the exercise.
Mistake #3: Allowing the Band To Go Slack
Another common mistake is not keeping the resistance band taut as the exercise is performed, which reduces the resistance and decreases the effectiveness of the training.
One of the main benefits of banded training is that your muscles are actively engaged throughout the entire range of motion of an exercise, regardless of what position they are in or the forces of gravity. If you allow your band to go slack, you are robbing your muscles of that benefit.
On top of that, if you start your pull with slack in the band then you may increase your risk of injury when the band tightens suddenly.
How to Fix Allowing the Band To Go Slack
This is a simple problem to fix. You simply need to stand far enough away from your anchor point to ensure the band is taught before you initiate the face pull and remain taut between every repetition.
Implementing Banded Face Pulls Into Your Training Routine
The best ways to implement banded face pulls into your training routine will vary based on your goals. However, I'll outline the two most common use cases for implementing this exercise, and explain the ideal sets and reps schemes for both.
Building Stability
If you are looking to implement banded face pulls to increase your shoulder stability, you should start by performing 2-4 sets of 10-15 reps.
If stability is your main goal, you should be focused on perfecting your form and controlling the entire movement using a lighter band. Focusing on retracting your scapula and activating your rotator cuff muscles will pay huge dividends.
I perform at least 2 sets of 15 banded face pulls before every single training session where I will be performing a push movement. I find this to be a great way to warm up my shoulders, and have noticed significantly less pain and discomfort.
Hypertrophy
If your main goal with banded face pulls is to encourage muscle growth in the targeted muscles, you’ll want to implement more volume and intensity into your face pull training.
I recommend performing 3 sets of 15-20 reps with one minute of rest in between each set. Then, you could also add a fourth and final AMRAP (as many reps as possible) set after another break.
When performing these sets, I focus on keeping a controlled tempo, limiting momentum, and focusing on the target muscle areas to ensure I’m maximizing muscle activation.
Best Bands For Face Pulls
If you’re looking to purchase bands for face pulls, I highly recommend getting a set of multiple bands. This will provide you with varying levels of resistance to choose from and will help you get the best gains long-term.
The military resistance band set by Gymreapers is a great set of bands for stability, strength, and muscle growth because they come in a variety of resistance levels. They work for face pulls and many other banded exercises, making them ideal for training multiple muscle groups. You can pick from several tension levels to match your abilities:
Desert Tan - 20 to 35 lbs.
OD Green - 30 to 60 lbs.
Dark Earth - 40 to 80 lbs.
Ranger Green - 50 to 120 lbs.
Coyote Brown - 60 to 150 lbs.
In my opinion, the best bands for face pull variations will be the Desert Tan or the OD Green. The other bands will likely be too heavy for face pulls and will probably lead to the common mistakes we discussed, so it’s best to save those for other banded exercises.
]]>
https://www.gymreapers.com/blogs/news/shoulder-warm-up-with-bands2023-07-12T17:25:58-06:002025-09-18T16:06:47-06:00Best Shoulder Warm Up With Bands (According to Trainer)Roc Pilon
Drawing from nearly a decade of personal training experience, I'm here to guide you through the optimal shoulder warm-up routines with bands to boost strength, flexibility, and joint stability.
I recommend a mix of band pull-aparts, overhead band stretches, and band pass throughs. This combination of movements effectively warms up all portions of the shoulder. Perform each exercise for 20 to 30 slow and controlled reps, avoiding jerking motions.
Keep reading for detailed explanations of these and other exercises, what mistakes to avoid, and what bands to use for your warm-up routine to protect your shoulders from aches and injuries.
Key Takeaways on Shoulder Warm Ups
You must warm up the three deltoid heads and four rotator cuff muscles before training to promote safety, stability, and good performance.
Resistance bands are ideal for a shoulder warm-up because they offer constant tension, promote joint stability, lead to greater muscle activation, and allow you to do many exercises.
Picking the correct movements and learning how to perform them correctly will make a massive difference in your warm-ups, ensuring better performance and joint stability.
Shoulder Muscles: Brief Overview
Despite their relatively small size, the shoulder muscles play an integral role in many arm motions and promote stability during upper body exercises like the bench and overhead press, pull-ups, rows, etc.
What muscles make up the shoulders?
Deltoids
The deltoid, which gets its name because of its triangular shape (resembling the Greek letter delta - Δ), is a superficial muscle enveloping the shoulder joint. The delts create a round or ‘capped’ shoulder appearance when developed. The delts have three heads:
Anterior (front): it makes up the frontal portion of the shoulders. One of its primary functions is to assist the chest and triceps during ‘push’ activities: push-ups, bench presses, etc.
Lateral (middle): it makes up the middle portion of the shoulders, and developing it contributes to upper body aesthetics. The lateral head is primarily responsible for arm abduction (lifting your arm to the side, away from the midline of your body).
Posterior (back): it makes up the rear portion of the shoulders and contributes to upper back aesthetics. The rear deltoids assist during pull movements like lat pulldowns and play a role in lifting your arms to your sides and back.
Rotator Cuff
The rotator cuff consists of four smaller muscles located underneath the deltoids. Their primary function is stabilizing the shoulder joint and supporting mobility by contributing to abduction and rotation.
The four rotator cuff muscles are the subscapularis, infraspinatus, teres minor, and supraspinatus. Individually and collectively, these muscles play a role in numerous arm motions and keep the humeral head (upper arm bone) centered in the joint socket.
Benefits Of Using Bands To Warm Up The Shoulders
Main reasons to use resistance bands for your shoulder warm-ups:
Greater muscle activation. Resistance bands provide constant tension, which allows you to activate the target muscles more effectively.
Less strain on joints and tissues. Thanks to the greater muscle activation, bands allow you to target all the muscles of your shoulders and warm up effectively without using as much resistance, which reduces the stress on your joints and tissues.
Easier to progress the resistance. You can adjust the amount of tension you get by manipulating the length of the resistance band or by using a thicker one.
Promotes joint stability. Shoulder joint stability largely depends on the strength and coordination of the muscles surrounding the joint. Since bands can improve muscle activation, they can strengthen the smaller and larger muscles, teaching them how to work together and enabling them to provide adequate joint support.
Pick from many effective exercises. You can use resistance bands to do various exercises and target your shoulders from multiple angles to warm up all areas well before training.
Affordability and portability. Resistance bands are light, portable, and relatively inexpensive, which makes them a fantastic fitness tool. You can take one or two bands to the gym to warm up your shoulders and other muscle groups before starting your workouts.
Boost your shoulder strength and flexibility with these top nine banded shoulder exercises. Incorporate these essential moves into your warm-up routine to prepare your shoulders for any workout. Each exercise targets specific shoulder muscle. Check out the quick how-to instructions below each video.
1. Band Pull-Aparts
Target muscles: rear deltoids, trapezius, and rhomboids
How to do Band Pull-Aparts
Grab a loop band with both hands.
Extend your arms forward with your elbows straight and palms facing down.
Inhale and pull the band apart, bringing your arms to your sides and back.
Bring your arms to the starting position as you exhale.
2. Overhead Band Stretches
Target muscles: rear deltoids, trapezius, lats, and rhomboids
How to do Overhead Band Stretches
Wrap one end of a loop band overhead––for example, on a pull-up bar.
Grab the opposite end of the band with your right hand and take two steps back.
Hinge at the hips to lean your torso forward several degrees. The goal is to align your torso with the band attachment point.
With your arm straight, push your buttocks back and straighten your back.
Hold the position for 30 to 60 seconds. You should feel a stretch in your shoulder and lat muscle.
Once finished, grab the band with your other hand and repeat.
3. Band External Rotations
Target muscles: rotator cuff, rear and lateral deltoids, and trapezius
How to do Band External Rotations
Grab a loop band with both hands.
Position your elbows at 90 degrees and pin them to your sides.
Bring your chest out and inhale.
Pull the band apart, rotating your arms out and keeping your elbows glued to your sides.
Pause briefly and bring your hands to the starting position.
4. Banded Face Pulls
Target muscles: rear deltoids, rotator cuff, trapezius, and rhomboids
How to do Banded Face Pulls
Wrap one end of a loop band at head level or slightly higher.
Grab the opposite end of the band with both hands. Your thumbs should face the ceiling.
Take a couple of steps back, bring your chest out, and stagger your stance, bringing one foot forward and one back for stability.
Inhale and pull the band to your face in one fluid motion.
Pause briefly and extend your arms forward as you exhale.
5. Banded Y-Raises
Target muscles: all deltoid heads, rotator cuff, and trapezius
How to do Banded Y-Raises
Wrap one end of a loop band at collarbone height.
Grab the other end with both hands.
Step back, extend your arms, and have your palms facing down.
Bring your chest out, engage your abs, and inhale.
Pull the band overhead and spread your arms in one fluid motion without bending your elbows.
Bring your arms to the starting position and exhale.
6. Banded W-Raises
Target muscles: rear deltoids, rotator cuff, trapezius, and rhomboids
How to do Banded W-Raises
Wrap a loop or open-ended band to a sturdy object at collarbone height.
Grab both ends of the band with your wrists neutral and thumbs facing the ceiling.
Take a couple of steps back to stretch the band.
Bring your arms in front of your body and bend your elbows at 90 degrees.
Retract your shoulder blades and inhale.
Extend your arms to your sides and back in one fluid motion without changing the elbow angle.
Pause briefly and bring your arms to the starting position as you exhale.
7. Band Lateral Raises
Target muscles: lateral deltoids
How to do Band Lateral Raises
Grab a loop resistance band with both hands.
Step over one end of the band and stand tall.
Position your arms to your sides and puff your chest out. Maintain a slight bend in your elbows.
Inhale and raise your arms laterally in one fluid motion until your wrists and elbows align with your shoulders.
Pause briefly and lower your arms to the starting position as you exhale.
8. Band Shoulder Press
Target muscles: lateral and front deltoids, triceps, and upper chest
How to do Band Shoulder Press
Step over a loop band with both feet.
Grab the band with both hands, stand up, and lift your arms to your shoulders with your elbows bent.
Puff your chest out, inhale, and contract your abs.
Press the band, fully extending your elbows and bringing your hands overhead.
Lower the band to the starting position. Your elbows should be slightly lower than your shoulders. Exhale.
9. Band Pass Throughs
Target muscles: all deltoid heads, trapezius, rhomboids, and rotator cuff
How to do Band Pass Throughs
Grab a loop resistance band with an overhand grip.
Stand tall with your arms straight and to your sides. Your palms should face you, and the band should be in front of your hips.
Inhale and move the band behind your back in one fluid motion, keeping your elbows straight.
Pause briefly and return the band to the starting position as you exhale.
Best Banded Shoulder Warm-Up
Now you know how to perform the exercises, it’s time to learn how to combine them to create the ultimate banded shoulder warm-up. Here is a simple shoulder warm-up routine you can do with a single light resistance band:
Exercise Name
# of Reps
Band Pass Throughs
20-25
Band Pull Aparts
20-25
Overhead Band Stretches
20-25
Banded Face Pulls
20-30
Band Shoulder Press
15-20
I recommend including this routine in your warm-up sequence before ‘push’ workouts, where you train your shoulders, chest, or triceps. You can also do the routine before training other muscle groups, such as the back or quadriceps, if specific exercises cause shoulder discomfort.
For example, if you struggle to get into the correct position for low-bar squatting, spending extra time to warm up your upper back and shoulders with this routine can be helpful.
It shouldn’t take you longer than two to three minutes to complete, and you shouldn’t experience much shoulder fatigue by the time you’re done. Feel free to switch out any of these exercises in this sample warm-up for others in the list above that target similar muscles.
Best Bands To Use For Your Shoulder Warm-Up
The Desert Tan resistance band from the Gymreapers military set is ideal for shoulder warm-ups and general mobility work.
This band provides 20 to 35 lbs of resistance, which is ideal for activating the shoulders and upper back without generating too much fatigue that would impair your training performance.
The band is looped, which means you can easily tie it to external objects like the upright of a squat rack or a pull-up bar and use it for exercises like banded W and Y raises, face pulls, rows, and lat pulldowns.
OD Green from the same resistance band set is also an option, especially if you’ve been warming up for a few minutes and want to do some warm-up sets before bench and overhead presses. It provides 30 to 60 lbs of resistance, which works well for intermediate and advanced trainees.
The remaining bands in the set cover higher tension ranges and aren’t as suitable for general warm-up work, especially for small muscle groups like the shoulders. However, these bands are handy for many other activities like push-ups, pull-ups, upright rows, curls, etc.
]]>
https://www.gymreapers.com/blogs/news/back-exercises-with-resistance-bands2023-07-12T17:24:54-06:002024-06-07T11:19:31-06:0012 Best Back Exercises With Resistance Bands (+ Sample Workout)Roc PilonDo you want to build a strong and broad back at home, outside, and while traveling? If so, I highly recommend looking into resistance bands. Here is why:
Resistance bands are excellent for back training because they improve muscle activation and help you establish a better mind-muscle connection. Bands can also be used for a variety of back exercises that target the back muscles from different angles to encourage more strength and muscle development.
To maximize your results while training with bands, you must know which back exercises to do, how to perform them properly, and how to incorporate them into a workout.
Key Takeaways
The back consists of many large and small muscle groups, including the trapezius, lats, rhomboids, rear deltoids, erector spinae, and teres major and minor.
Bands can be used for a variety of exercises, provide constant tension, and improve muscle activation, making them ideal for those who want to build strength and mass with limited equipment.
Choosing the right bands is essential for increasing the variety of movements you can perform and challenging yourself appropriately with the correct loads.
Trapezius (the ‘traps’): This large muscle is located on the upper portion of the back and is involved in scapular retraction (pulling the shoulder blades back), shoulder stability, and neck alignment.
Latissimus dorsi (the ‘lats’): These are the largest muscles in the upper body and make up a significant percentage of the back. The lats contribute to pulling movements like pull-ups, and one of their functions is to flex the torso laterally.
Rhomboids: These small muscles are situated between the shoulder blades, assisting with scapular retraction and supporting the lats during pulling activities.
Erector spinae: These muscles run along both sides of the spine. Their primary function is to extend the spine and assist the lats with lateral torso flexion.
Teres major and minor: These are smaller muscles located close to the scapula (shoulder blades), and their primary function is to promote stability of the humerus (upper arm bone) in the shoulder socket.
Benefits of Training the Back With Bands
Here are five reasons to use resistance bands to elevate your back training:
Prominent back muscle contractions. Bands offer linear variable resistance (LVR), which means the tension of the bands increases as you stretch it out and get closer to the top of each repetition.
This forces your back muscles to contract harder at the top of each repetition, potentially triggering a more significant growth response.
Could help you establish a mind-muscle connection. Thanks to the constant tension and LVR, resistance bands can make it easier to feel your back muscles stretching and contracting on each repetition which can help you target them more effectively while training.
“Just because resistance bands are cheaper than free weights doesn't mean they'll give you a workout so easy you barely break a sweat. In fact, one of the key resistance band benefits is their ability to strengthen your muscles by increasing the time they spend under tension.”
Can be used for a variety of movements. The beauty of bands is that gravity doesn’t influence the resistance, so you can attach a band overhead, at chest height, or close to the floor and target your back muscles from all angles.
Provide assistance for some essential back movements. You can use a loop resistance band for assistance on activities like the dead hang, chin-up, pull-up, scapular pull-up, and an inverted row.
The band would remove some of the resistance, making it easier to do full repetitions for those who don’t yet have the strength to do these exercises unassisted.
Good overloading ability. Progressive overload, the act of increasing the difficulty of your training over time, is crucial for long-term muscle and strength gain.
Bands can provide progressive overload in many ways (i.e., increasing the time under tension, increasing the load, overloading a certain portion of the movement, etc); all of which help to improve the size and strength of your back muscles.
This exercise targets the lats, rhomboids, and trapezius muscles. The movement pattern resembles seated cable rows.
How to do Horizontal Band Row
Anchor a resistance band at stomach height. Loop it over a sturdy object (e.g., the upright of a squat rack) or use a door anchor.
Grab the opposite end of the band with both hands.
Take a couple of steps back to stretch the band.
Bring your chest out, take a breath, and engage your abs.
Pull the band to your stomach in one fluid motion while pinching your shoulder blades together.
Pause briefly and extend your arms as you exhale.
Pro tip: If the band pulls you forward, you can stagger your stance (bringing one foot forward and the other back) for a more stable position.
2. Single-Arm Horizontal Row
The one-arm version of the band row trains one side of the body at a time, allowing you to focus on working one side at a time and reducing the risk of muscle imbalances (having one side stronger than the other).
How to do Single-Arm Horizontal Row
Anchor a resistance band at stomach height.
Grab the opposite end of the band with your right hand.
Take a couple of steps back.
Bring your chest out, inhale, and squeeze your abs.
Pull the band to the side of your stomach in one fluid motion while pinching the shoulder blades together.
Slowly extend your arm and exhale.
Once finished training one side, grab the band with your left hand and repeat.
Pro tip: Allow your shoulder to move forward slightly (protraction) and rotate your torso by a few degrees as your arm extends, then focus on pulling the shoulder back and squeezing your shoulder blades together as you pull the band towards you; this encourages a full range of motion.
3. Band Lat Pulldown
The banded lat pulldown is a vertical pulling motion that trains the lats, biceps, and middle back muscles. It is a great banded alternative to the cable lat pulldowns.
How to do Band Lat Pulldown
Attach a looped band overhead. Tie the band to a horizontal bar or use a door anchor (positioned on the top of the door frame).
Grab the band with both hands and step back to stretch it. Use an overhand (palms facing forward) or neutral (palms facing one another) grip.
Bring your chest out, engage your abs, and inhale.
Pull the band to your upper chest in one fluid motion, pulling your elbows behind you and squeezing your lats.
Slowly extend your arms and exhale.
Pro tip: You might have to get down on your knees or sit on the floor to stretch the band out and get a full range of motion, especially if you’re taller.
4. Single-Arm Band Lat Pulldown
The single-arm banded lat pull-down is another fantastic single-arm variation that allows you to focus on raining one side at a time and encourages you to work through any side-to-side imbalances you may have.
How to do Single-Arm Band Lat Pulldown
Attach a looped band overhead.
Grab the band with your right hand and step back to stretch it.
Bring your chest out, take a breath, and engage your abs.
Pull your elbow behind you while keeping your shoulder back to engage the lats.
Pause briefly and extend your arm as you exhale.
Once finished training one side, grab the band with your left hand and repeat.
Pro tip: Allow your shoulder blade to elevate as your arm extends and follow up with a lateral torso crunch as you pull the band back and squeeze your lat. These minor technique tweaks can result in a superior lat stretch and contraction.
5. Bent-Over Band Row
The bent-over band row is another horizontal pull, similar to the horizontal band row, but it involves holding yourself in a bent-over position that engages your whole posterior chain. The main back muscles worked in this variation are the lats, traps, rhomboids, erector spinae, and biceps.
How to do Bent-Over Band Row
Grab a loop resistance band with both hands and step over it.
Lean forward until your torso is roughly parallel to the floor.
Bring your chest out, take a deep breath, and squeeze your abs.
Pull both ends of the band in one fluid motion until your elbows are at torso level or slightly higher.
Slowly extend your arms as you exhale.
Pro tip: You can adjust the resistance with your foot stance. A wider stance allows you to stretch the band more, creating more tension and making it more challenging. In contrast, a narrower stance (or placing only one foot on the band) doesn’t stretch the band as much, making it easier.
6. Seated Band Row
The seated band row is also a horizontal pulling exercise, but it is an easier variation than the standard horizontal row and the bent-over row because you don’t have to focus on much to hold your body in position.
For this reason, a seated band row is a great option for beginners who need to focus on mastering the pull before trying to incorporate a postural component.
How to do Seated Band Row
Attach a resistance band in a low position––for example, 5 to 10 inches above the floor. You can use a door anchor or wrap a loop band over one upright of a squat rack.
Grab the band with both hands, take a couple of steps back to stretch it, and sit on the floor.
Bring your chest out, engage your abs, and take a breath.
Pull the band to your mid-stomach in one fluid motion, squeezing your upper back muscles.
Slowly extend your arms as you exhale.
Pro tip: Use the mental cue of ‘pulling through your elbows’ and imagine that your hands are mere hooks for the band. Doing so can improve back activation by letting the back do most of the work and having your arms just follow through.
7. Band-Assisted Pull-up/Chin-up
Band-assisted pull-ups and chin-ups are fantastic for people who don’t yet have the strength to do these movements with their entire bodyweight. Bands provide the opportunity for all lifters to take advantage of these fantastic vertical pulling movements, to develop their back muscles to the fullest.
“The banded pull-up can be a useful training exercise for building the raw muscle and strength required for this movement, as well as the direct motor mechanics required to perform strict pull-ups.”
-Oleksiy Torokhtiy, European & World championships medalist
How to do Band-Assisted Pull-up/Chin-up
Wrap a loop band over a pull-up bar. Tuck one end of the band through the other and pull tight to secure it around the bar.
Place your feet on the band (using a bench for assistance if necessary), reach up, and grab the bar with an overhand (palms facing forward) or underhand (palms facing back) grip. Your hands should be roughly shoulder-width apart.
Bring your shoulders back, take a deep breath, and squeeze your abs.
Pull yourself up in one fluid motion, bringing your chin over the bar.
Pause briefly and slowly lower yourself to the starting position, fully extending your arms.
Exhale.
Pro tip: Keep your shoulder back throughout the entire movement, especially at the top when your chin is over the bar. This will help you maximize lat activation to build bigger and stronger lats over time.
8. Band Deadlift
Performing deadlifts with a band leads to greater muscle contraction at the top of each rep, thanks to the linear variable resistance that bands provide. This is a great exercise for those who want to get stronger and those who want to challenge their muscles in new ways to encourage more growth.
This exercise can be performed with a band by itself or can be performed using bands attached to a barbell depending on the equipment you have available.
How to do Band Deadlift
Grab a loop resistance band by its two ends and step over it with both feet.
Have your feet a few inches apart.
Bend your knees and lean your torso forward by hinging at the hips.
Bring your chest out, engage your abs, and inhale.
Press through your heels and pull forcefully to stand up, driving your hips forward and underneath you.
Stand tall without hyperextending your lower back, pause briefly, and return to the starting position while keeping your back neutral.
Exhale near the bottom.
Pro tip: You can use multiple loop bands to create the necessary resistance. For example, the Coyote Brown, Ranger Green, and Dark Earth bands from this set collectively provide you with up to 350 lbs of resistance.
9. Band Face Pulls
Face pulls are one of the best exercises to train the smaller upper back and shoulder muscles: the rear deltoids, rhomboids, and mid trapezius. For this reason, banded face pulls are excellent for building shoulder stability.
How to do Band Face Pulls
Attach a resistance band at head level or slightly higher. Tie the band to a sturdy object, such as the upright of a squat rack, or use a door attachment.
Grab the opposite end of the band with both hands and take a couple of steps back to stretch it.
Stagger your stance, retract your shoulder blades, and inhale.
Pull the band to your face in one fluid motion, squeezing your upper back.
Slowly extend your arms and exhale.
Pro tip: Keep your elbows high and wrists neutral (thumbs facing the ceiling) as you pull to keep the focus on the upper back and allow for a more comfortable shoulder position.
10. Band Shrugs
Shrugs are a fantastic movement that develops the trapezius through shoulder elevation. They’re a great alternative to barbell shrugs for those with limited equipment.
How to do Band Shrugs
Grab a loop resistance band with both hands.
Step over the middle of the band and have your feet a few inches apart.
Stand tall and position your arms to your sides.
Bring your chest out, engage your abs, and inhale.
Shrug your shoulders in one fluid motion. Imagine that you’re trying to touch your ears with your shoulders.
Pause briefly at the top position and slowly lower your shoulders as you exhale.
Pro tip: Like deadlifts, you can use multiple bands for additional resistance if a single one doesn’t challenge you enough.
11. Straight Arm Band Pullover
Pullovers are an exercise that primarily trains your shoulders and lats without working your biceps because there is no elbow flexion. This is a great option for those who find that their biceps fatigue before their back does because it allows them to train their back until it fatigues without worrying about other muscles interfering.
How to do Straight Arm Band Pullover
Attach a resistance band overhead––for example, tie one end to the top of a squat rack or pull-up bar.
Grab the opposite end of the band with both hands.
Take a couple of steps back to stretch the band.
Lean your torso forward by pushing your buttocks back to maintain a neutral spine.
Bend your elbows slightly, take a deep breath, and engage your abs.
Pull the band from an overhead position to your thighs without bending your arms.
Pause briefly and bring your arms to the starting position. You should feel a stretch in your lats. Exhale.
Pro tip: When the band comes into contact with your thighs, pause, and squeeze your lats by applying force into your thighs and puffing the chest up simultaneously.
12. Band Upright Row
The banded upright row is a fantastic compound exercise to develop your upper back, shoulders, biceps, and midsection.
How to do Band Upright Row
Grab a loop band with both hands.
Step over the band with both feet.
Assume a comfortable foot stance with your toes pointing slightly out.
Have your arms straight and palms facing your body.
Retract your shoulder blades, inhale, and squeeze your abs.
Pull the band from your hips to your chest in one fluid motion by bringing the elbows up to around shoulder height. The band should travel up in a straight line.
Pause briefly and slowly lower your arms as you exhale.
Pro tip: Avoid elevating your elbows above your shoulders because doing so can increase the risk of shoulder impingement.
Sample Back Workout Routine With Bands
Now that we’ve covered the most effective banded back exercises, here is how you can put them together to design an effective workout.
Exercise
Sets
Reps
Rest Period
Band-assisted pull-ups
3-4
To failure
120-180 seconds
Bent-over band row
3-4
12-15
90-120 seconds
Seated band row
3
12-15
90-120 seconds
Band shrugs
3
12-20
60-90 seconds
Band face pulls
2-3
15-25
60 seconds
Here are a few potential exercise swaps:
Band-assisted pull-ups ⇒Band-assisted chin-ups
Bent-over band row ⇒Band lat pulldown
Seated band row ⇒Band deadlift
Band face pulls ⇒Band upright rows
Best Bands For Training Your Back
Loop resistance bands are ideal for back training because they are versatile and easy to set up and anchor in position. Plus, you can use a loop band for assistance during pull-ups and chin-ups.
This means you can pick the perfect band for each exercise or even combine two or more bands on activities where you might be able to lift more weight: deadlifts, shrugs, etc.
Additionally, a band set saves you more money than purchasing individual bands. Even if you don’t get much use from Ranger Green and Coyote Brown now, they will be available when you’ve built the necessary strength.
On top of that, these bands are made of high-quality elastic material and are likely to last a long time, even with regular use.
]]>
https://www.gymreapers.com/blogs/news/inverted-rows-with-bands2023-07-12T17:23:41-06:002023-08-16T17:32:33-06:00How To Do Inverted Rows With Bands (The Proper Way)Roc PilonIf you’ve mastered the inverted row and are looking for a way to progress it, then you need to start incorporating banded inverted rows.
Banded inverted rows involve the standard row exercise, but with your body weight and a resistance band adding to the challenge. The band increases the intensity, encouraging greater strength over time, allowing you to progress the inverted row in more ways than by simply adding more reps or total sets.
To help you get the most out of this exercise, I’ll provide a detailed step-by-step guide on how to perform it, identify common mistakes and their solutions, and give advice on incorporating banded inverted rows into your workout routine.
Muscles Worked With Inverted Rows
Banded inverted rows work the following muscle groups:
Latissimus Dorsi (Lats)
The latissimus dorsi, or lats, are the primary muscles engaged during inverted rows. They are large muscles in your back that give it its V shape. Inverted rows require pulling a load (your body) horizontally, a movement that heavily engages these muscles.
Rhomboids
Rhomboids are located in your upper back, between your shoulder blades. They play a vital role in retracting the scapula (pulling your shoulder blades together), which is a primary movement in inverted rows.
Trapezius
The trapezius, or traps, is a large muscle that extends down the back of the neck and upper spine. It aids in the pulling motion during inverted rows.
Biceps Brachii
The biceps are the muscles on the front of your upper arm. While the biceps are not the primary muscle group worked, they play a significant role in the pulling motion by bending your forearms toward your upper arm at the elbow.
Erector Spinae
These are a group of muscles running along your spine. They maintain the straightness and curvature of the spine, providing stability during the inverted row to keep your body in a plank-like position.
Deltoids
The deltoids, or delts, are the rounded muscles over the top and sides of the shoulders. The posterior deltoids are engaged during the rowing motion.
How To Do Inverted Rows With Bands: Step-By-Step Guide
While the inverted row is pretty straightforward and could probably be imitated just by seeing it done (it’s just an upside-down push-up after all, right?), it’s worth going through the steps to make sure you’re doing it right.
Step 1: Set Up Your Band
Select an appropriate resistance band and securely anchor it so it will stretch across your chest from side to side. Ensure it is tightly fastened to a sturdy post or object on the floor on either side of you. Make sure the band doesn’t get in the way of your arms performing the row.
Step 2: Lay Under the Bar
Lay on the floor with a barbell secured about 2-3 feet above the ground, so that your arms can fully extend without your back hitting the floor. Take a shoulder-width grip on the bar.
Step 3: Pull Yourself Up
Pull your chest towards the band by bending your elbows and squeezing your shoulder blades together. Ensure your body moves as a unit, remaining in a plank-like position. As you pull toward the bar, the band across your chest will increase in tension, making it harder than if you were only pulling your body weight.
Step 4: Lower Back Down
Slowly extend your arms and lower your body back to the starting position. Maintain control to ensure a smooth motion.
Step 5: Repeat For Reps
Repeat this motion for as many reps as the set calls for, or until you are unable to maintain good form with each rep.
Remember, the key to an effective banded inverted row is form and control, not speed.
Common Banded Inverted Row Mistakes
Understanding and avoiding common mistakes can significantly improve the effectiveness of the banded row.
Here are some common mistakes that I see people make with banded inverted rows:
Mistake #1: Choosing The Wrong Band
Using a band that's too strong can limit your range of motion and reduce muscle activation, while a band that's too weak may not provide enough resistance, making the band useless.
Fix: Select The Right Band
Choose a band that allows you to perform the inverted row with a full range of motion (arms straight to chest touching the bar) and proper form.
As a rule of thumb, if you can't complete at least 8 reps with good form, the band is probably too strong. If you can easily do more than 15, then the band might be too weak.
Mistake #2: Incorrect Form
The mistake I see most often is lifters performing the inverted row with terrible form. This involves letting the shoulders hunch forward as you pull, letting the lower back arch, or leaving the hips behind.
All of these incorrect techniques increase your risk of injury and decrease the effectiveness of the exercise.
Fix: Maintain Proper Form
Keep your body straight and your core engaged throughout the movement so that your body moves as a unit. Pull your shoulder blades back and down as you row so that your shoulder blades are pinched together at the top of the movement when your chest touches the bar.
Mistake #3: Limiting Range of Motion
Not using the full range of motion can prevent you from getting the full benefits of the exercise because if you don’t complete the entire rep then you don’t build strength in every portion of the lift and you don’t activate your muscles to their fullest extent.
Fix: Full Range of Motion
Ensure you pull yourself up until your chest touches or almost touches the bar and lower yourself until your arms are fully extended. Make sure the barbell is set high enough that you can fully extend your arms without letting your back touch the floor.
Mistake #4: Performing the Exercise Too Quickly
Performing the exercise too quickly causes you to use momentum, rather than the target muscles to complete the repetition, which reduces the effectiveness of the exercise because your muscles are no longer doing the work.
Fix: Control Your Movements
Perform the exercise in a controlled manner, focusing on muscle contraction and relaxation. If you struggle to slow down, then try implementing a tempo by counting to 3 on the way up, pausing with your chest touching the bar for a second, then counting to 3 again as you lower.
Implementing Banded Inverted Rows Into Your Training Routine
Including banded inverted rows in your workout routine can significantly enhance your upper body strength. Here's how to incorporate them into your program:
Sets and Reps
Start with 3 sets of 8-16 reps. As your strength improves, you can increase your number of sets (up to 5 sets) and increase the number of reps you can do within the rep range. The last few reps should be challenging, but not so difficult that your form breaks down.
Load
Start with a band that allows you to perform the exercise with good form for 8-16 reps, and gradually increase the resistance as you get stronger so that you can keep your sets in the 8-16 rep range.
For example, if you can do 10 reps with a light resistance band, then work until you can do 16 reps with the light resistance band. Once you’ve mastered that, increase to a medium resistance band and try for at least 8 reps.
You can also add tempos and pauses to make them more challenging if you’re not ready to progress to the next resistance band, like pausing with the bar on your chest for a second or two or making your descent last for 5-8 seconds as you fight the pull of the band.
Frequency
For best results, muscles should be trained twice a week for 6-8 sets over the course of the week. You can include banded rows into your upper body or dedicated back days 1-2x a week to help hit that frequency target.
Exercise Order
Inverted rows are typically performed after compound exercises like squats or deadlifts. You can also do them towards the end of your workout as a burnout exercise. Whatever your training split, these should be treated as an accessory exercise to support your compound lifts, which means they come later in your workout.
Choosing the right resistance band can enhance the effectiveness of your inverted rows, and ensure you have a great tool in your gym bag for years to come.
My top recommendation is GymReapers’ Resistance Bands because they come in different resistances, allowing you to progress as you get stronger. The bands are durable and made from natural latex, ensuring consistent resistance and reliable longevity.
Using high-quality bands like those offered by GymReapers can help you get stronger and build more muscle.
]]>
https://www.gymreapers.com/blogs/news/banded-pull-ups2023-07-12T17:19:38-06:002024-07-19T13:52:27-06:00How To Do Banded Pull-Ups (The Proper Way)Roc PilonIf you want to start doing pull-ups but you’re not quite strong enough to do them without assistance then the banded pull-up is a great exercise to start incorporating.
Banded pull-ups involve performing a traditional pull-up with the assistance of a resistance band. The band helps offset some of your body weight, making the movement easier.
This is a great pull-up alternative for those who aren’t strong enough to do a pull up on their own.
I’ll walk you through exactly how to set up and perform banded pull-ups, what type of bands to use, and how to incorporate this movement into your workout plan.
Muscles Worked With Pull-Ups
Pull-ups are one of the most effective upper body exercises you can do, and using a resistance band for assistance can be a game changer, especially for beginners. Banded pull-ups work the exact same muscles as bodyweight pull-ups, those muscles include:
Latissimus Dorsi (Lats)
This large, wing-shaped muscle lays across your back and is responsible for that coveted V-shaped physique.
When you perform a pull-up, your lats will be the main muscle that you’re targeting because they are responsible for extending your arm behind your body (extension) and bringing your arms closer to your body (adduction) which occur while doing pull-ups.
Biceps Brachii
The second major contributor is the biceps brachii, the muscles that probably pop into your mind whenever someone says "flex."
Located in the upper arm, your biceps assist in the pulling motion of the pull-up by bending your arms at the elbow (elbow flexion) to bring you closer to the bar.
Brachialis and Brachioradialis
Slightly less known but equally important are the brachialis and brachioradialis. These are located on the side of your upper arm and in your forearm respectively. Their job is to provide additional pulling power and grip strength during your pull-ups.
Rhomboids, Trapezius, and Other Back Muscles
Your rhomboids, trapezius, and other various back muscles are muscles that work “behind the scenes”. They ensure your back remains stable and your body aligned as you perform the exercise.
Abdominal Muscles
You may not realize it at first, but a good pull-up requires a stable core, which is where your abdominals come in. They act as stabilizers during the movement, keeping your body from swinging and adding that extra pinch of spice to the exercise.
If any of these muscles aren’t quite strong enough to perform their role, then it may feel impossible to perform a bodyweight pull-up. Fortunately, band pull-ups exist and you can incorporate them to help work up to a bodyweight pull-up.
Now that you know which muscles are working, let's focus on how to do pull-ups using bands for assistance, without becoming too reliant on the band itself.
Step 1: Select the Right Band
Choosing the right band is key to getting the most out of your banded pull-ups. Bands come in a variety of strengths, with a thicker band offering more assistance (making the pull-up easier), and a thinner band providing less assistance.
If you're new to pull-ups or they’re especially challenging for you, then start with a thicker band and gradually work your way to a lighter one as you get stronger.
Step 2: Attach the Band to the Pull-Up Bar
Next, loop your resistance band around the pull-up bar. To do this, reach up and hook one end of the band over the bar, then pull it down and thread it through the other end of the band, creating a secure loop around the bar. Once it's attached, pull it tight so that it doesn’t shift when you step into it.
Step 3: Position Your Feet or Knees in the Band
Step on a stool or bench (if necessary) and place one foot or knee (depending on your comfort and strength level) into the band. The band should be taut, providing a nice bit of resistance. If you're using your foot, the band should be sitting under your feet. If you're using your knee, it should sit just below the knee joint.
Looping the band below your feet and staying in a standing position will stretch the band further for more assistance, whereas looping it under your knees will remove stretch and offer less assistance.
Step 4: Grip the Bar
Reach up and grab the bar with an overhand grip (palms facing away from you). Your hands should be slightly wider than shoulder-width apart.
Step 5: Perform the Pull-Up
With the band looped under your feet or knees, pull your body up towards the bar. Your aim should be to bring your chin above the bar while keeping your shoulders pulled back behind you, keeping your shoulder from rounding forward at the top of the movement.
Lower yourself down slowly, maintaining control throughout the entire movement.
Step 6: Repeat!
Repeat for as many reps as you can manage without compromising your form. Remember, quality over quantity.
Wondering how many sets you should be doing and how often? I’ll talk about that shortly!
Common Banded Pull-Up Mistakes
As a strength coach, I’ve seen my fair share of banded pull-up mistakes and I want to make sure you aren’t making them, so let me walk you through some common mistakes and how to fix them.
Mistake #1: Using a Band That's Too Strong or Too Weak
The Goldilocks rule applies here: not too strong, not too weak, just right. Using a band that's too strong will do most of the work for you, robbing your muscles of the chance to do the work and get stronger.
On the other hand, a band that's too weak might not give you the support you need, leading to frustration, possible injury, or simply a lack of quality work.
Fix: Choosing the Right Band
As a rule of thumb, if you can't do at least five banded pull-ups with good technique, then the band is too weak. If you can easily do more than 15 banded pull-ups, then the band might be too strong.
We aren’t letting the band give us a free ride, we are working our muscles, so use just enough assistance from the band to help you complete the reps, while still challenging your muscles to do 95% of the work.
Mistake #2: Letting the Band Control You
If you're wildly swinging or bouncing at the bottom of the pull-up, the band might be controlling you more than you're controlling it. This can lead to injury, cause the band to break, and limit the amount of work your muscles need to do; all of which negatively impact your results.
Fix: Maintain Control and Stability
Focus on keeping your movements controlled by engaging your core and using your muscles (rather than momentum) to pull yourself up and lower yourself down. Remember, slow and steady often wins the race, even in weightlifting.
Mistake #3: Not Using the Full Range of Motion
Some people have a tendency to only lower themselves halfway or not pull themselves up fully. This prevents you from building strength in each portion of the lift and limits your potential for muscle growth.
If you’re not training full ranges of motion when doing banded pull-ups, then you may never progress to bodyweight pull-ups.
Fix: Use the Full Range of Motion
Ensure you're pulling yourself up until your chin is over the bar, and lower yourself until your arms are fully extended. This full range of motion ensures all the muscles involved are being worked to their fullest potential.
Mistake #4: Neglecting Form
Form, form, form. It's incredibly important to keep the correct form during your pull-ups to prevent injury and ensure that you’re in a position where the working muscles can do their job effectively.
For example, many people tend to let their shoulders round forward (protract) when they pull themselves up which prevents them from using their lats effectively because the lats work best when the shoulders are pulled back in the opposite action (retraction).
Fix: Mind Your Form
Keep your shoulders back, and your core engaged, and remember to breathe. If you're unsure about your form, don't hesitate to ask a trainer at your gym or consult a video tutorial online.
It's better to do fewer pull-ups with proper form than many pull-ups with bad form.
Implementing Banded Pull-Ups Into Your Training Routine
So you’ve got the hang of it, but you’re probably wondering how often you should do them, how many reps, and how long you should stick with it.
Here’s how to incorporate banded pull-ups into your programming:
Sets and Reps
A great starting point is 3 sets of 5 to 10 reps. You want to reach a point of muscle fatigue by the end of each set, but not to the point where your form suffers. As you build strength, you can gradually increase your reps and sets.
I recommend 3-5 sets max, and 10 reps max. If you can do more than this then use a lighter band to make it more challenging.
For example, if you’re starting out with 3 sets of 5 reps with a thick band then try to progress to 3 sets of 10 reps with the thick band before adding an extra set or changing bands.
Load
The load in this case is controlled by the band that you choose. Start with a stronger band and gradually move to lighter ones as you gain strength. The aim is to reach a point where you can perform pull-ups without the assistance of a band at all, so really push yourself to move from the heavy bands to lighter bands as you get stronger.
Frequency
Like any muscle group, your back and pull-up muscles are best trained twice a week for 6-8 total sets (assuming you take those sets to near failure each time).
Depending on how often you train your upper body and/or back, you can add these to your upper body and back days to hit them twice a week along with the other work you have in your program.
Exercise Order
Pull-ups are a demanding compound exercise that engages multiple muscle groups, so if it’s your primary focus, then it’s best to do them early in your workout when you're fresh and have the most energy.
You can start your upper-body workouts with pull-ups to get them done when your strength levels are at their highest.
Alternatively, I’ve used pull-ups with an assistance band as a great burnout exercise at the end of a workout. With my muscles already fatigued from deadlifts or other back work, the assistance band variation of pull-ups allows me to get more volume in without sacrificing form due to fatigue.
Best Bands For Pull-Ups
Now that we've got the technique down and we understand how to incorporate banded pull-ups into our workout routine, the only thing left to do is get the right equipment! For high-quality resistance bands that won't let you down, I recommend Gymreapers.
The Gymreapers Resistance Bandscome in a variety of strengths, from light to heavy, so you can start with a thicker band and gradually work your way down as you get stronger.
These bands are durable, high-quality, and built to last. They're made from natural latex, providing a smooth and consistent stretch that doesn't sacrifice strength.
The bands are color-coded based on their resistance level, so you can easily grab the one you need for your workout.
Remember, using the right equipment is crucial to achieving your fitness goals safely and effectively. So choose wisely, train hard, and never stop striving to become the best version of yourself!
]]>
https://www.gymreapers.com/blogs/news/upright-row-with-bands2023-07-12T17:18:02-06:002023-08-16T17:34:03-06:00How To Do Upright Row With Bands (The Proper Way)Roc PilonIf you’re interested in doing upright rows but you have limited equipment on hand, then banded upright rows are the perfect option to help you build bigger traps and shoulders.
An upright row with a band involves using the arms to pull the band from hip height to shoulder height. It is best performed with a looped band that allows you to complete each rep in one smooth motion, near the middle of your sessions, for sets of up to 15-25 slow reps.
I’ll dive into the nitty-gritty of band upright rows because knowing how to perform the exercise step by step, how to program it into your training, and what resistance bands to use will save you time and allow you to reap all the associated benefits.
Key Takeaways
Band upright rows train the shoulders (primarily the lateral and front deltoids), biceps, and upper back (trapezius, rhomboids, etc.).
Upright rows are often performed incorrectly, increasing the risk of shoulder impingement, discomfort, or simply limited results.
Upright rows could be incorporated into your upper body workouts for 2-3 sets 1-2 times per week, but this can be adjusted based on your current training volume.
Muscles Worked With Upright Rows
Upright rows are an upper-body exercise where the objective is to lift a weight from hip level to your chest in a straight line. This movement primarily trains the following muscles:
Shoulders: your lateral deltoids (the muscles on the side of your shoulders) play a role in arm abduction (lifting your arms away from your midline to your sides), which occurs as you pull the band from hip level to your chest.
Biceps: the biceps are primarily responsible for elbow flexion (bending of the arm), which is necessary for pulling the band to chest level.
Upper back: your trapezius, rhomboids, and other upper back muscles contribute to the rowing motion and keep the shoulder blades retracted (squeezed together) for a stronger and more stable position.
Core: the abs, obliques, transverse abdominis, erector spinae, and glutes flex isometrically to promote full-body rigidity during upright rows.
How To Do Upright Rows With Bands: Step-By-Step Guide
Here are the step-by-step instructions for performing upright rows with a resistance band:
Grab a looped resistance band of your choice. Start with a thinner band that allows you to do smooth reps through a full range of motion.
Step over one end of the band with both feet.
Hold the opposite end of the band with an overhand grip (palms facing down). Your hands should be shoulder-width apart or slightly wider and at hip level.
Retract your shoulder blades, squeeze your glutes, and engage your abs.
Inhale and pull the band from your hips to your chest in a straight line.
Pause briefly at the top position and slowly lower the band to your hips as you extend your arms. Exhale.
Now that you know how to perform banded upright rows, you should also be aware of the common mistakes that occur with this exercise and how to avoid them.
Mistake #1: Using a Narrow Grip
Using a close grip is one of the most common and potentially dangerous mistakes. A narrow grip places the shoulders in an unfavorable position. Having your hands closer together puts more stress on the shoulders which can cause joint discomfort and increase your risk of injury.
How to Fix
Keep your hands shoulder-width apart or slightly wider apart when gripping the resistance band. This will limit the degree of shoulder internal rotation, which reduces shoulder pinching and discomfort.
As a bonus, a wider grip leads to greater upper back and deltoid activation which can help you develop more defined upper body muscles.
Mistake #2: Using the Wrong Band
Another common mistake is using the wrong resistance band for the exercise. Oftentimes lifters try to go too heavy and choose a resistance band that is too thick.
The problem is that using too much resistance will force you to swing your body and use jerking motions to complete each repetition, robbing your muscles of the tension they need to grow.
Even if the band feels light enough at the bottom of each rep, the resistance it provides will increase as the band lengthens so it’s important to account for the change in resistance as you raise your arms.
How to Fix
Start with a lighter resistance band that allows you to perform smooth repetitions through the recommended range of motion (I’ll touch on this later on). You should also be able to execute the full range of motion for each repetition.
If you can’t pull the band all the way to your chest without “cheating the movement” then it’s too heavy and you should use a lighter band.
For instance, if you have the military band set by Gymreapers, you can start with the lightest band (20 to 35 lbs of tension) to see how it feels and if it feels too heavy, then try the next band in the set (30 to 60 lbs of tension).
Mistake #3: Lifting the Elbows Too High
Training through a full range of motion is generally better for muscle growth because you can stretch your muscles on the eccentric portion of each rep and follow up with a more intense concentric contraction.
For example, when doing bicep curls, it’s typically best to extend your arms fully on the way down (eccentric) before bending them to the point where your wrists are slightly higher than your elbows (concentric).
However, with the upright row, there is a limit to how high you should pull because lifting the elbows as high as possible could increase your risk of injury. When it comes to the upright row, more range of motion isn’t necessarily better.
“Studies indicate that impingement typically peaks between 70° and 120° of glenohumeral elevation. Authors of a 2011 paper recommend that asymptomatic individuals elevate their arms during the upright row to just below 90° (shoulder height). Other authors have made similar recommendations, so at least in this case, turn a deaf ear to the full-ROM gods.”
-Nick Tumminello, 2016 NSCA Personal Trainer of the Year and fitness expert
How to Fix
Avoid raising your elbows above shoulder level, and pay attention to how your shoulders feel. Slow down the movement by counting to 3 on the way up, pausing for 1 second, and lowering for 3 seconds.
If you’re still experiencing some pinching or general discomfort after slowing down and stopping short of shoulder height, then consider consulting a physiotherapist to help work through this limitation.
Mistake #4: Swinging Back and Forth
The final mistake with banded upright rows that you could be making is swinging your body back and forth in an effort to do more repetitions or lift your elbows higher.
The problem is that compensatory patterns can reduce muscle activation and place more stress on the joints and connective tissues. Plus, as discussed above, lifting the elbows too high could increase the risk of shoulder impingement, which is another reason to keep your reps smooth and controlled during upright rows.
How to Fix
You must maintain a stable body position and focus on using your biceps, shoulders, and upper back muscles to get the most out of upright rows. Perform your reps with control, even if that means going lighter than you want to.
Using the right muscles, rather than “cheating” will allow you to create the necessary stimulus for growth and strength gain while reducing the injury risk.
Implementing Banded Upright Rows Into Your Training Routine
One of the best ways to implement banded upright rows into your workout program is to use a lighter band and do multiple high-rep sets. You should perform each repetition slowly and with good control to engage the correct muscles and experience good muscle contractions in the top position.
You can include banded upright rows in your pull (back and biceps), push (chest, shoulders, and triceps), or general upper-body workouts.
Here is an example of how the exercise might fit into a typical workout:
Exercise
Sets
Reps
Rest period
Flat barbell bench press
3-4
8-10
2 mins
Seated dumbbell shoulder press
3-4
10-12
2 mins
Decline push-up
3
RPE 8-9
2 mins
Banded upright row
3
15-25
1.5 mins
Dumbbell lateral raise
2-3
15-20
1-1.5 mins
Cable rope tricep extensions
2-3
15-20
1-1.5 mins
When deciding how many sets to do, look at your training plan to determine how much extra volume you might need for your upper back, biceps, and deltoids. If you’re already doing plenty of work for these muscle groups (8-10 total sets per muscle group per workout), only add 2-3 sets of upright rows or remove an exercise for fatigue management.
The same goes for your training frequency. You can do banded upright rows 2-3 times per week but be mindful of your overall volume, training program structure, and weekly workout schedule.
For instance, if you’re following a 4-day upper/lower split, you can include a few sets of banded upright rows during both upper-body workouts.
The military resistance band set by Gymreapers is ideal for upright rows and many other resistance exercises because these bands have a looped design and come in a variety of resistance levels to help you choose a level of resistance that suits your current abilities and to progress over time.
You can pick from several tension levels to see what matches your abilities:
Desert Tan - 20 to 35 lbs.
OD Green - 30 to 60 lbs.
Dark Earth - 40 to 80 lbs.
Ranger Green - 50 to 120 lbs.
Coyote Brown - 60 to 150 lbs.
Finally, these bands are a great option because you can use them for many exercises, including push-ups, band-assisted pull-ups or chin-ups, bicep curls, extensions, etc. Take these bands outside and while traveling for effective full-body workouts anywhere.